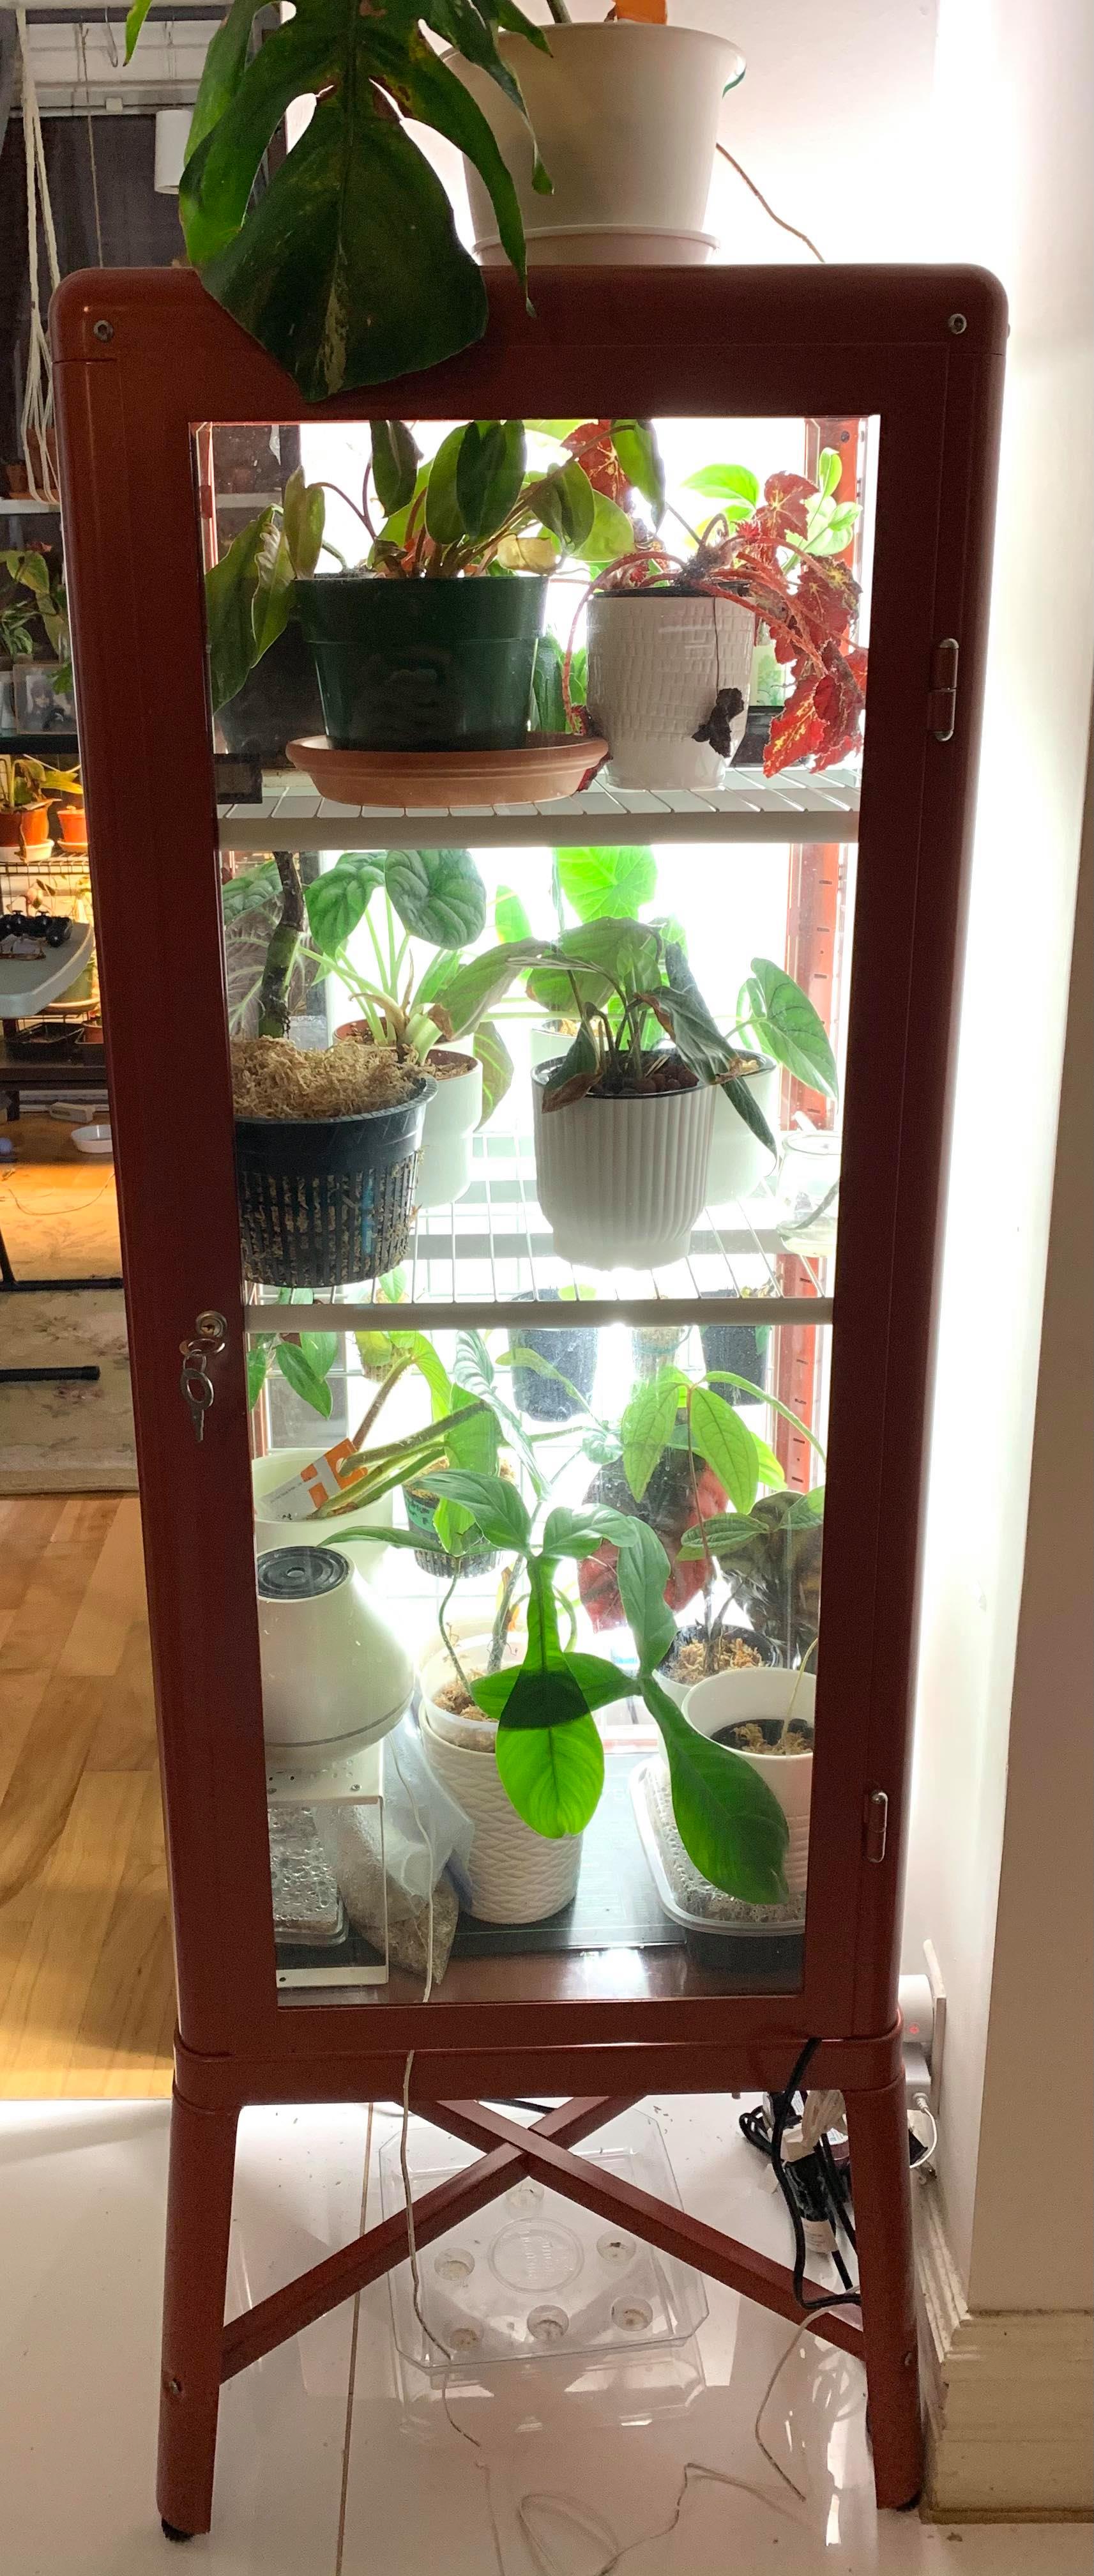
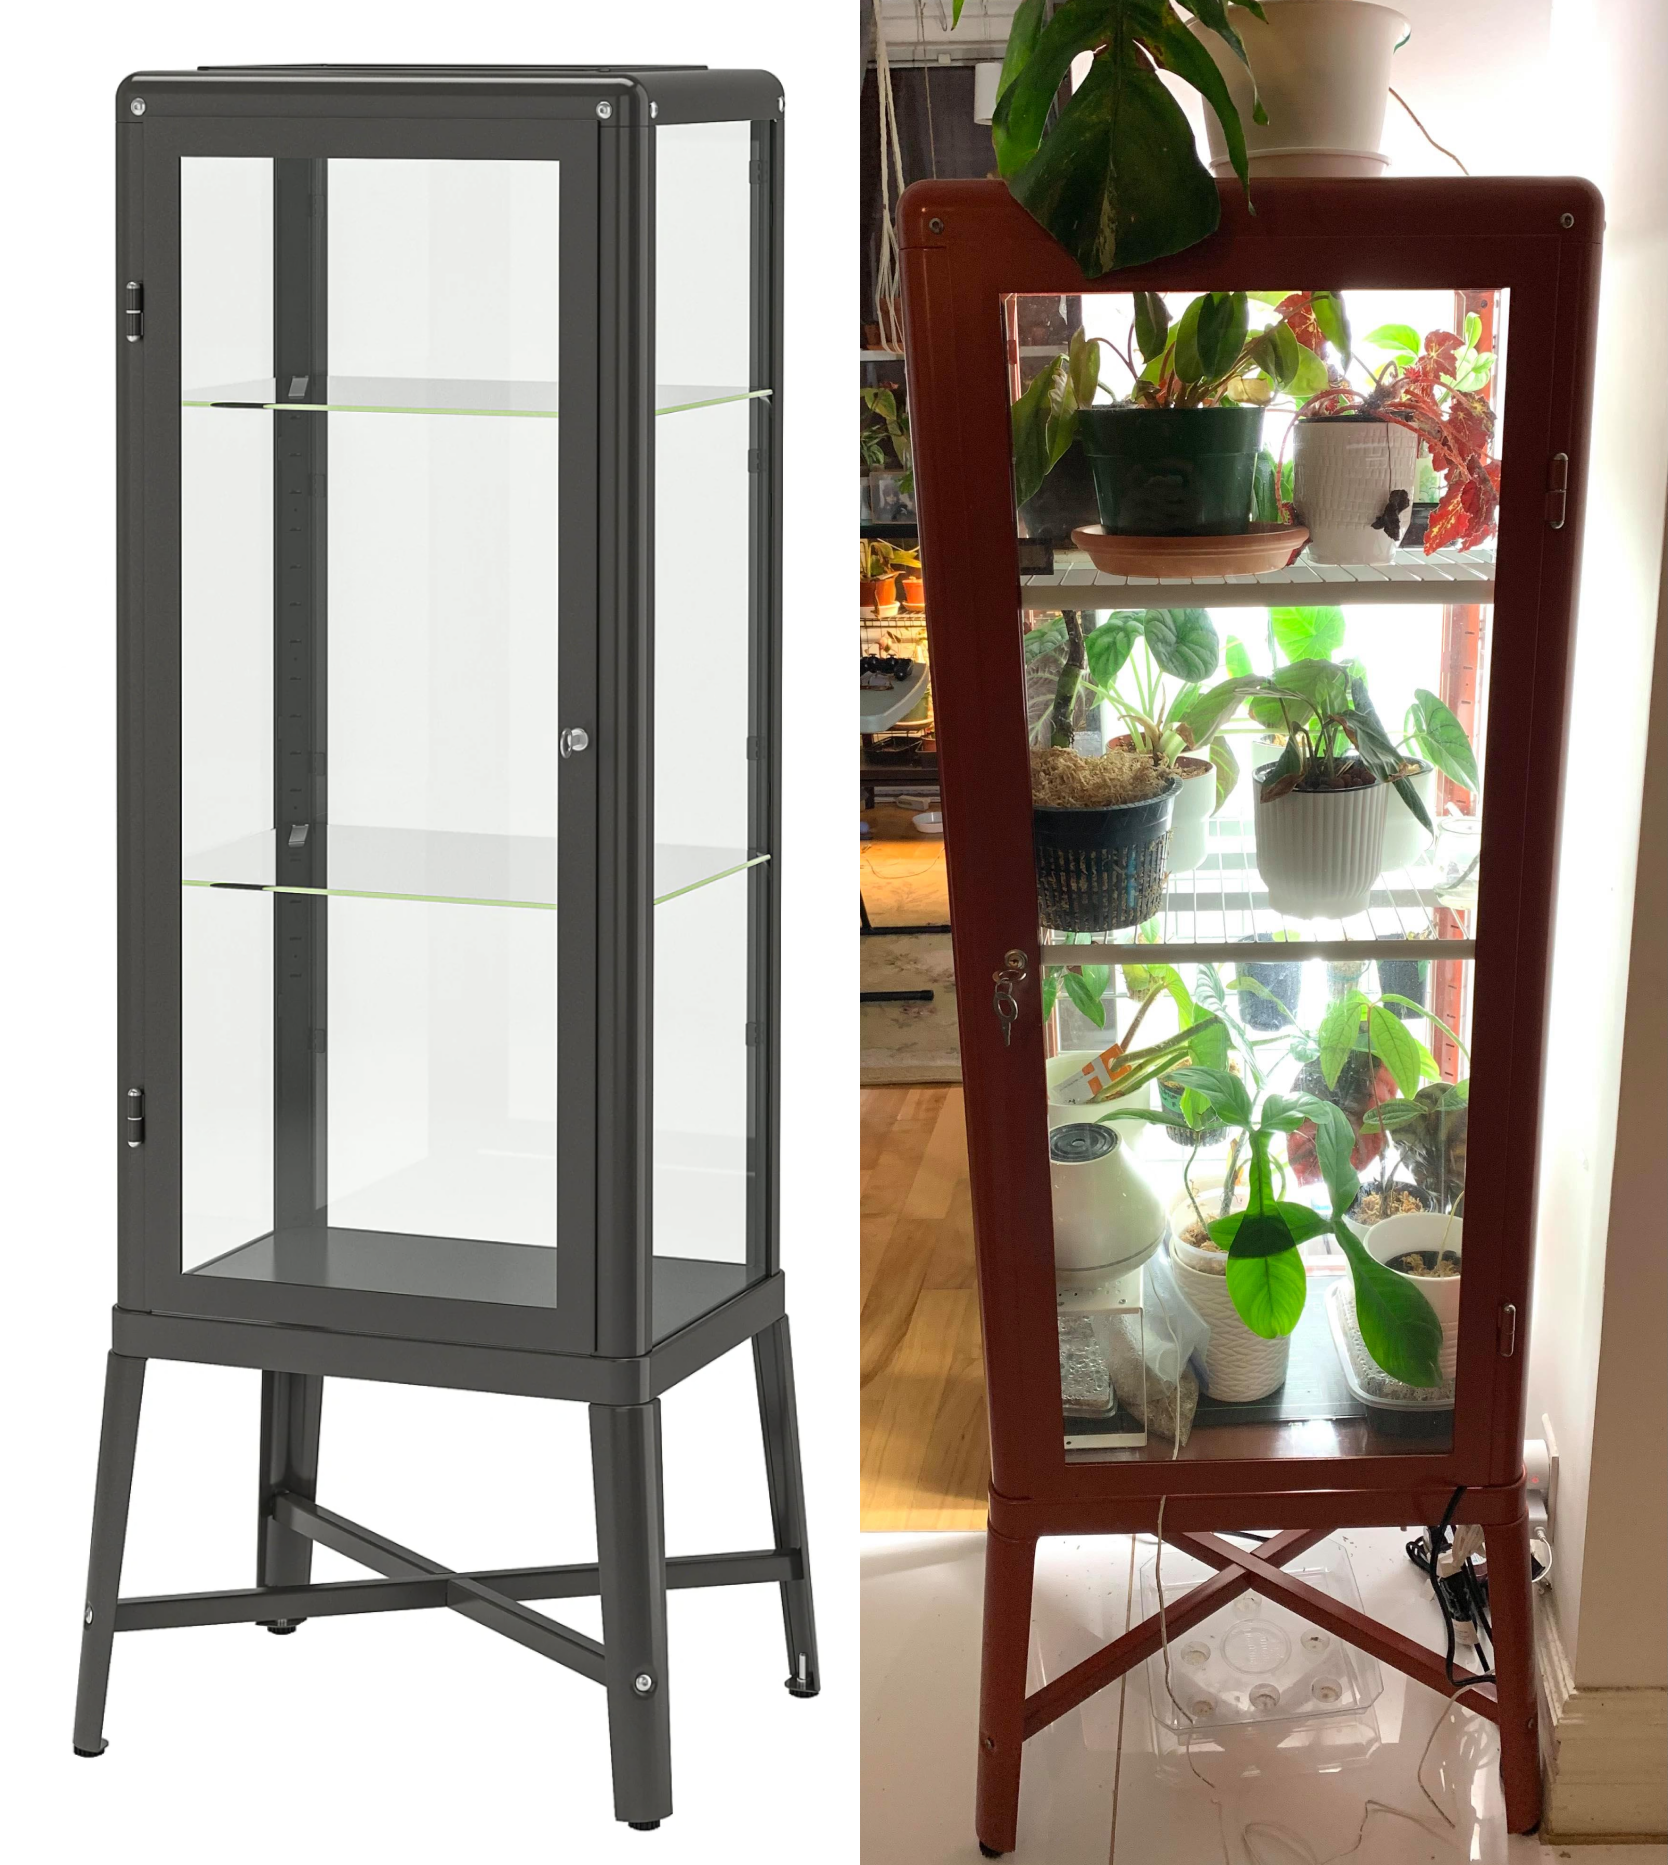
Converting Ikea Fabrikor (tall) into greenhouse
Looking for a greenhouse that's aesthetically pleasing and functional? Look no further than the Ikea Fabrikor (tall)! Here I will outline the steps I took to convert my Ikea Fabrikor cabinet into a functional greenhouse.
Looking for a greenhouse that's aesthetically pleasing and functional? Look no further than the Ikea Fabrikor (tall)! Here I will outline the steps I took to convert my Ikea Fabrikor cabinet into a functional greenhouse.
This is the first post in a 4-part series converting Ikea cabinets into greenhouses; next up is Fabrikor (wide).
Firstly, I have to acknowledge the very knowledgeable, helpful, and welcoming Facebook group, Ikea Greenhouse Club and the (unrelated) Instagram account of the same name. These groups are a wealth of information and are a testament to the ingenuity of plant lovers and collectors.
List of all the items I used to convert the Fabrikor into a greenhouse (US product links):
- Ikea Fabrikor (tall) cabinet
- Wire shelves
- C-channel to hold shelves up
- Wire grid panel for extra space
- White spray paint
- Bolt cutters or hack saw
- Mini shelf
- 4ft LED growlight
- Gorilla double sided tape
- USB fans
- Smart plug
- Heat mat (optional)
- Humidifier (optional)
Some important things to consider in a greenhouse (I am not an expert, but just speaking on what has worked for me): Humidity, airflow, and lighting
Wire shelves:
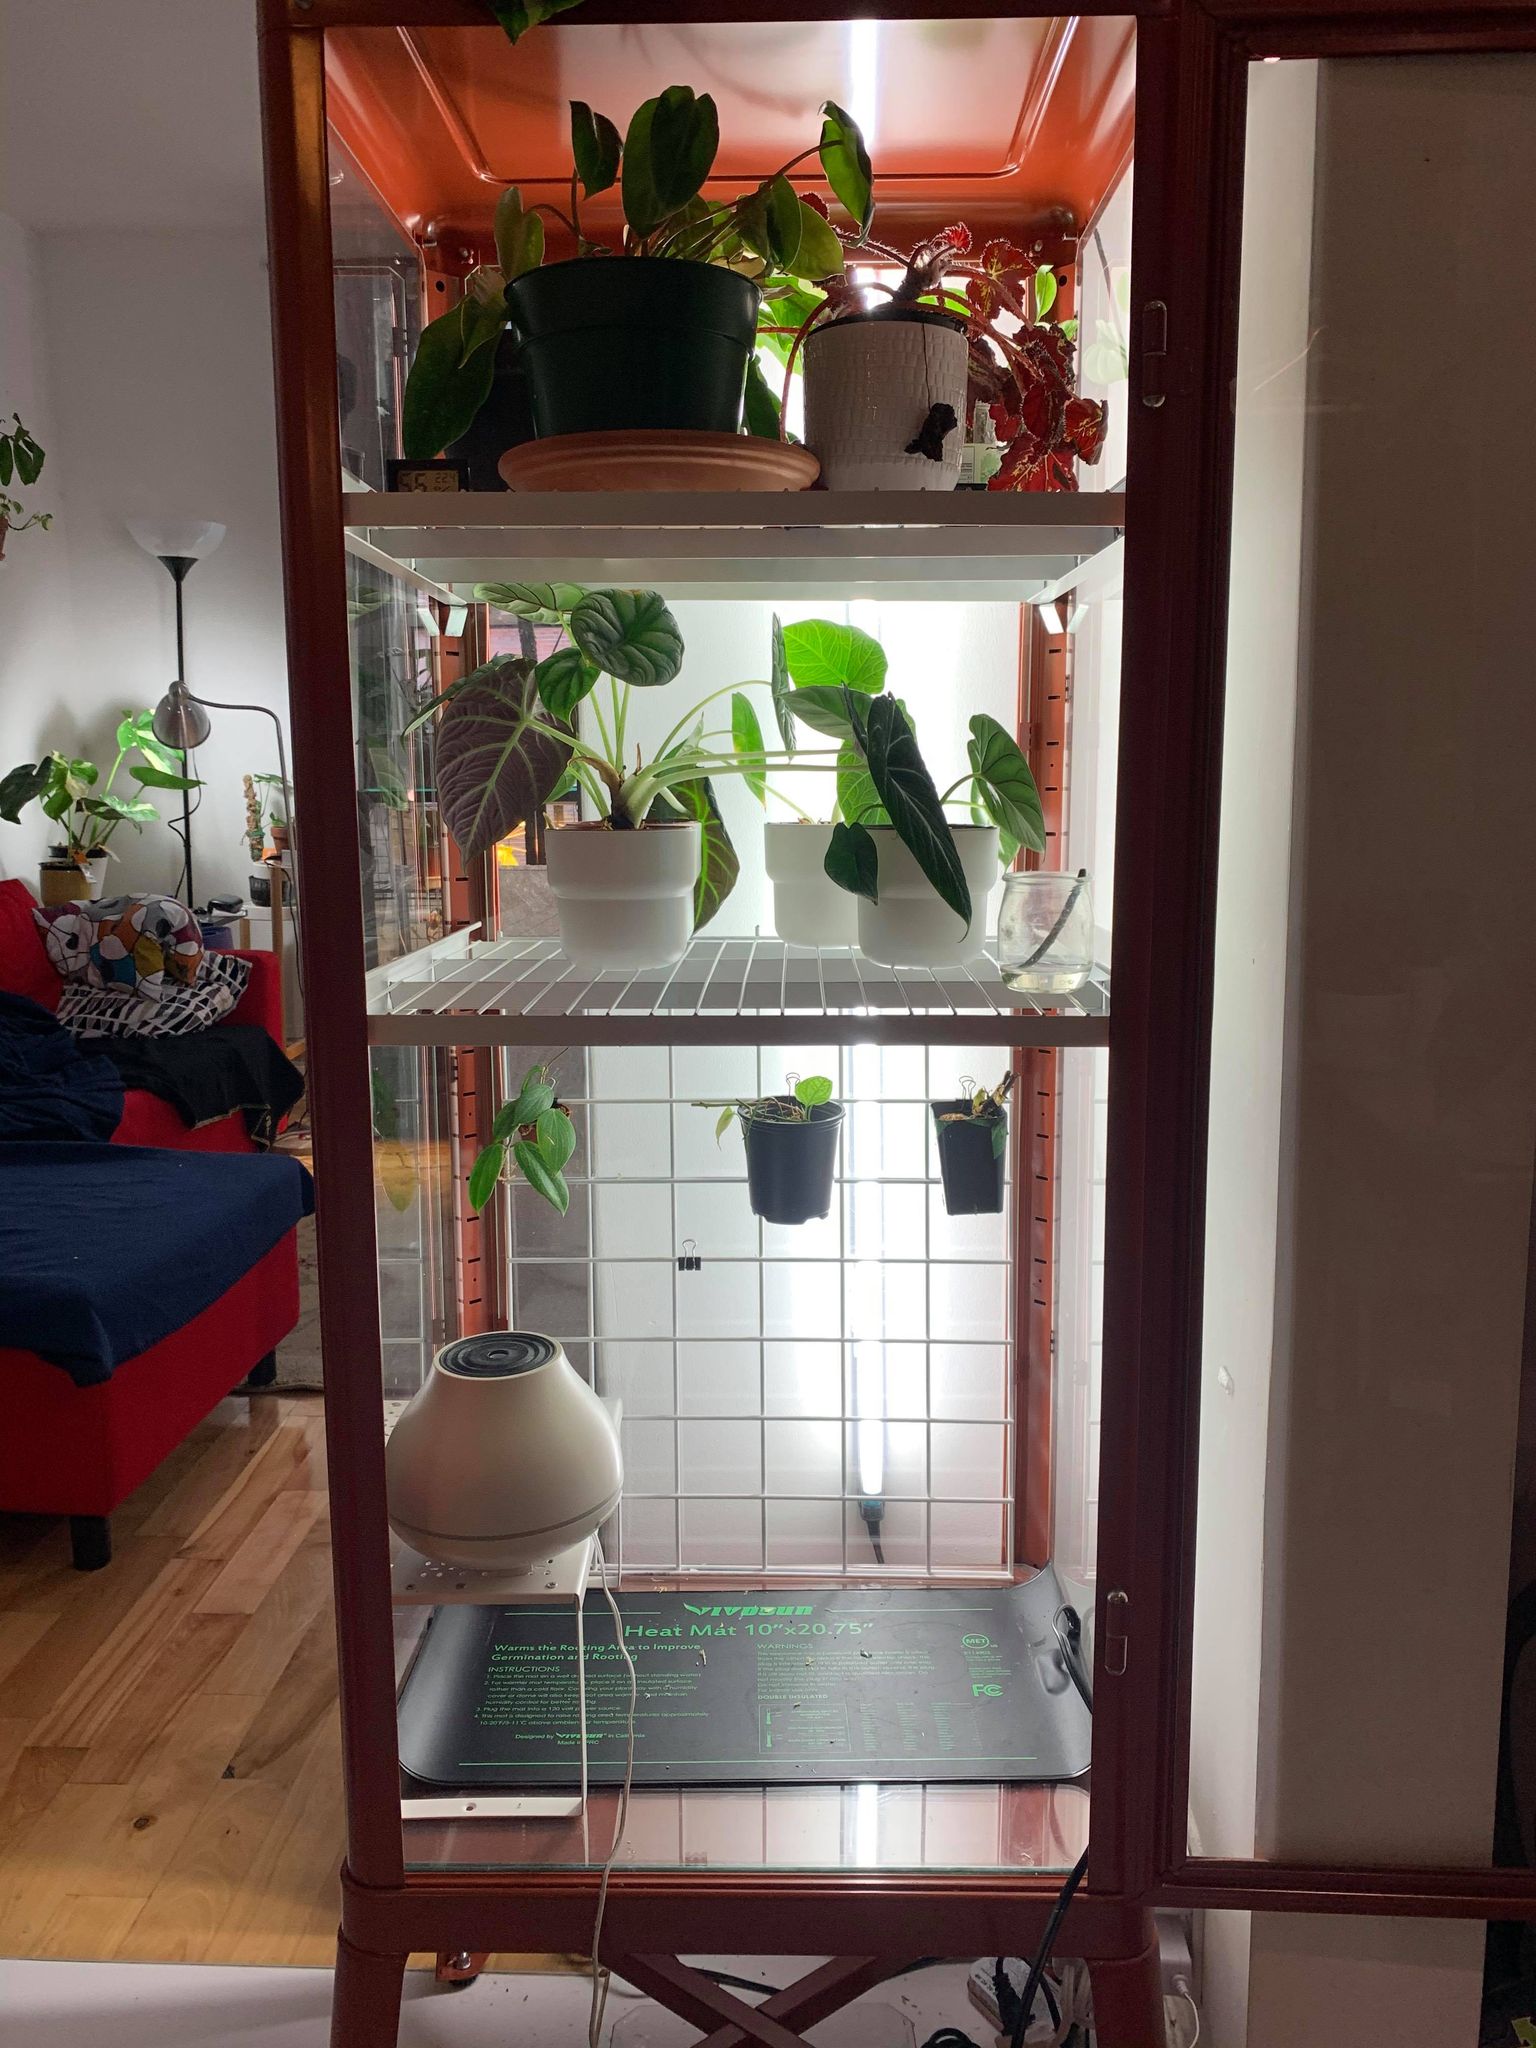
One of the major changes I made to the Fabrikor was replacing the glass shelves with wire shelves. This was done to improve airflow and more evenly distribute humidity throughout the cabinet. Adding wire shelves to the Fabrikor is a bit trickier than the Milsbo series, but a smart and handy tip from a member of the Ikea Greenhouse Club made it easier! All the shelf materials I used are from Ikea.
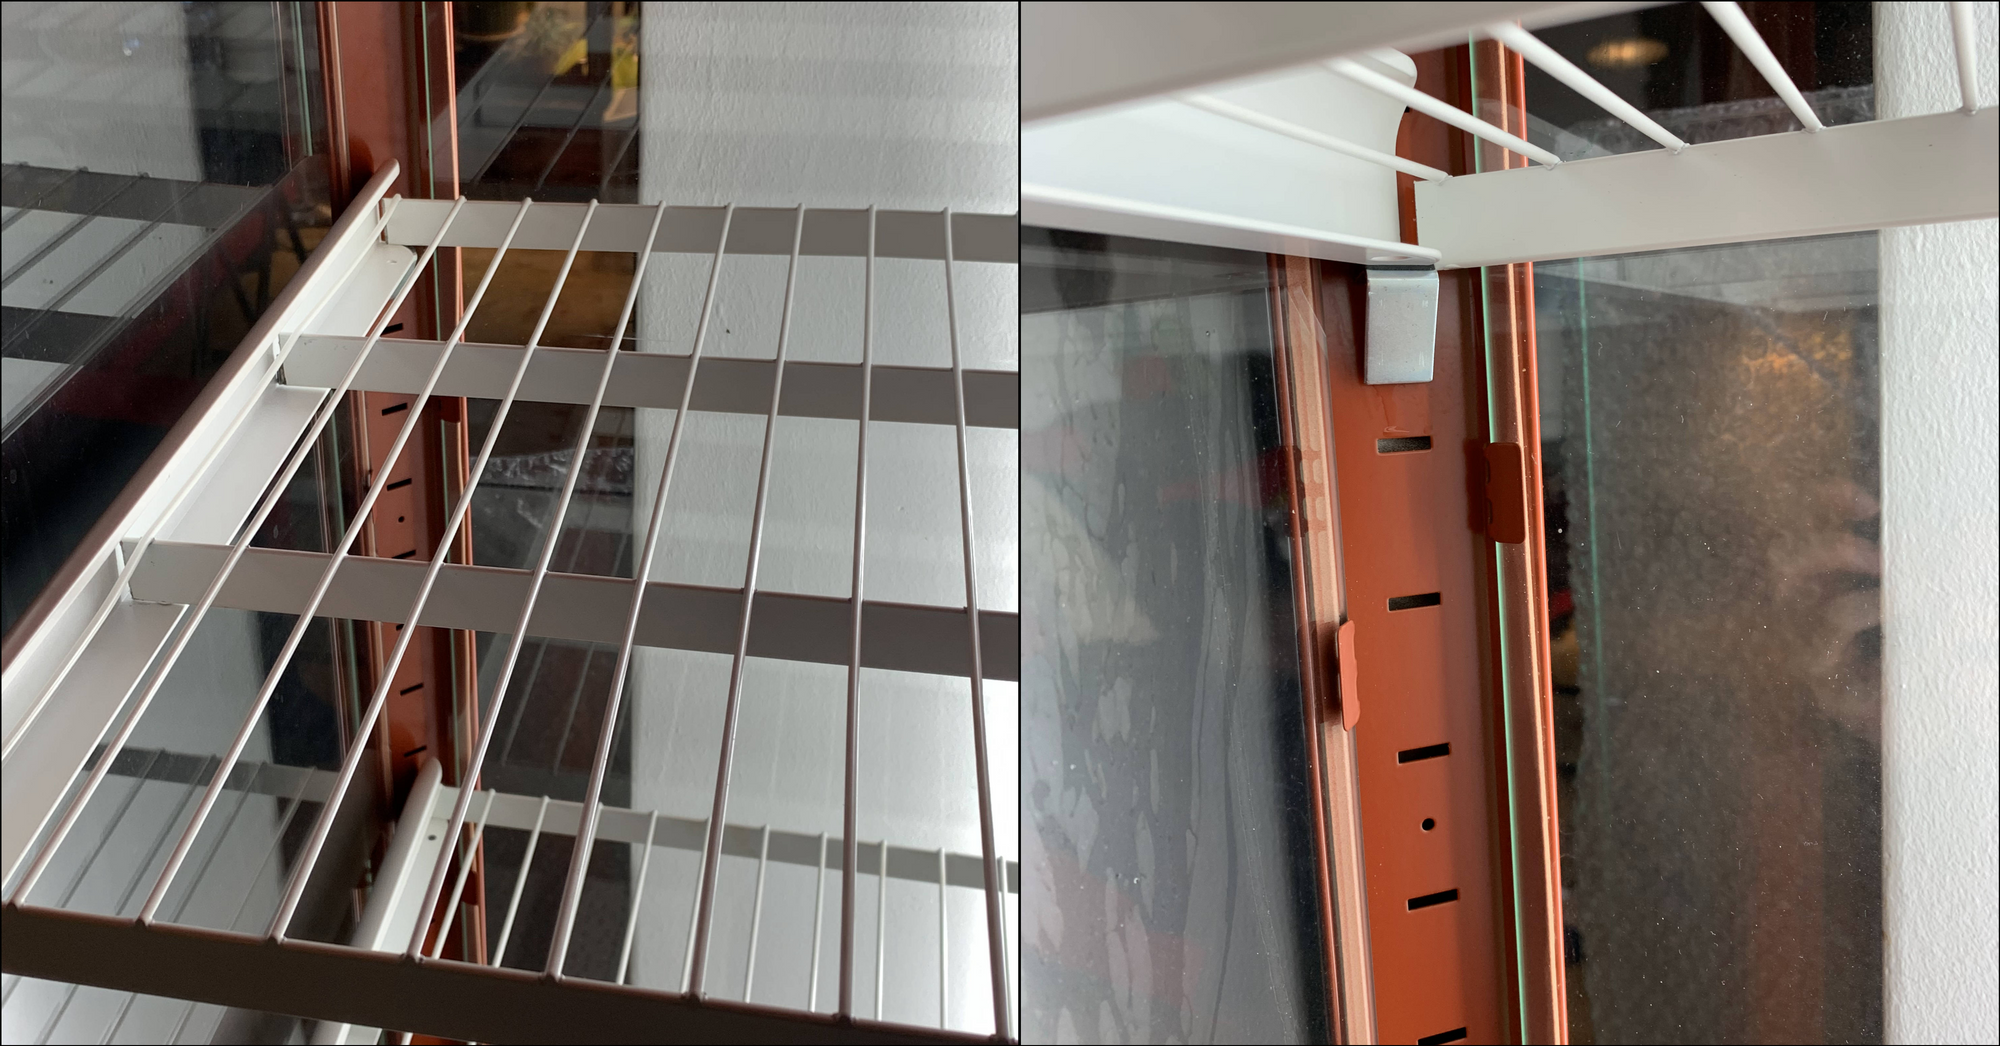
To install shelves in the Fabrikor, you need two pieces: a support (or C-Channel) to hold the wire shelf and the wire shelf, itself.
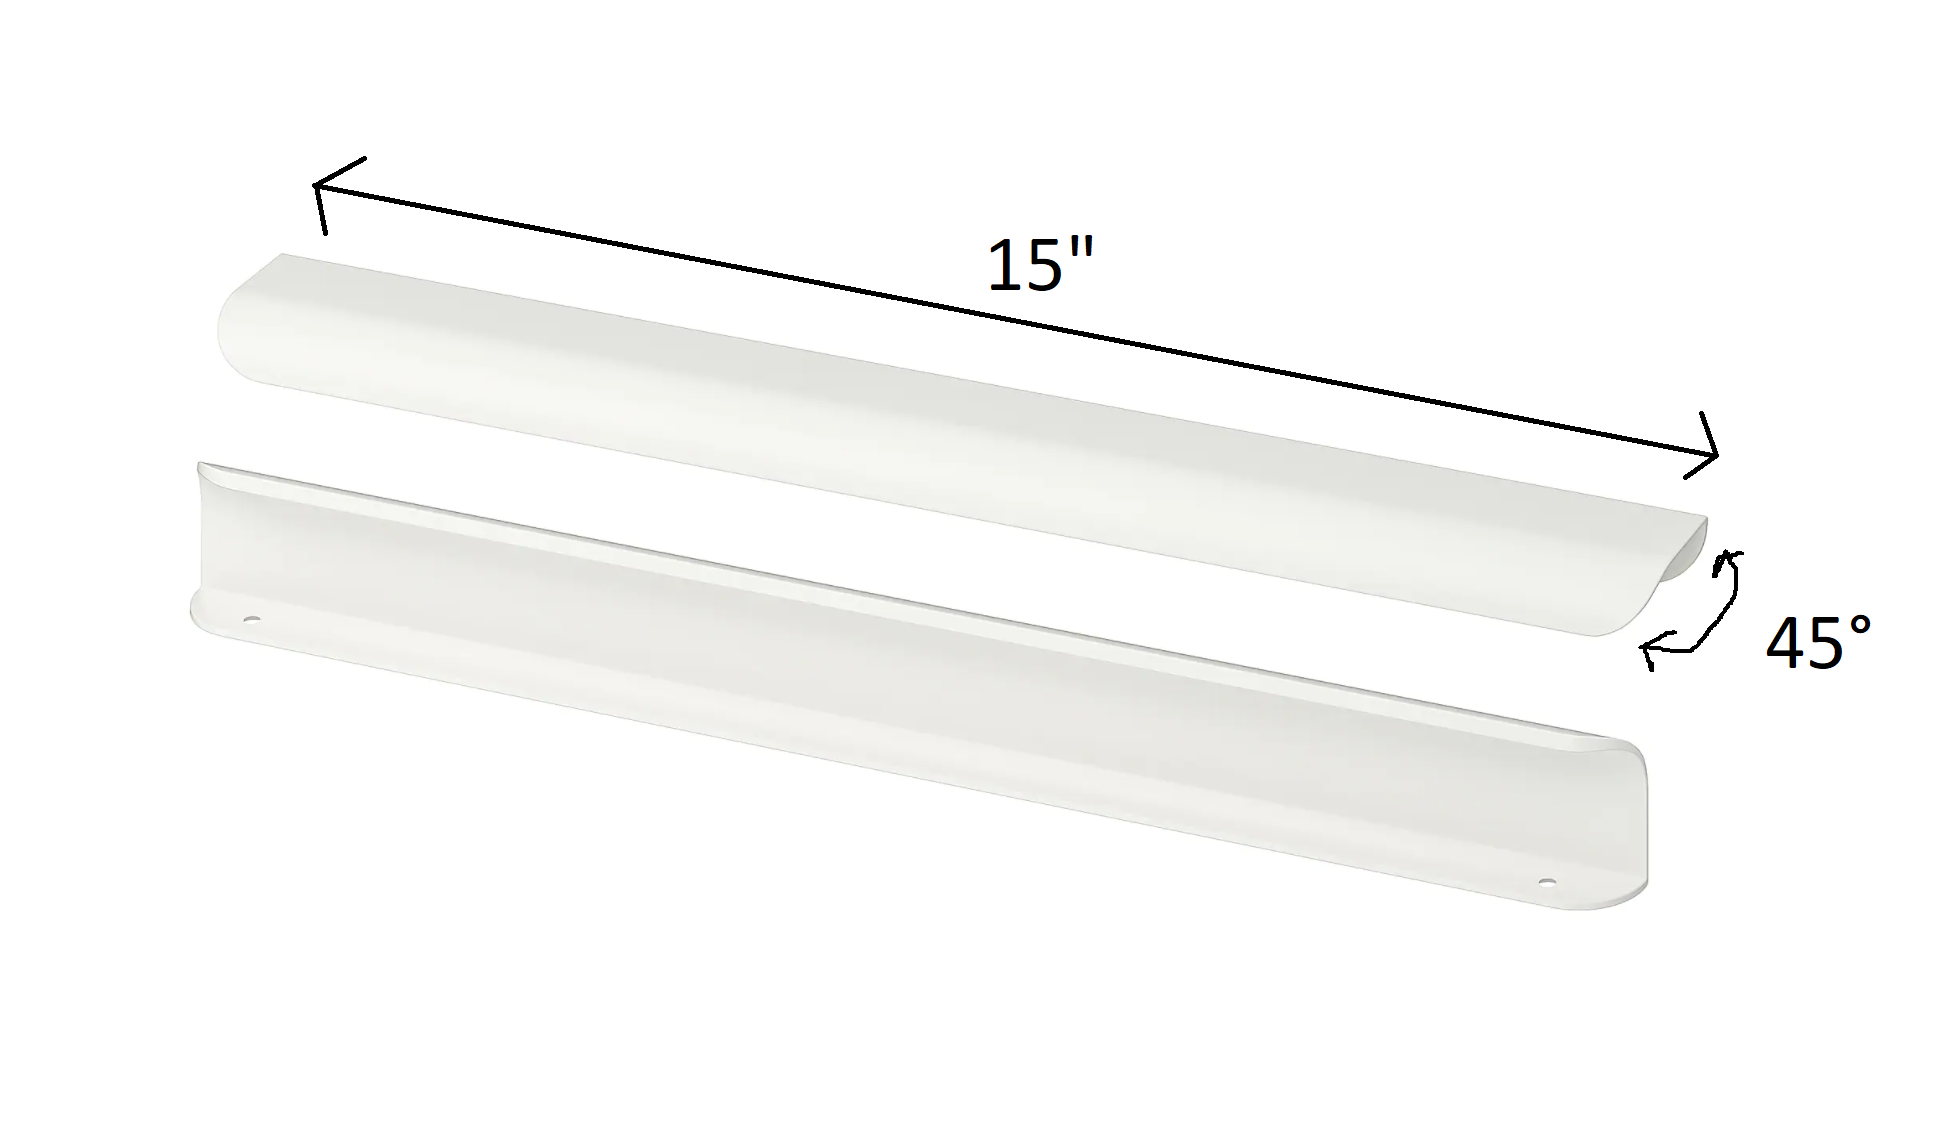
Measurements of the shelf and C-channel:
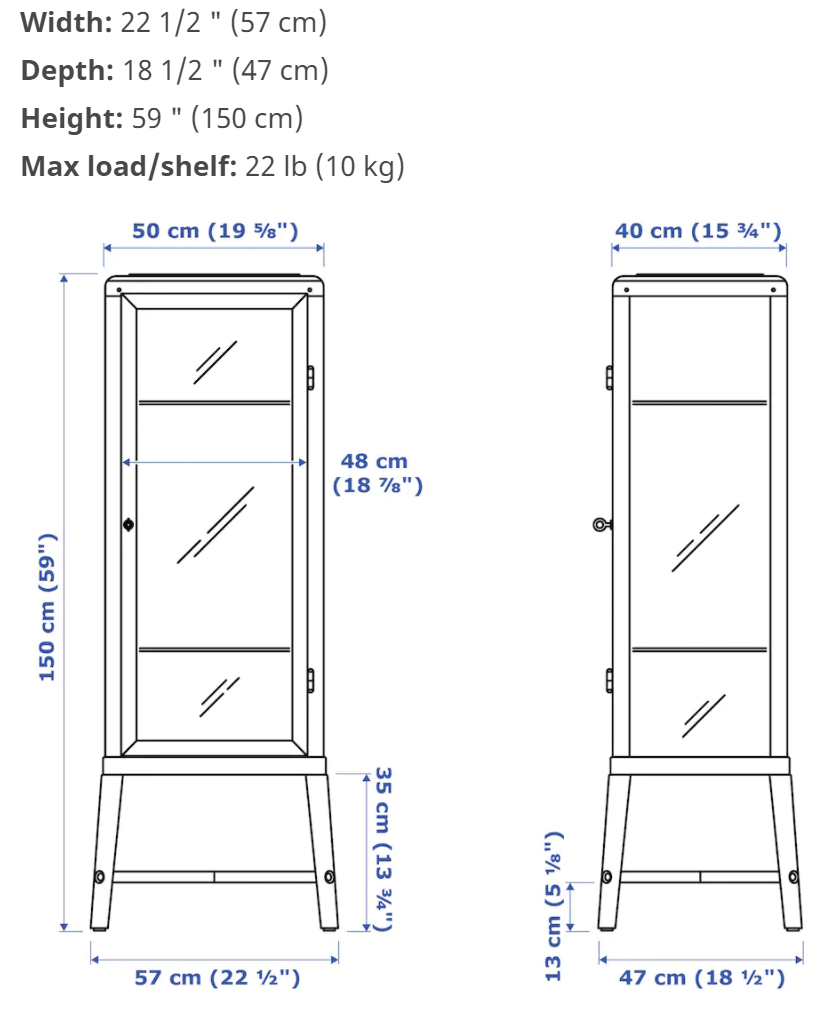
- Wire shelf: 15 3/4" depth by 18" width
- C-Channel: 15" width with tapered corners at 45 degrees (to fit in Fabrikor)
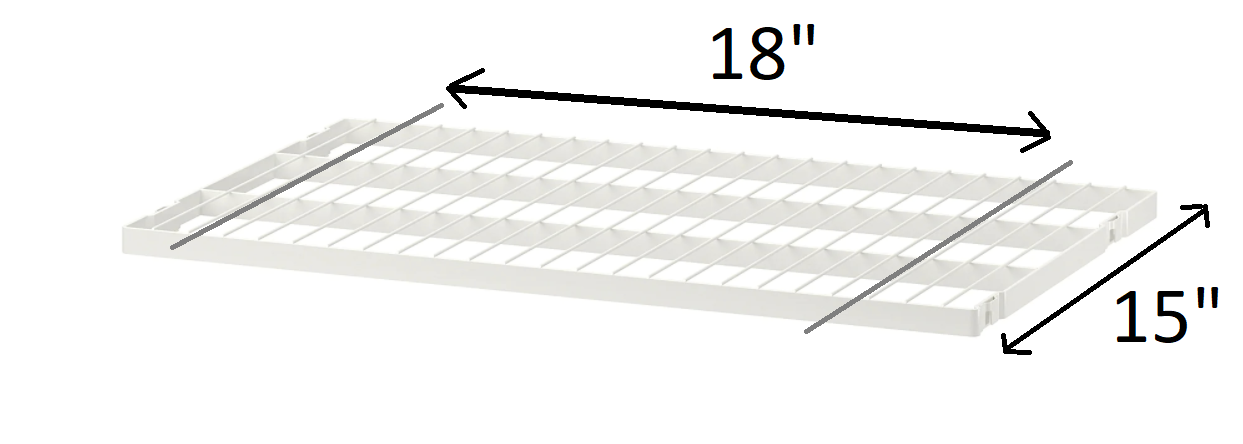
I used the Ikea Boaxel Shelf as it's the exact depth of the Fabrikor shelves. 15 inches is also a very uncommon depth for other wire shelving, thus, if you buy other wire shelves they are usually 12", 16", 20" deep.
Th Boaxel shelf is 23 5/8" wide, so I had to cut 5" off, by removing 2.5" from each side. In the image above, I indicate where I cut, you can easily just cut off 5" from one side, but I wanted it to be the same on both sides. Since it was difficult to get exactly 2.5" on each side, I removed 2" from one side and 3" from the other.
Note: I measured the glass shelf that came with the Fabrikor to know how much to cut off the wire shelf. The glass shelf is ~18". Please always measure before cutting.
I used a 24" bolt cutter to cut through the metal. A bolt cutter is not the ideal tool for this job. It was pretty difficult to cut through the metal and required two people (one person to hold the shelf, the other to cut). A hack saw was the alternative tool, but we did not have the set-up for such a tool.
To hold the shelf up, I used the Ikea Billsbro 15" handles. They are the perfect length (15") and have an angle that contours exactly to the corners of the Fabrikor.
I used the shelf racks that originally came with the Fabrikor. First, lay the Billsbro on the left side on the two Fabrikor shelf racks, put the wire shelf in such that it's supported by the Billsbro. Then, with the wire shelf still at an angle, put the right side of the wire shelf into the Billsbro and then place both pieces together onto the two shelf racks. It should fit snuggly.
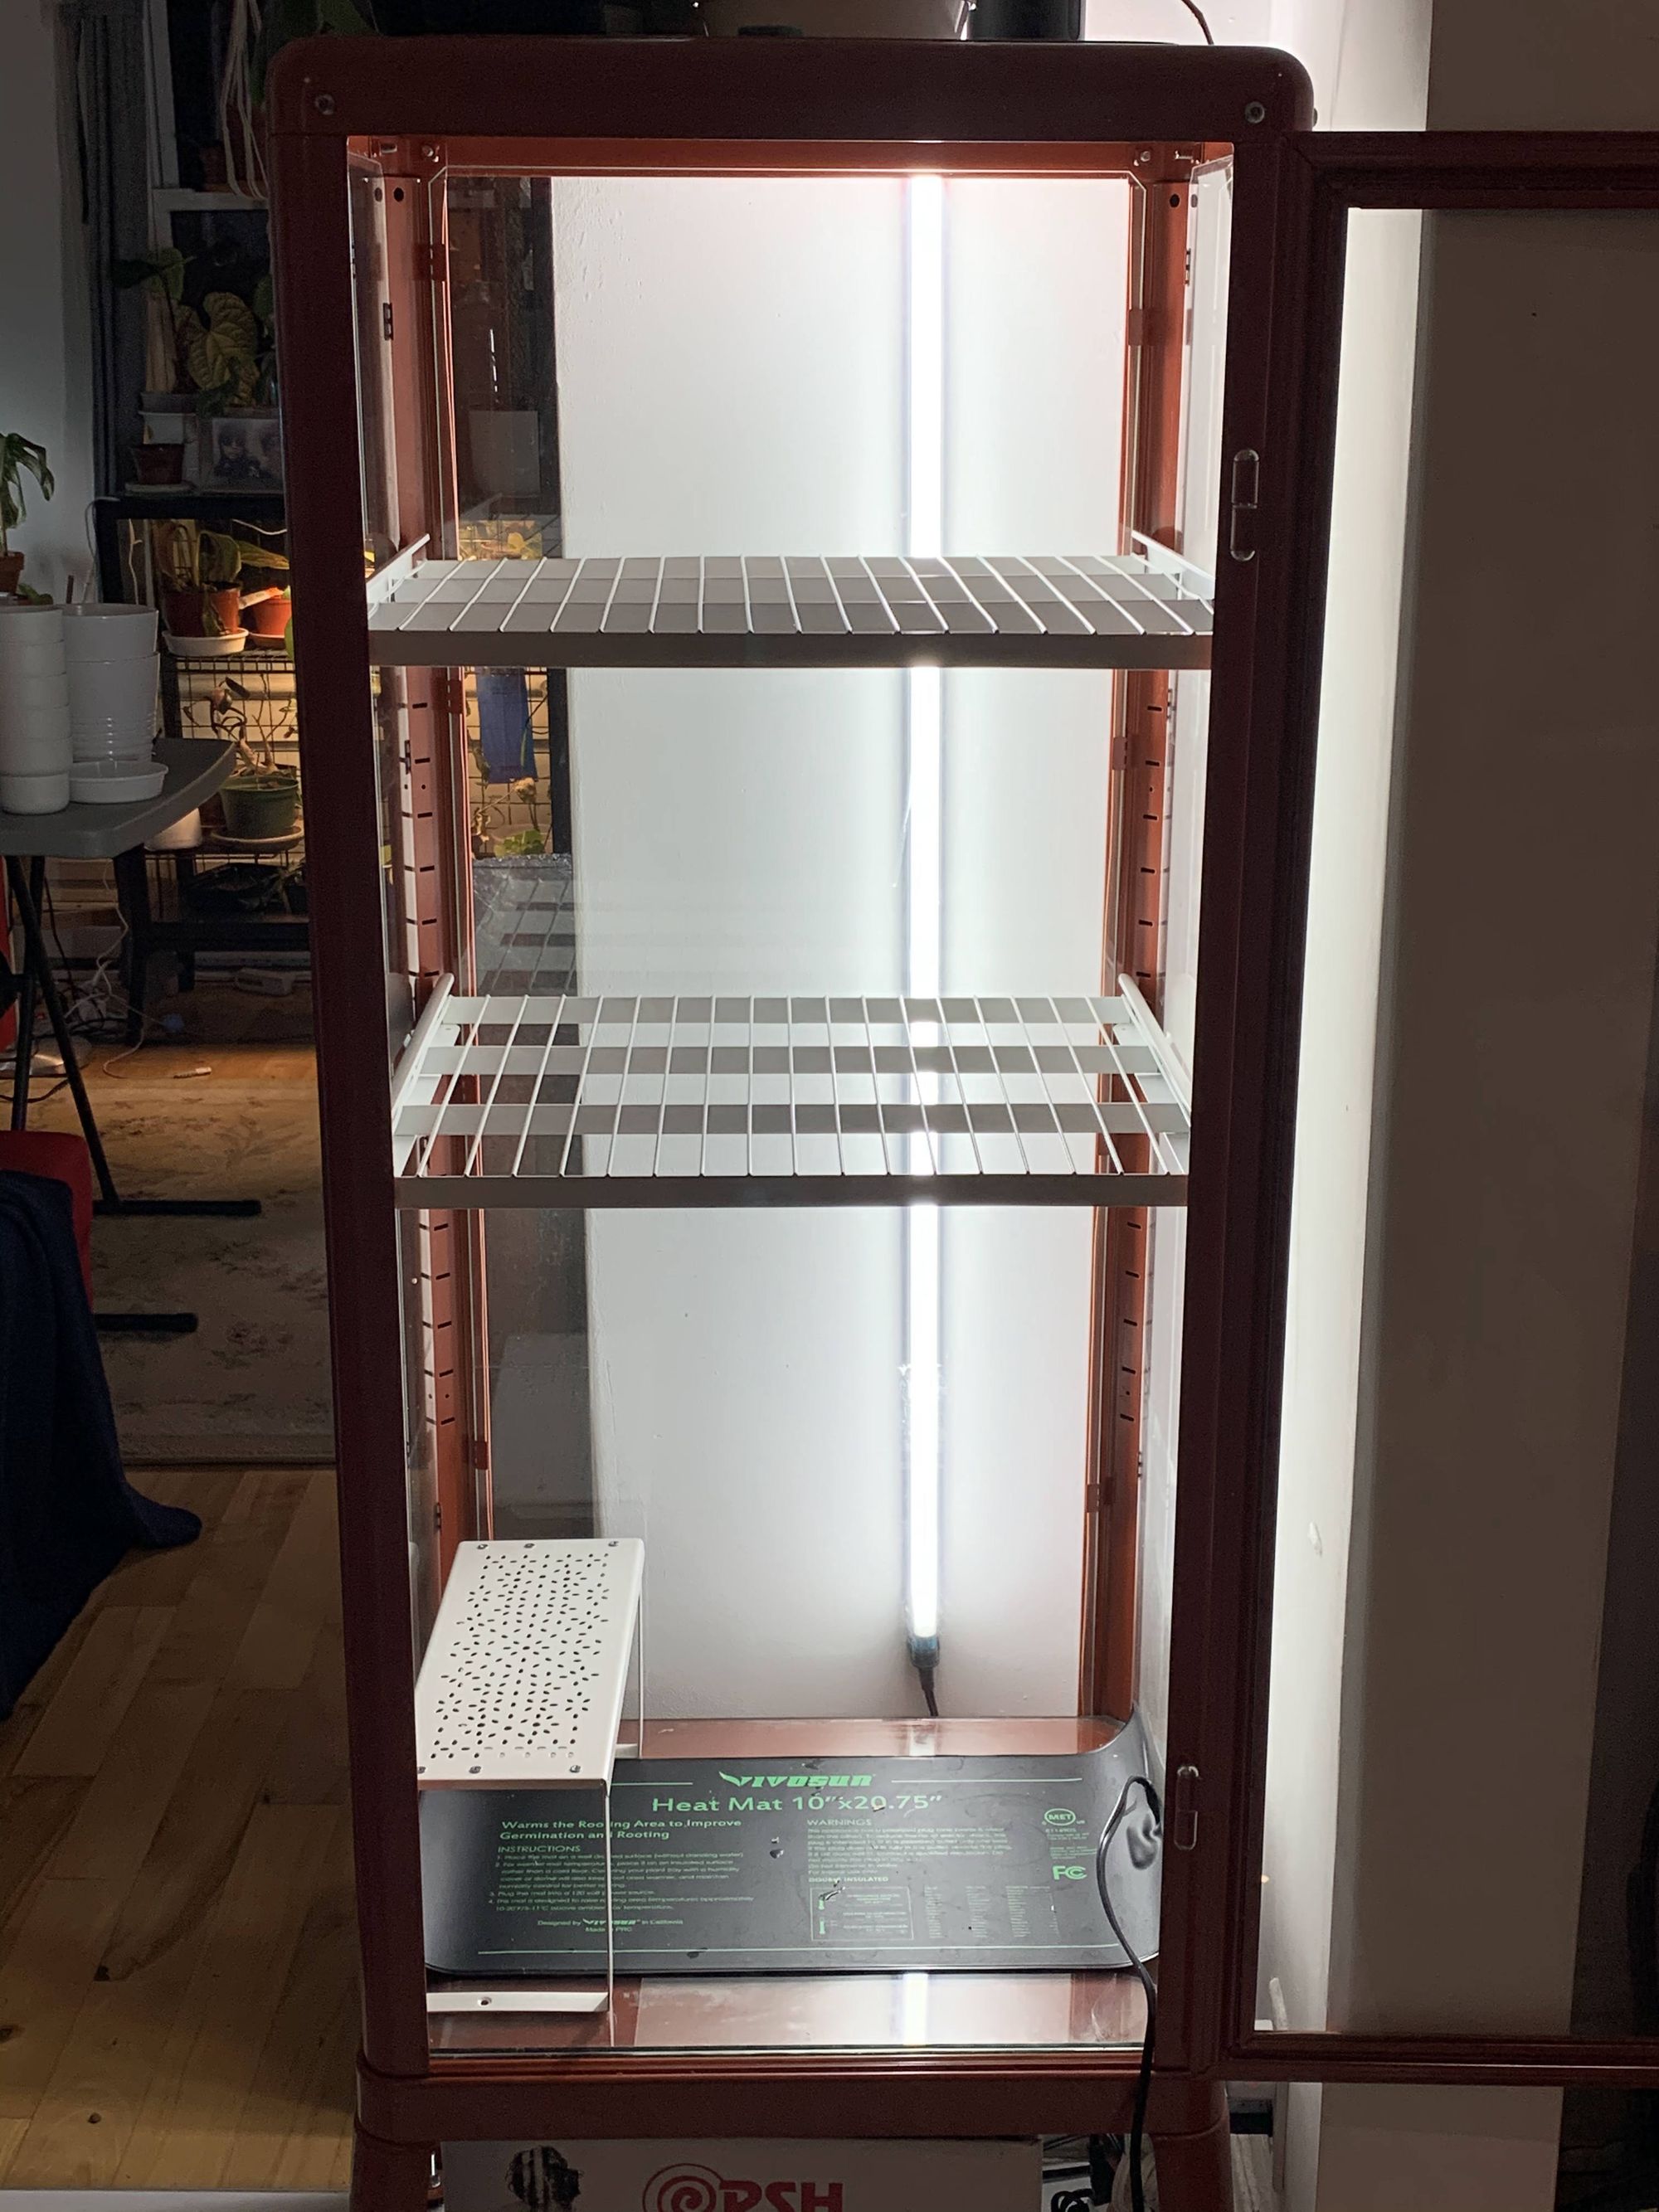
It's your choice whether you install one, two, or no shelves. I wanted two because I use it for my smaller plants and propagation.
UPDATE (December 16, 2021): There is some rusting on the uncut edges of the shelves. If I wasn't so lazy I would spray paint them with Rustoleum.
Wire grid panel:
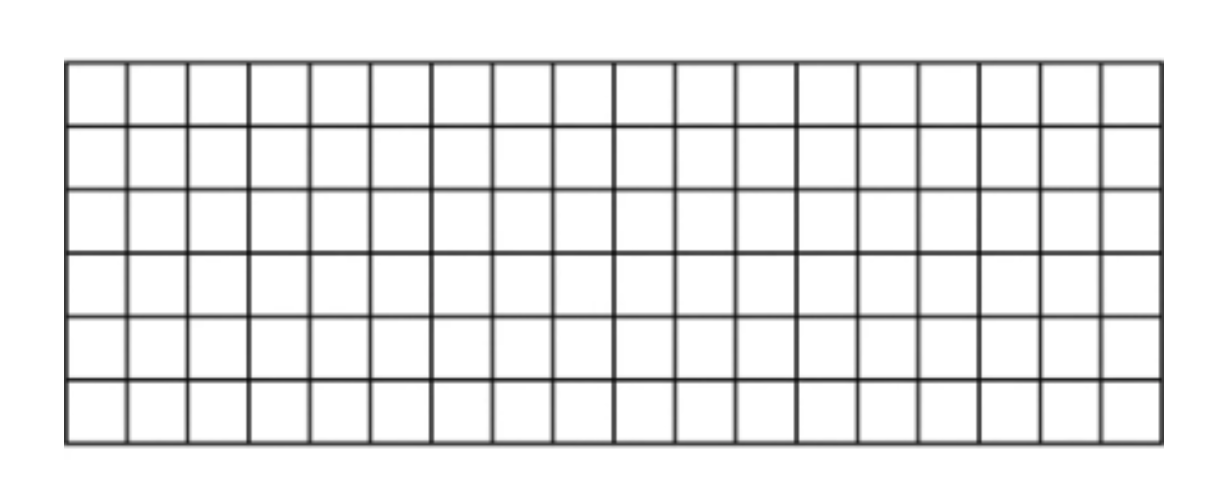
I prefer a wire grid panel to the Skadis board from Ikea (pictured below) because it allows the light to shine through the back of the cabinet. Additionally, it's easier to find accessories and you can even use binder clips to attach plants.
I originally wanted the entire back to be covered by the wire grid panel, but the snugness of the shelves didn't leave space. Thus, I just measured the space remaining on the bottom, which was 20" and cut the wire grid panel to that size.
Home Depot (Canada) sells the cheapest wire grid panel option, which is the perfect size for the Fabrikor (18" x 48"). I was not able to find this panel on the US site, perhaps other hardware stores may have similar options.
I used bolt cutters to cut the wire grid to 20". As they only come in black, I spray painted it white with rustoleum spray paint so it would match. You must do the spray painting outdoors and it's much faster if you also let it dry outside. Please wear a mask and gloves while you spray paint.
Installing the wire grid panel is extremely easy. It rests on the bottom of the cabinet and is held in by the shelf above.

Now you can use binder clips to hold plants up. Or you can buy wire grid panel accessories from Amazon.
Here are some wire grid panel accessories available at Amazon. (Remember: spray paint is your friend! If the cheapest option isn't the color you want, you can easily spray paint it):


Grow lights:
Different from other conversions, I prefer to have my lights on the outside of the cabinet as opposed to the inside for two reasons. First, it can be unsafe to have lights in a high humidity space. And second, I didn't want to drill any holes in my cabinet for cable management.
I mounted my Barrina LED 48" grow lights on the wall behind my Fabrikor using Gorilla double sided tape. Do not use cheap Dollar Store double sided tape!
Do the plants grow towards the light? Yes, but I see it as akin to a plant being placed in a windowsill. They always move towards the light anyways, I rotate them to keep the growth even.
Fans:
Humidity and adequate airflow come hand-in-hand. Without proper airflow, the air inside your cabinet will become stagnant, which increases the chances of root rot.
Computer fans are popular options for promoting airflow. The version below is what I've seen most commonly used. I am still waiting for these fans to come in the mail, I will update the post once I have installed them!
In order for the fans to work with the smart plug, they must have an analog power switch.


UPDATE: Fans have arrived. I actually ordered different ones from above, link here. I'm happy because they are not connected to each other like the AC Infinity Multifan.


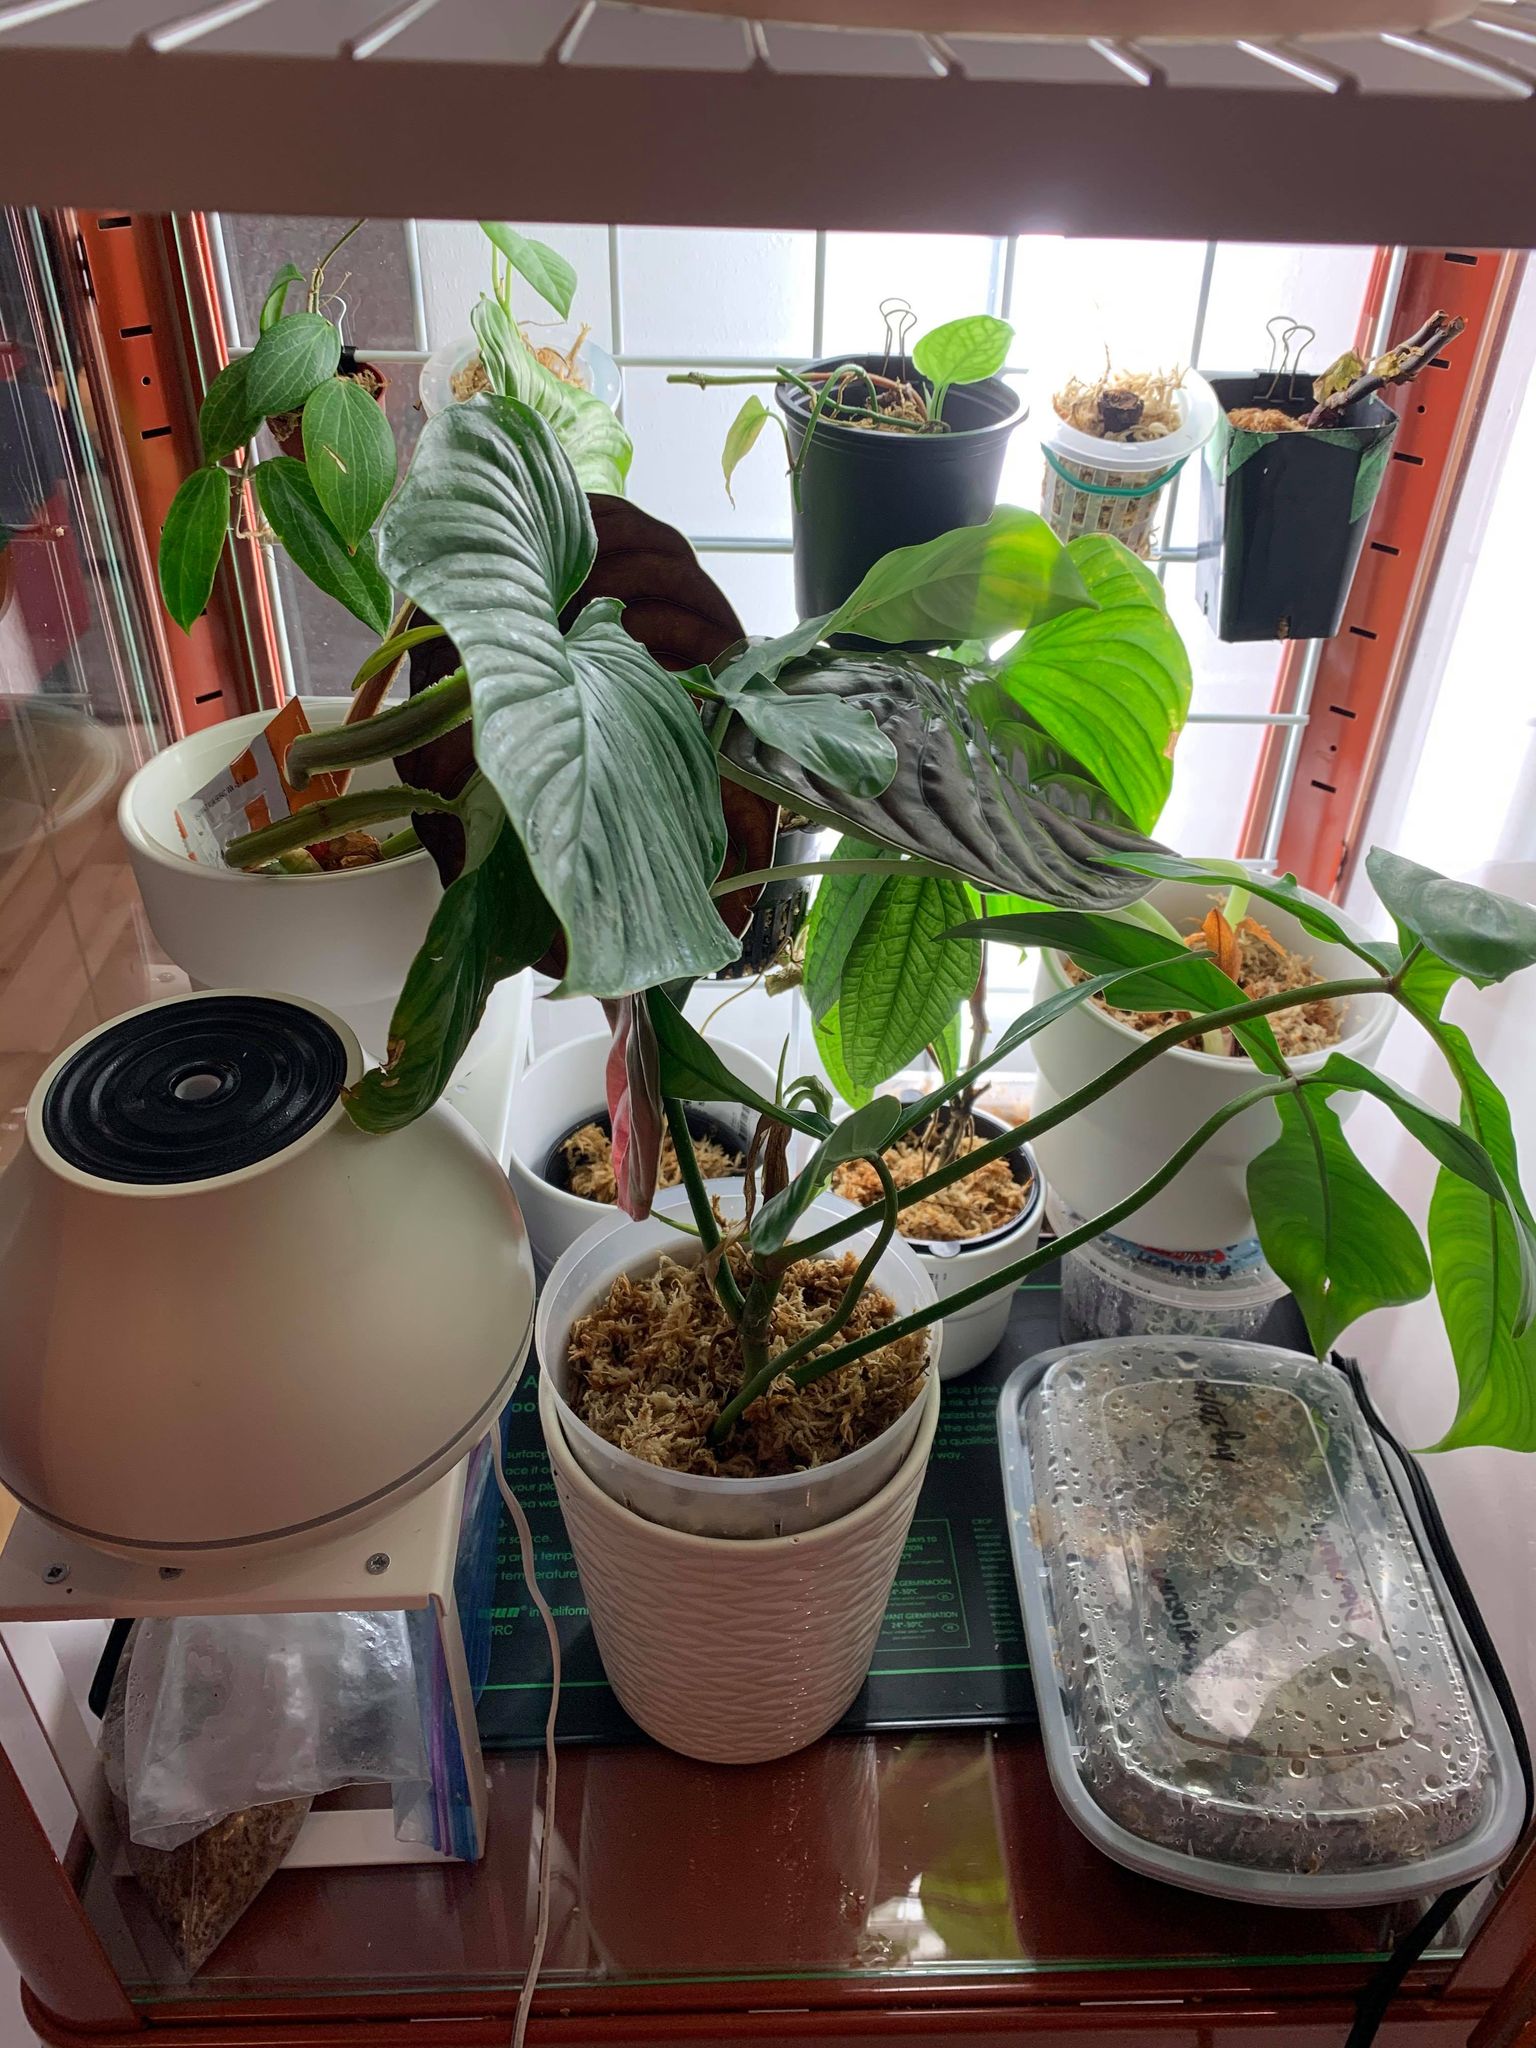
I installed one fan per shelf. Using the rubber feet of the fan, I fit them between the wires on the shelf.

Humidity and Humidifiers?
Without weatherstripping (to be discussed below) or a humidifier, my humidity stayed around 60-65%. Up until a few days ago, I did not use a humidifier in this cabinet. But since winter rolled in, I decided to add a small one.


After adding the humidifier, the humidity is around ~90%. I let it run for 1-3 h each day. As it has a digital power button, it cannot be controlled by the smart plug.
I believe with weatherstripping and during the summer, a humidifier is not necessary. With weatherstripping and a humidifier, the humidity may get too high and lead to water pooling on the bottom of your cabinet.
Heat mat:
Having a heat mat is, in my opinion, a matter of personal preference. I find that having a heat mat inside my Fabrikor keeps it very warm inside and helps seedlings and cuttings root/grow faster.
I put the heat mat on the bottom shelf and it's controlled by the smart plug, I will outline below.


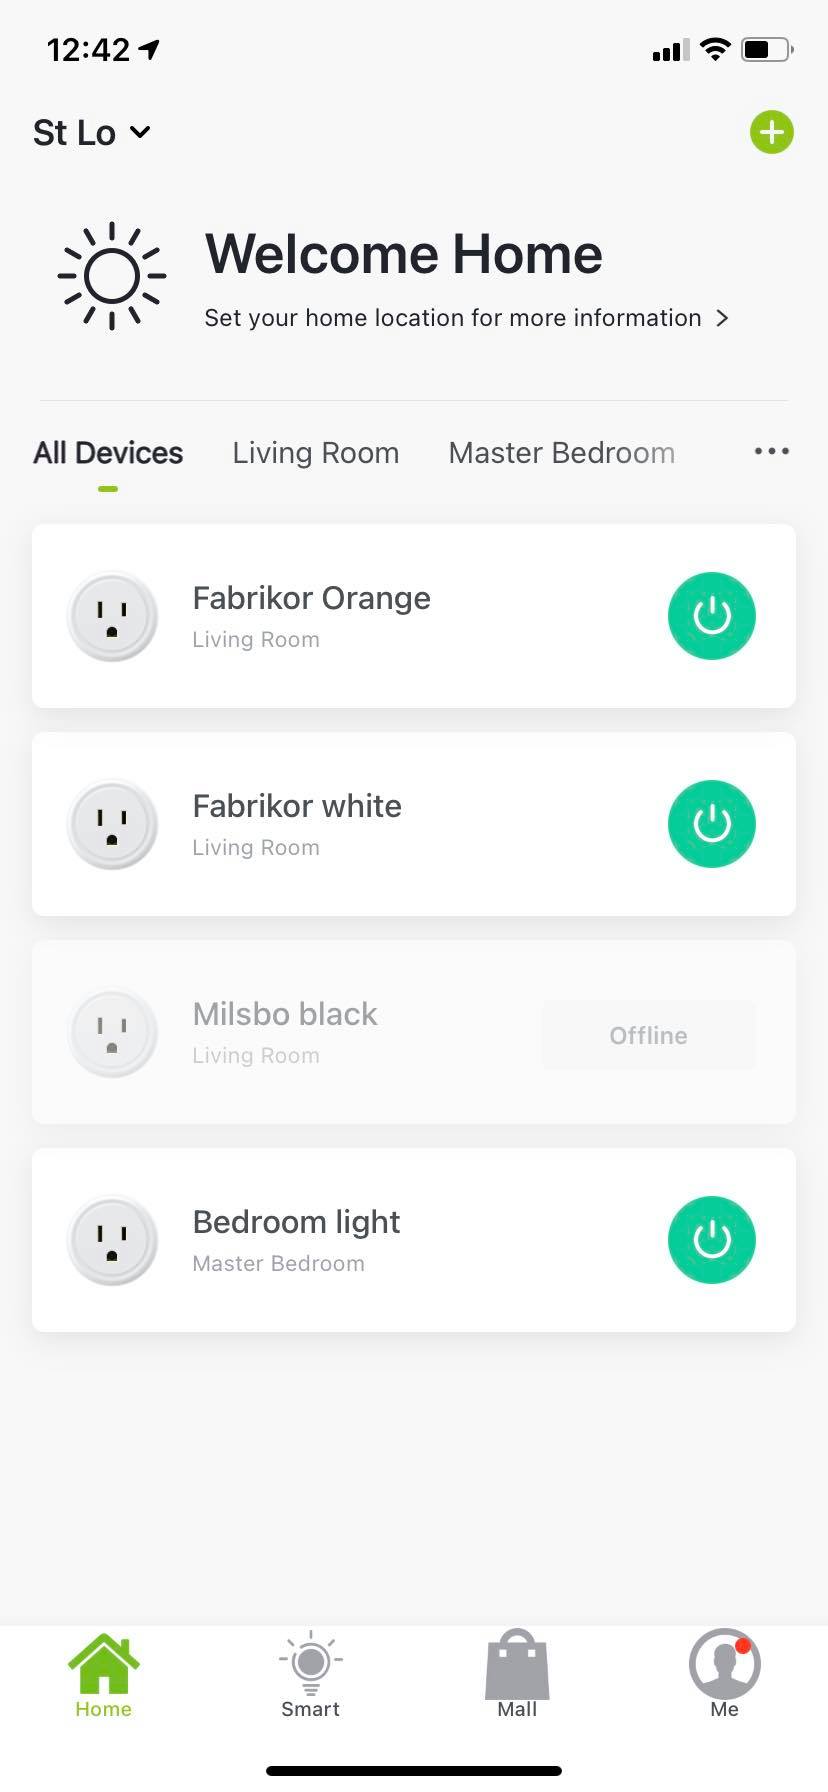
Smart plug:
Having a smart plug was one of the biggest game changers. No longer must you turn on your lights, fans, humidifiers every morning and turn them off every night. With a smart plug, everything is now automatic!


If you plug a power bar into the smart plug, it will turn it into a smart power bar. I plugged my lights, heat mat, and fan into the power bar. Now every morning at 5 AM, everything turns on and at 5 PM everything turns off.
Weatherstripping?
I know many people like to weatherstrip their cabinets as it keeps the humidity consistent, but I like having a bit of airflow and I am lazy.
I personally have not done this on any of my cabinets, but here are some supplies I have seen people use:
- Door weatherstripping: This is used to cover the gaps between the doors.
- Weatherstripping foam: This is used to seal the gaps between the glass and the metal frame. It could also be used to bolster the seal around the door.


It seems like a lot of steps, but I had so much fun doing it. My plants are extremely happy about their now pimped up home!