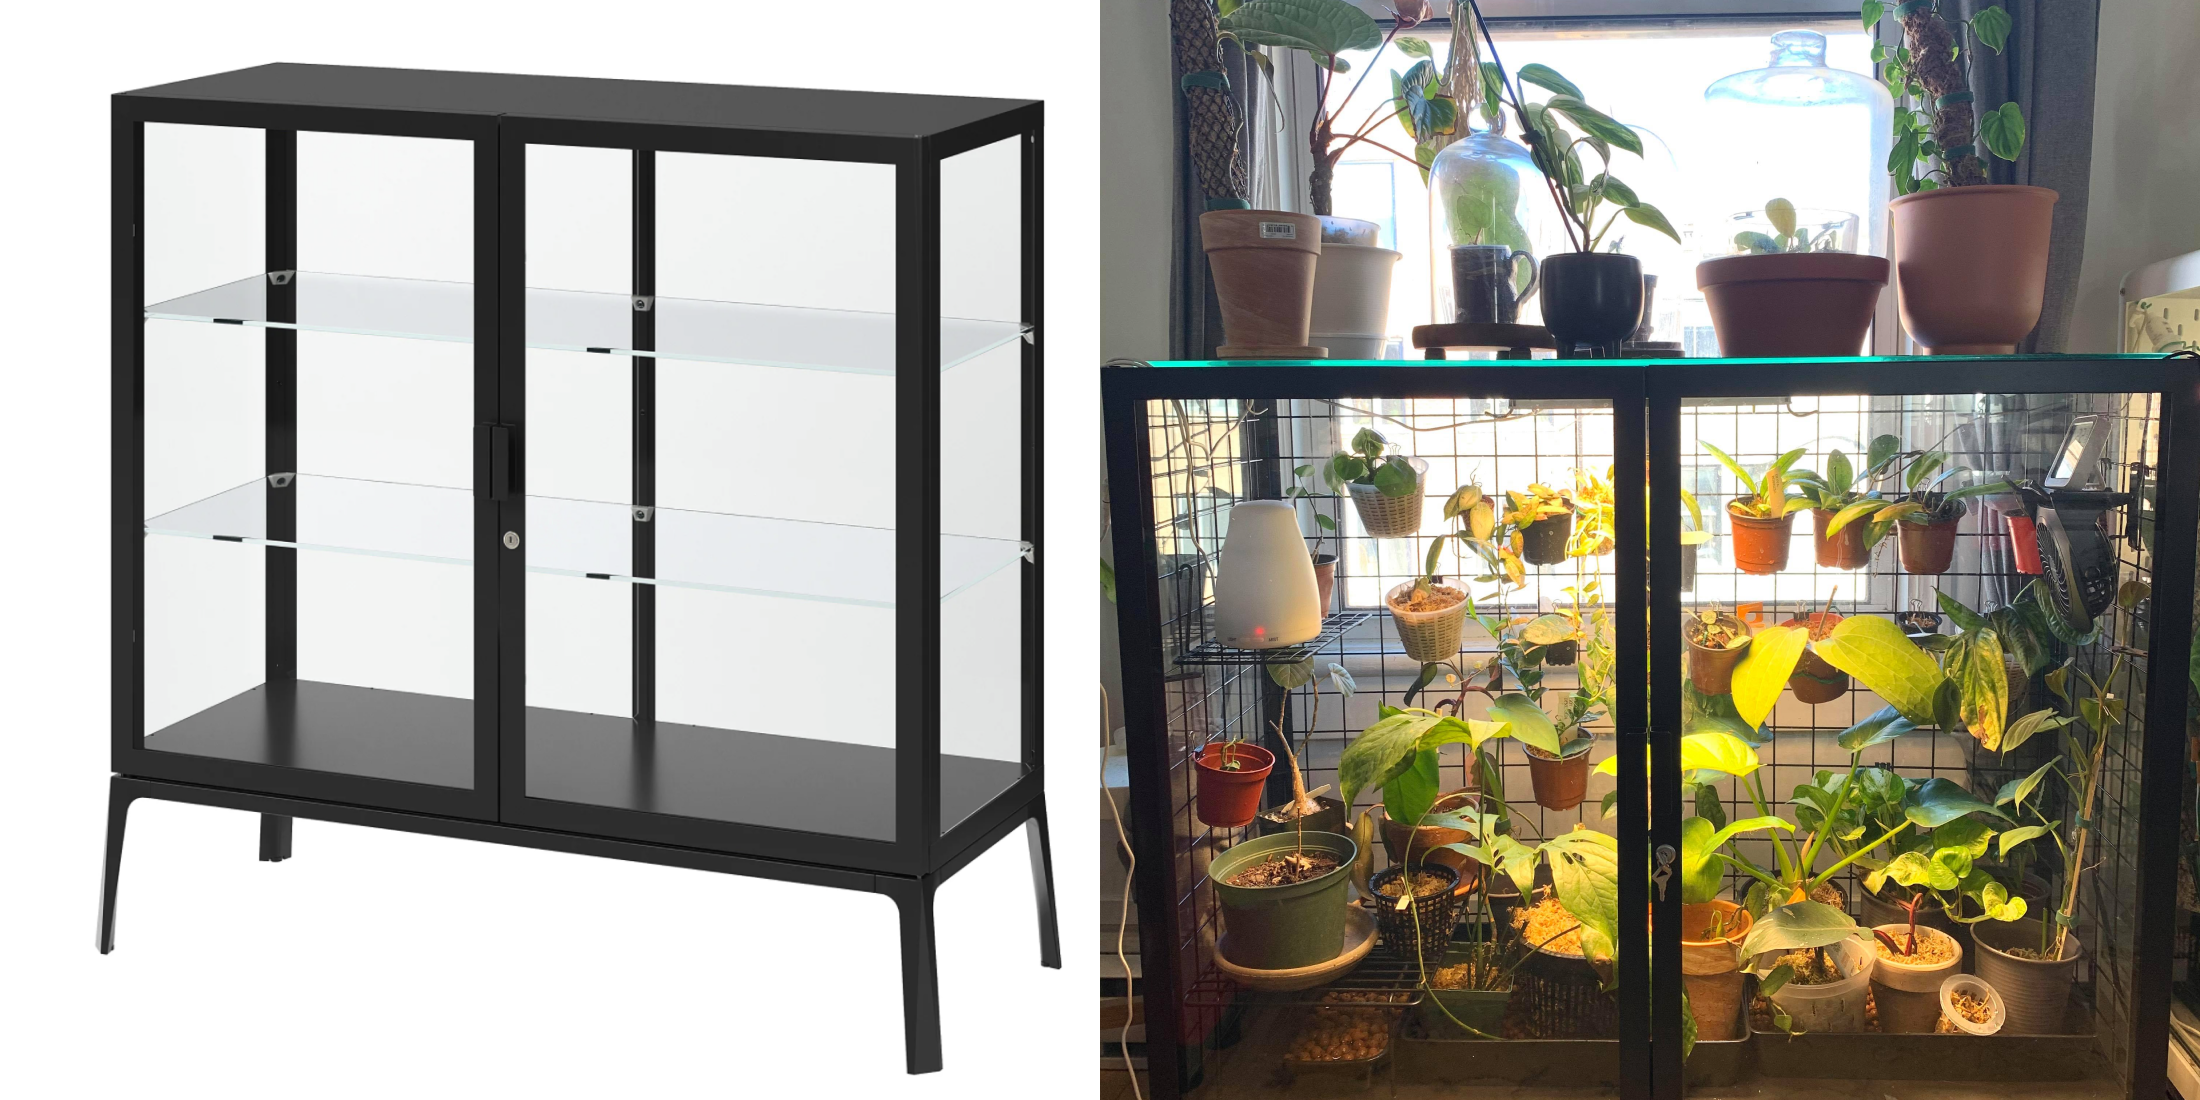
How to convert Ikea Milsbo (wide) cabinet into greenhouse
The final post in our series on converting Ikea cabinets into greenhouse. Today, I will discuss how I converted the Milsbo wide into a greenhouse.

Updated February 2, 2023
The final post in our series on converting Ikea cabinets into greenhouse. Today, I will discuss how I converted the Milsbo wide into a greenhouse.

Looking for the other cabinets? Check out my other conversions for Milsbo (tall), Fabrikor (wide), and Fabrikor (tall).
List of all the items I used to convert the Milsbo (wide) into a greenhouse:
- Ikea Milsbo (wide) cabinet
- Wire grid panel for back
- Wire grid panels for sides
- Bolt cutter (to cut the wire grid panels to size)
- Grow light
- Neoamydrium magnets hooks (to hang growlight)
- USB fan
- USB extension cord
- Grid wall hook (to hold fan)
- Wire grid shelf kit
- Mini shelf from Dollarama
- Mini humidifier
- Smart plug
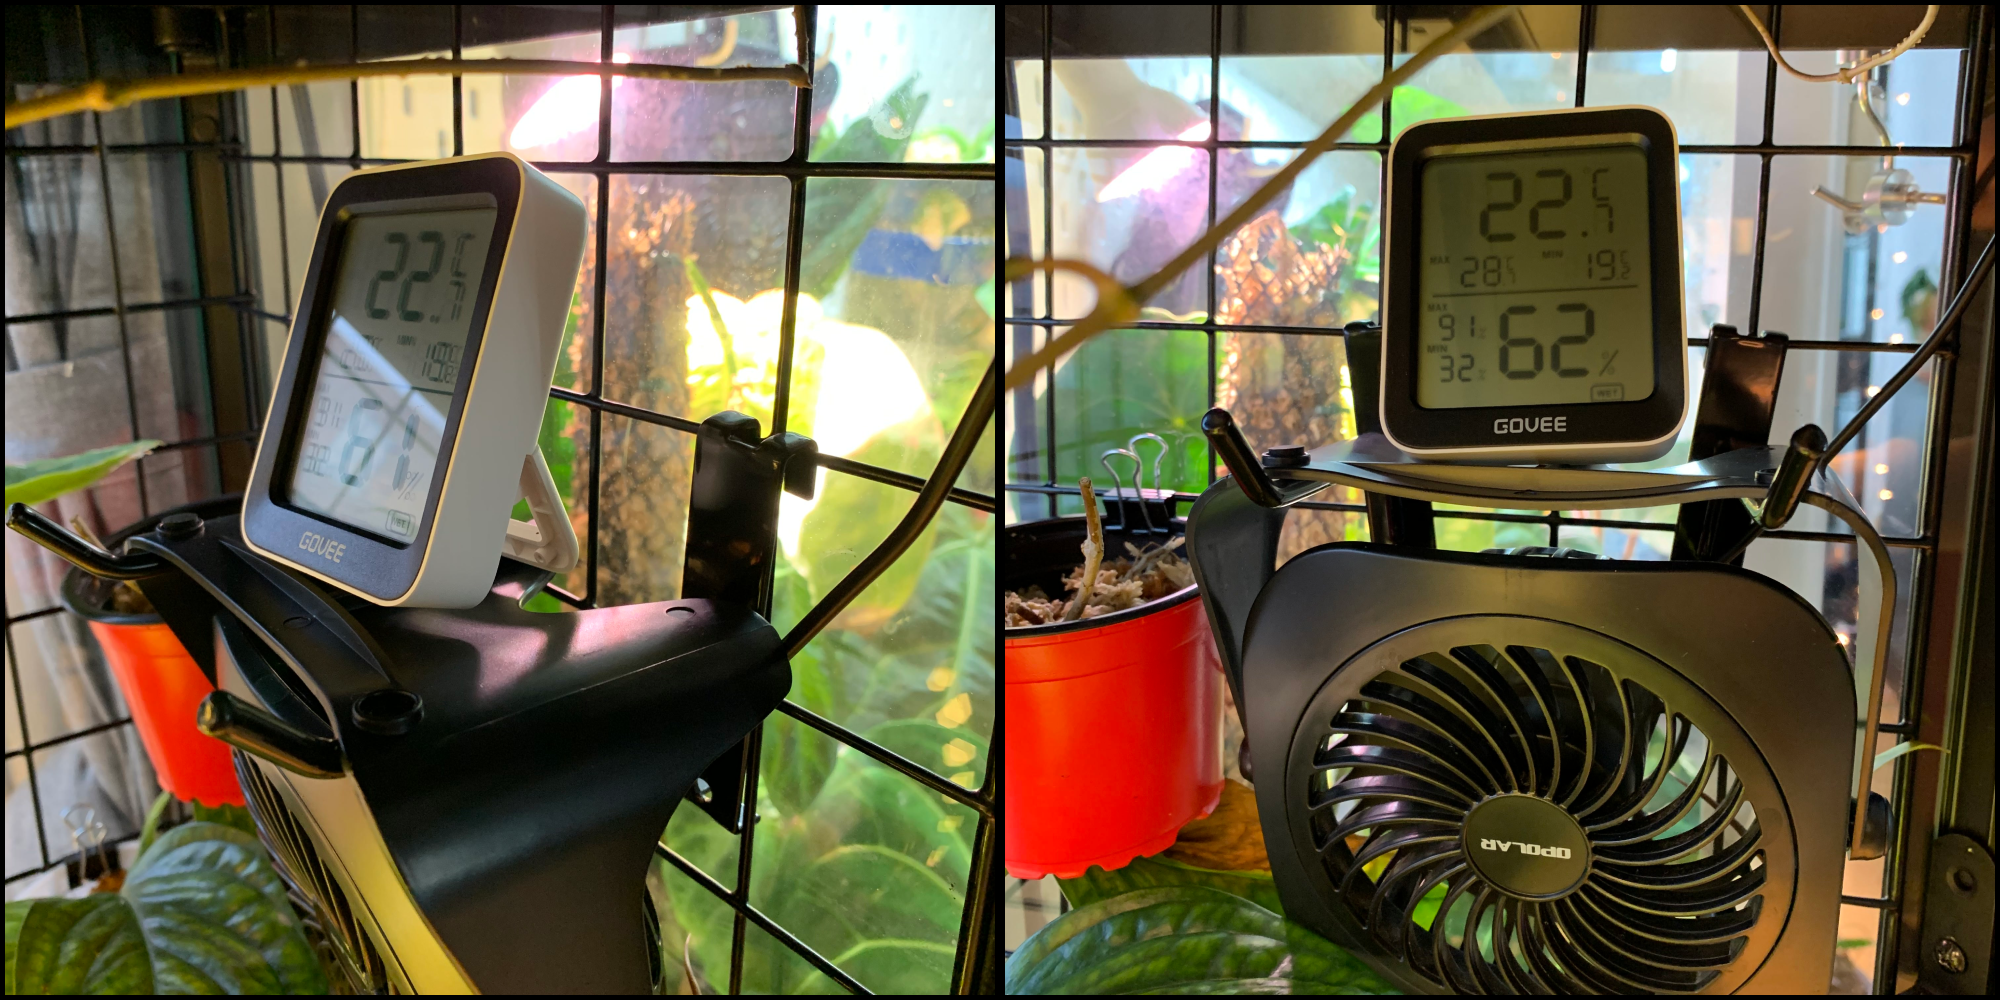
- Govee hygrometer
Wire shelves:
I used to have a single wire shelf in this cabinet, but I removed it as my plants started getting too tall. If you are interested in installing a shelf, you will need two pieces: wire shelf and L-brackets.
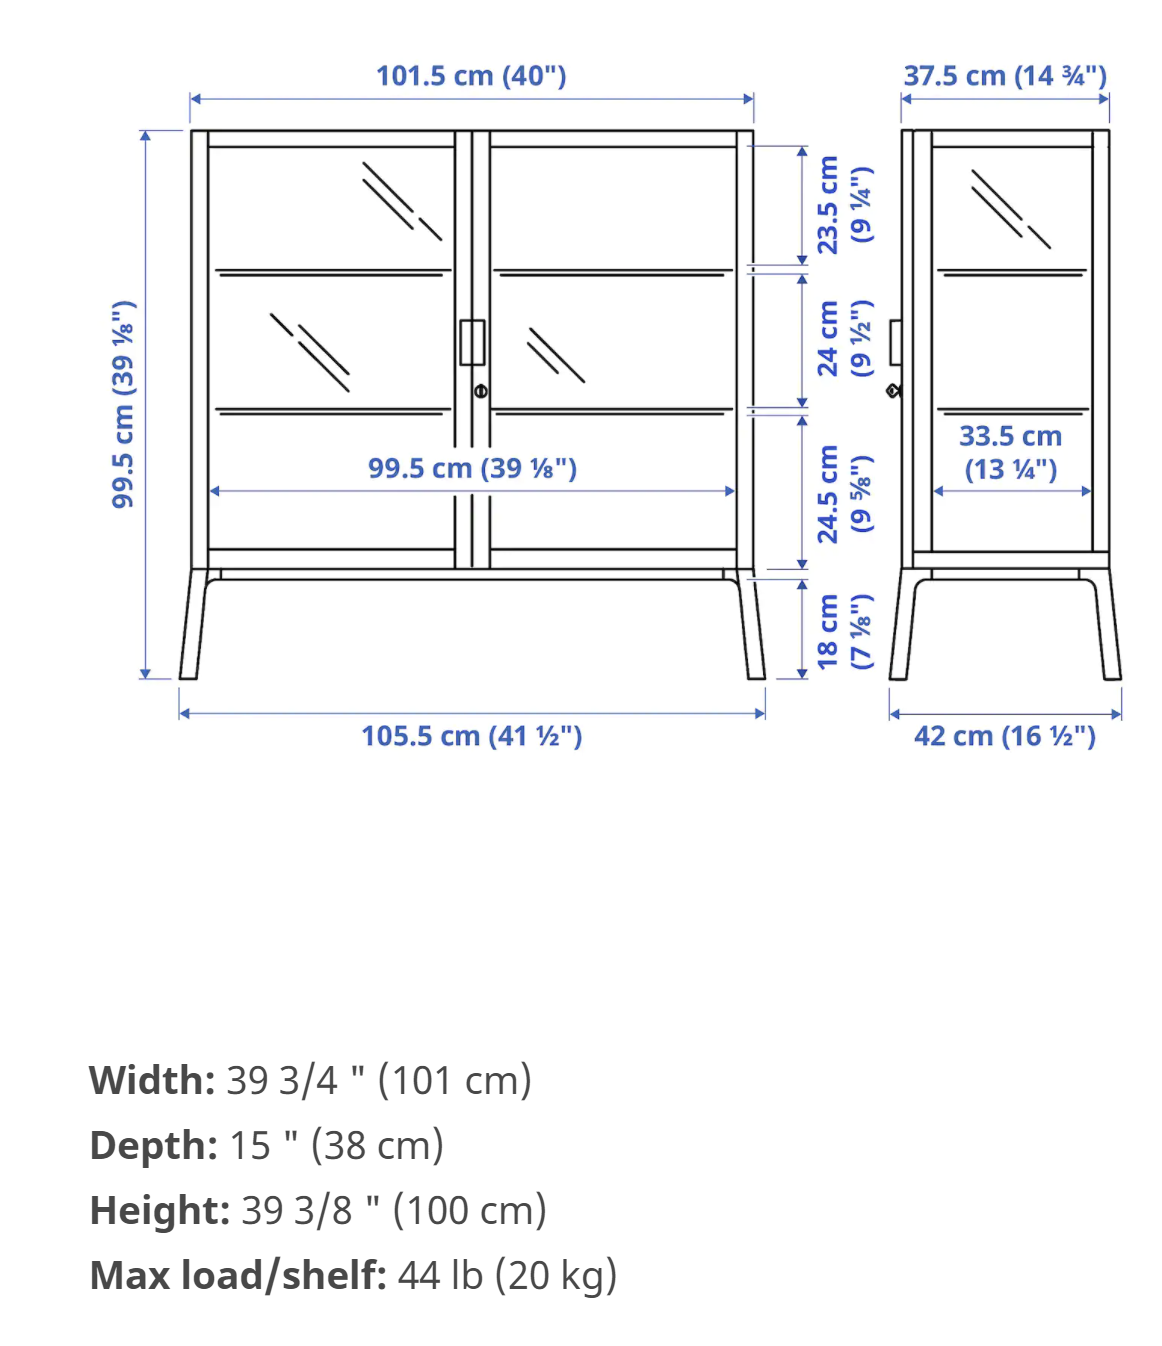
Measurements of wire shelves and L-brackets:
- Wire shelf: 39" wide by 12" deep
- L-brackets: 2"
For the wire shelf, I purchased a 48" ClosetMaid shelf and had it cut down to 39" at Reno Depot (Quebec). This was the most affordable version I could find. As they don't typically come in black, I spray painted it with Tremclad Rustoleum in flat black. Please spray paint outside or in an extremely well ventilated area. I strongly recommend wearing gloves and a mask. Let it dry outside for at least 24 hours to allow the toxic fume to dissipate.
To install the shelf, use the existing screws and holes of the Milsbo. You can also spray paint the L-brackets to make it look seamless.
For the back of the shelf, install the L-bracket using the second hole. For the front of the shelf, install the L-bracket using the top hole. This allows the shelf to sit evenly with the lip facing downwards.
Wire grid panel:
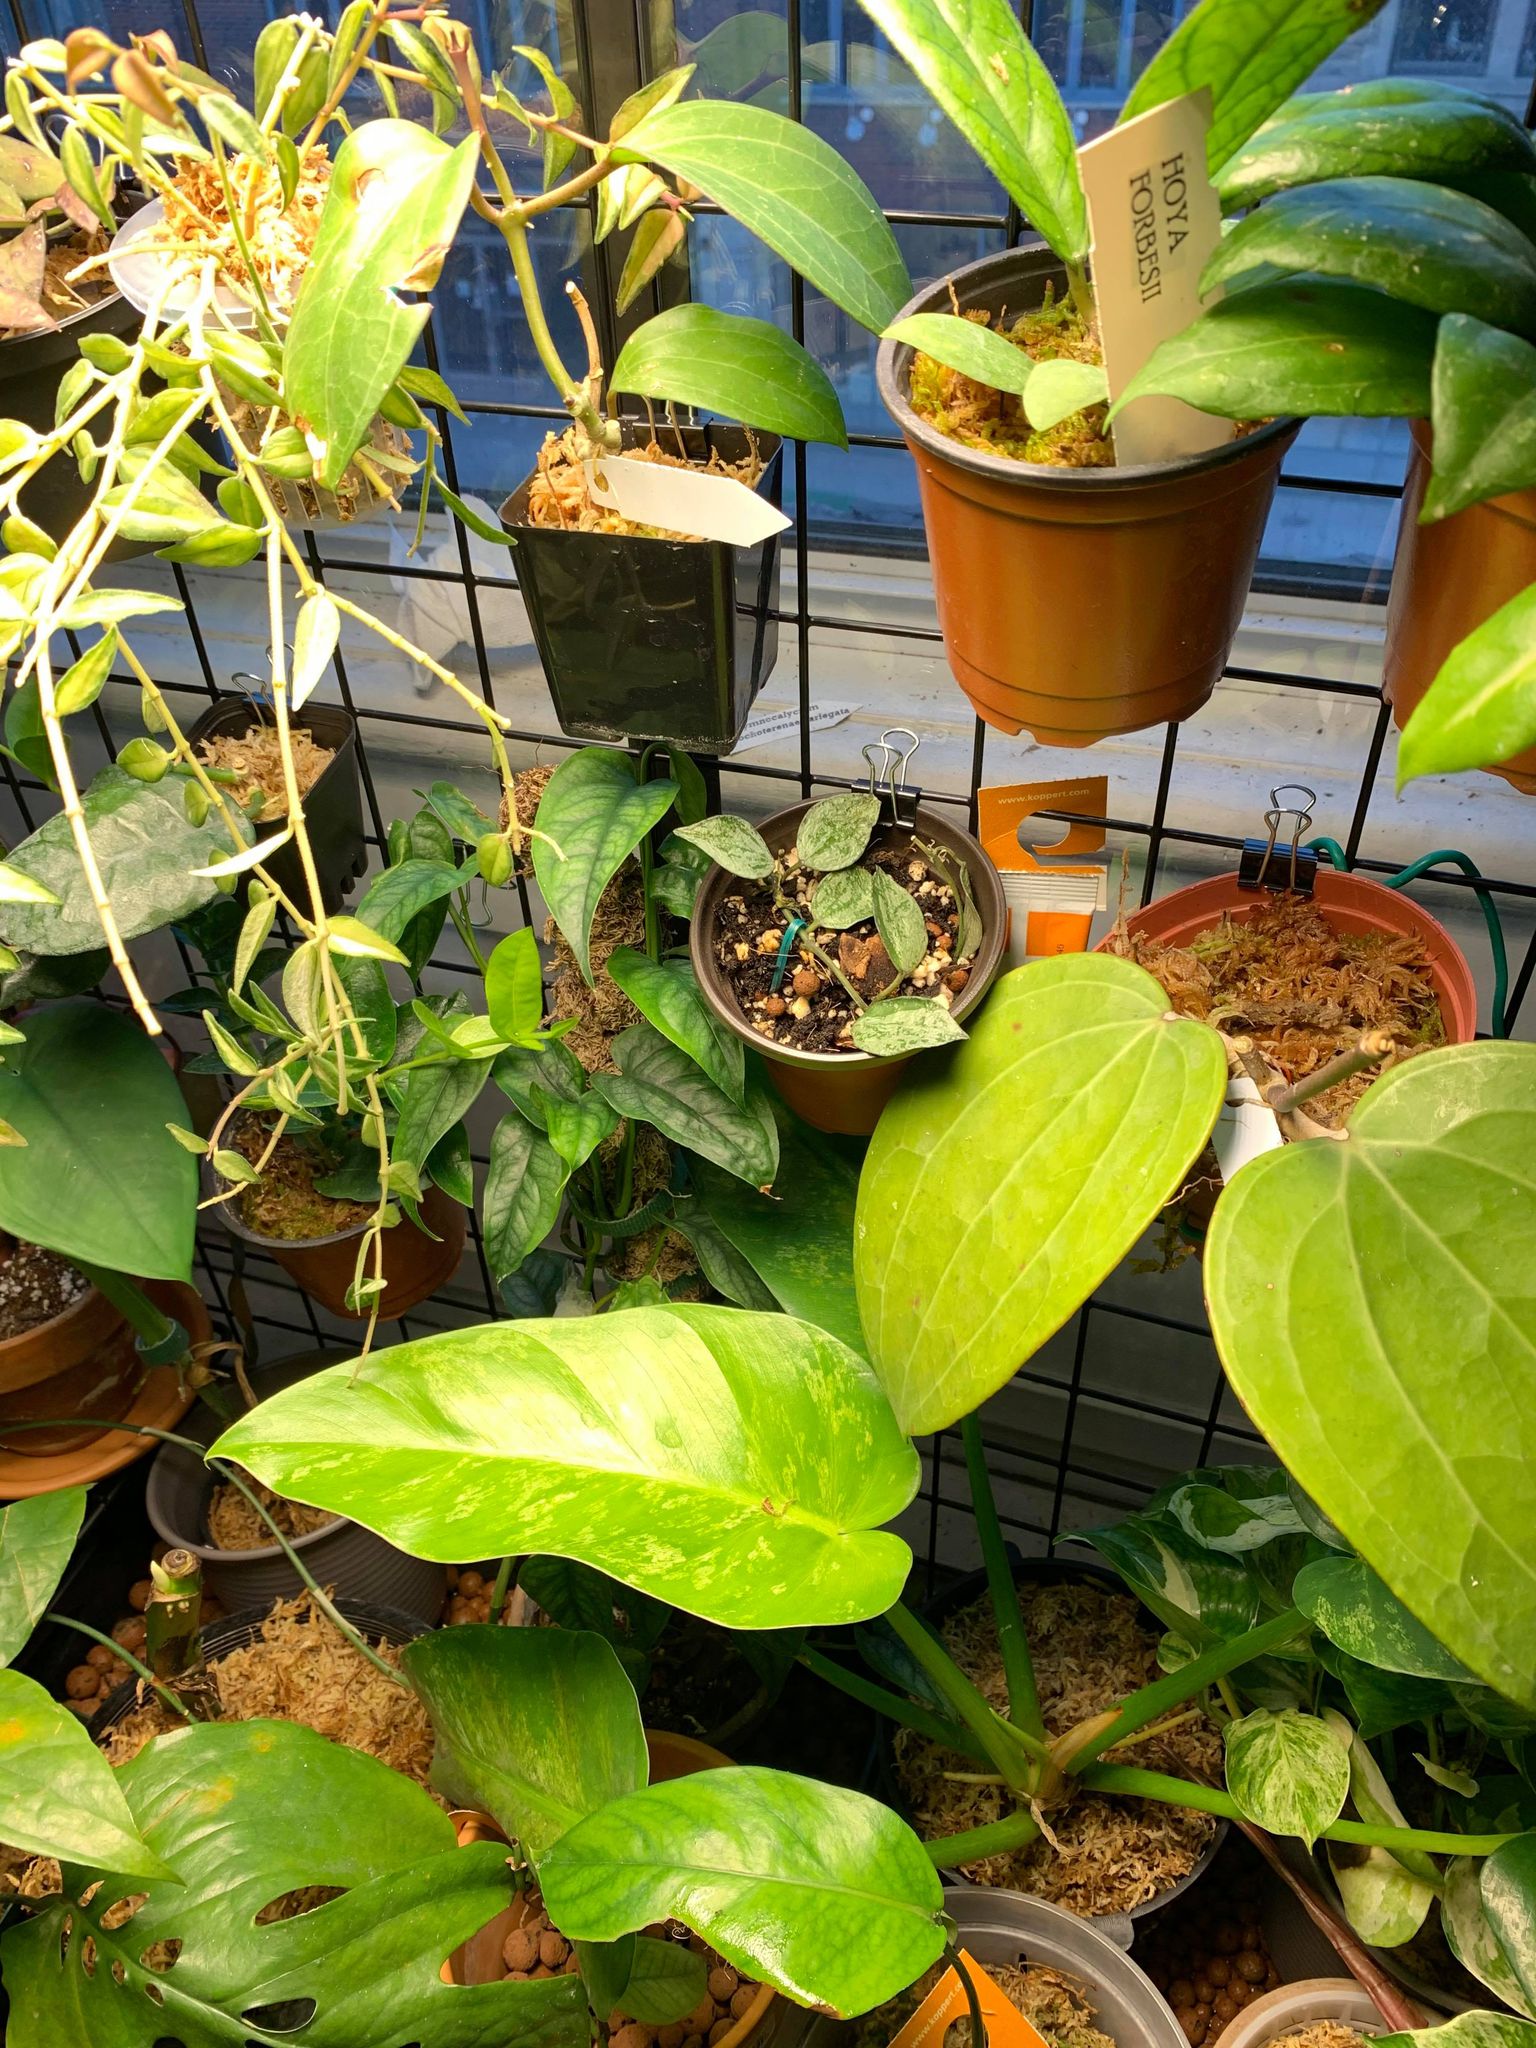
I have wire grid panels installed on the back and sides to maximize space.
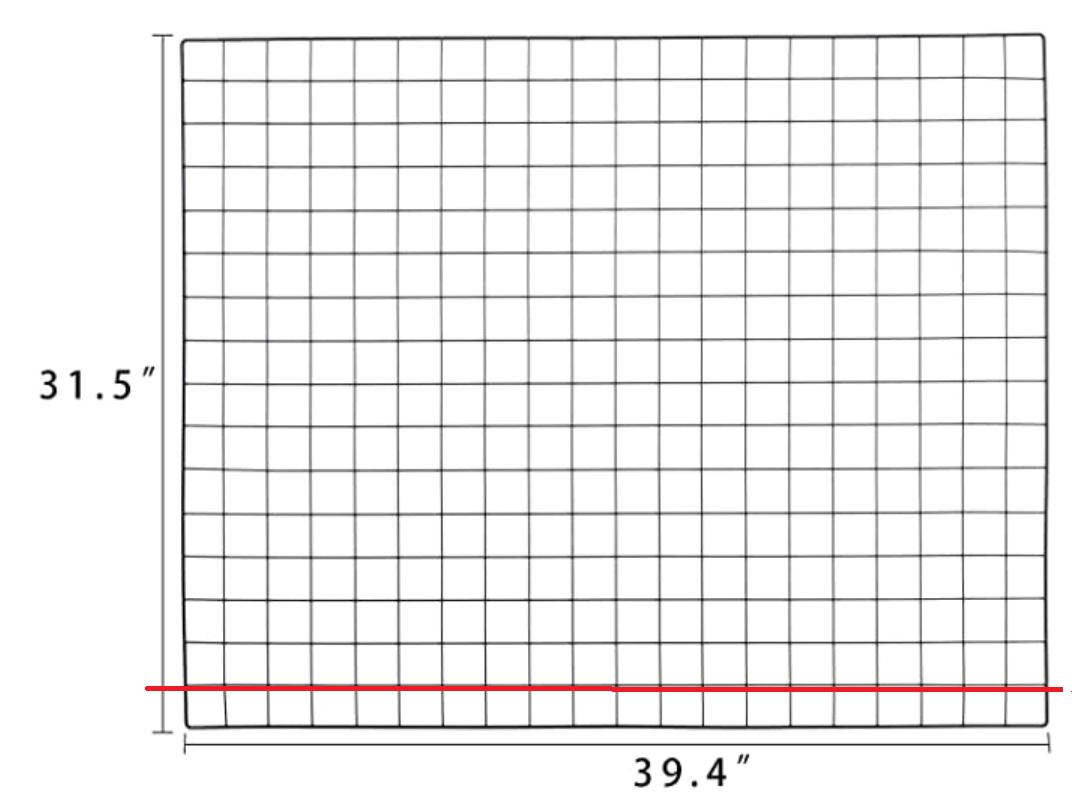
I found a 39.4" x 31.5" wire grid panel, which was close as possible to the size that I needed: 39 1/8" width by 28" depth. I used bolt cutters to cut off the bottom square, as indicated below in red.
Update (February 2, 2023): The wire grid panel I used is no longer available and unfortunately, there are no similar sized substitutes.
Side panels:
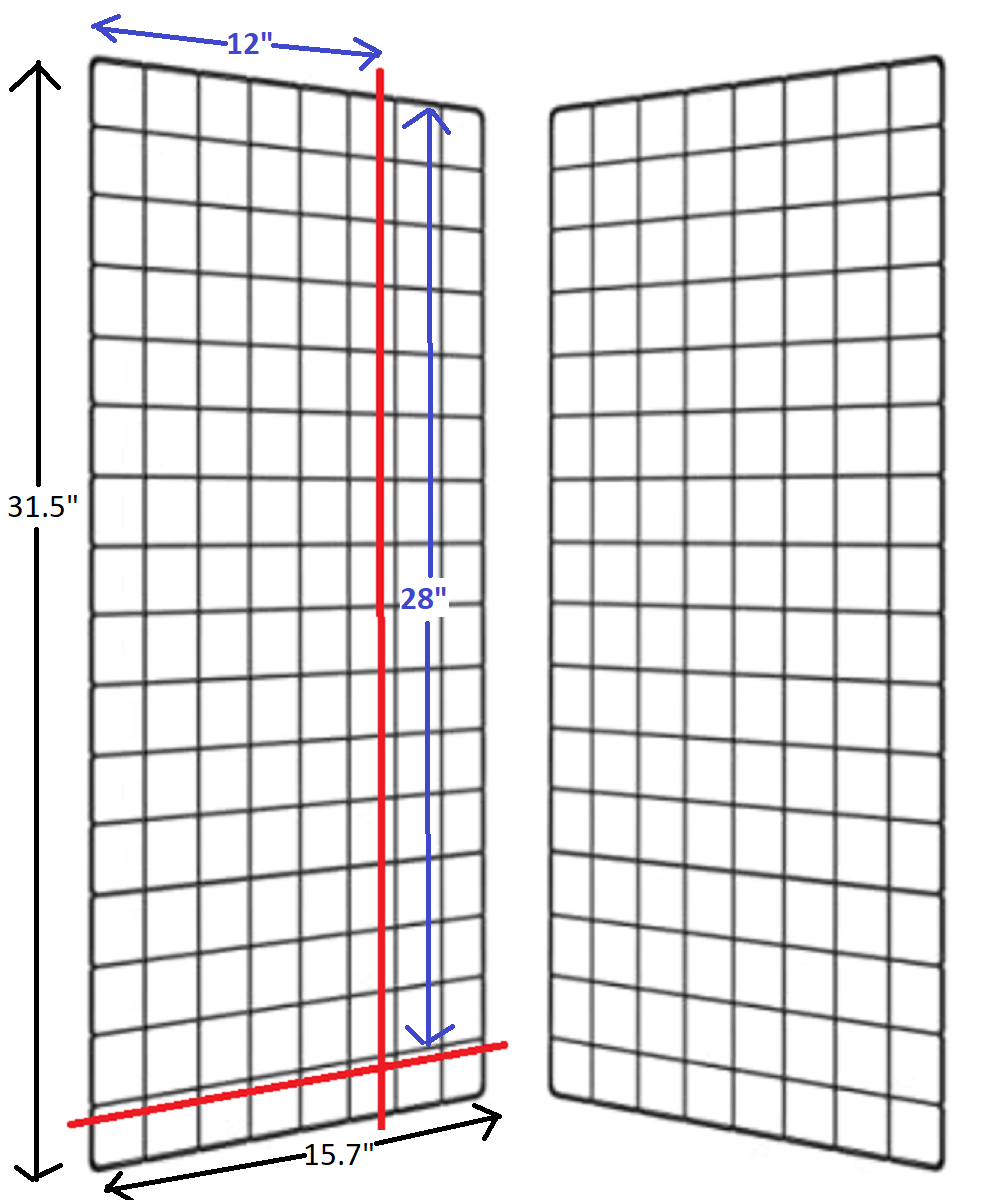
I used two 15.7" x 31.5" wire grid panels, which I cut to 12" x 28" using bolt cutters as indicated in the line below:
Update (February 2, 2023): The original wire grid panels are no longer available. These 22" x 28" wire grid panels are a good substitute. You will need to cut 10" inches from the width and none from the length.
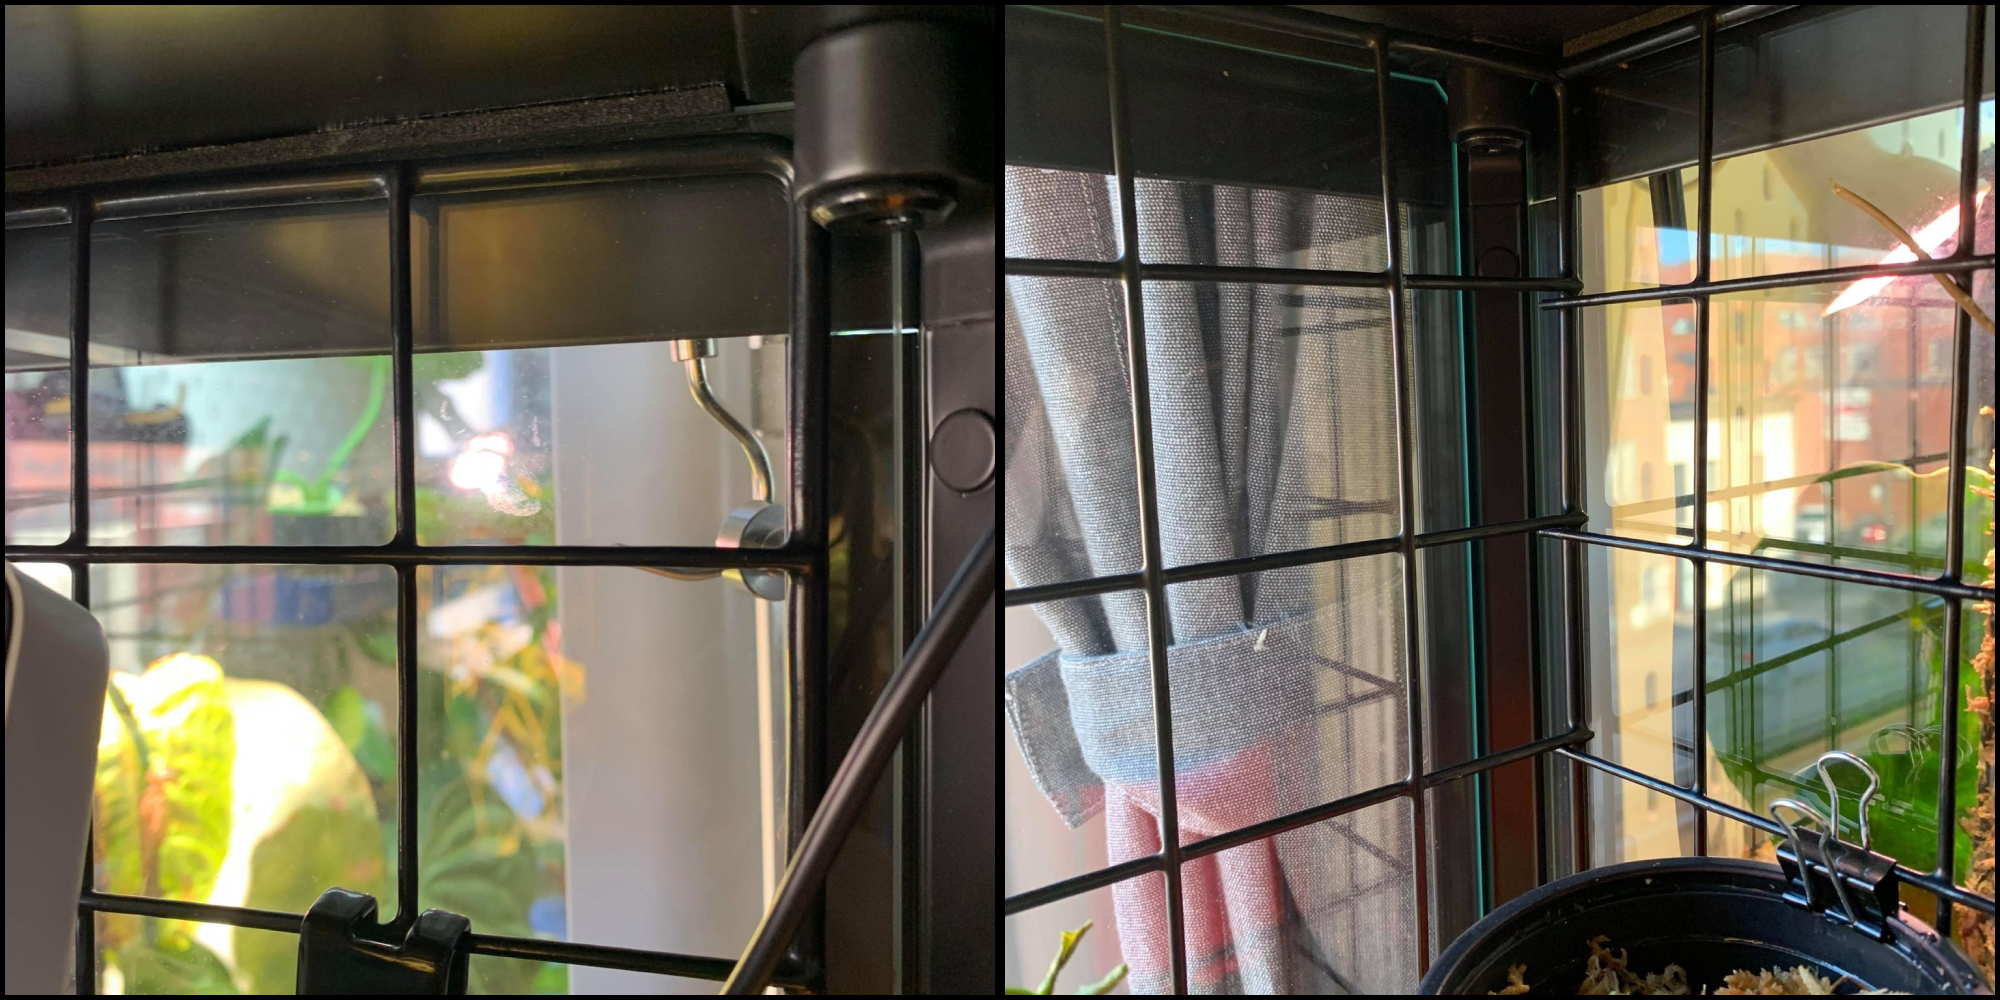
Because the panels are the exact size of the back and sides, no difficult installation necessary, simply stand the panels on the bottom. For the side panels, put the wire panel behind the knob in the top corner.

Growlights:
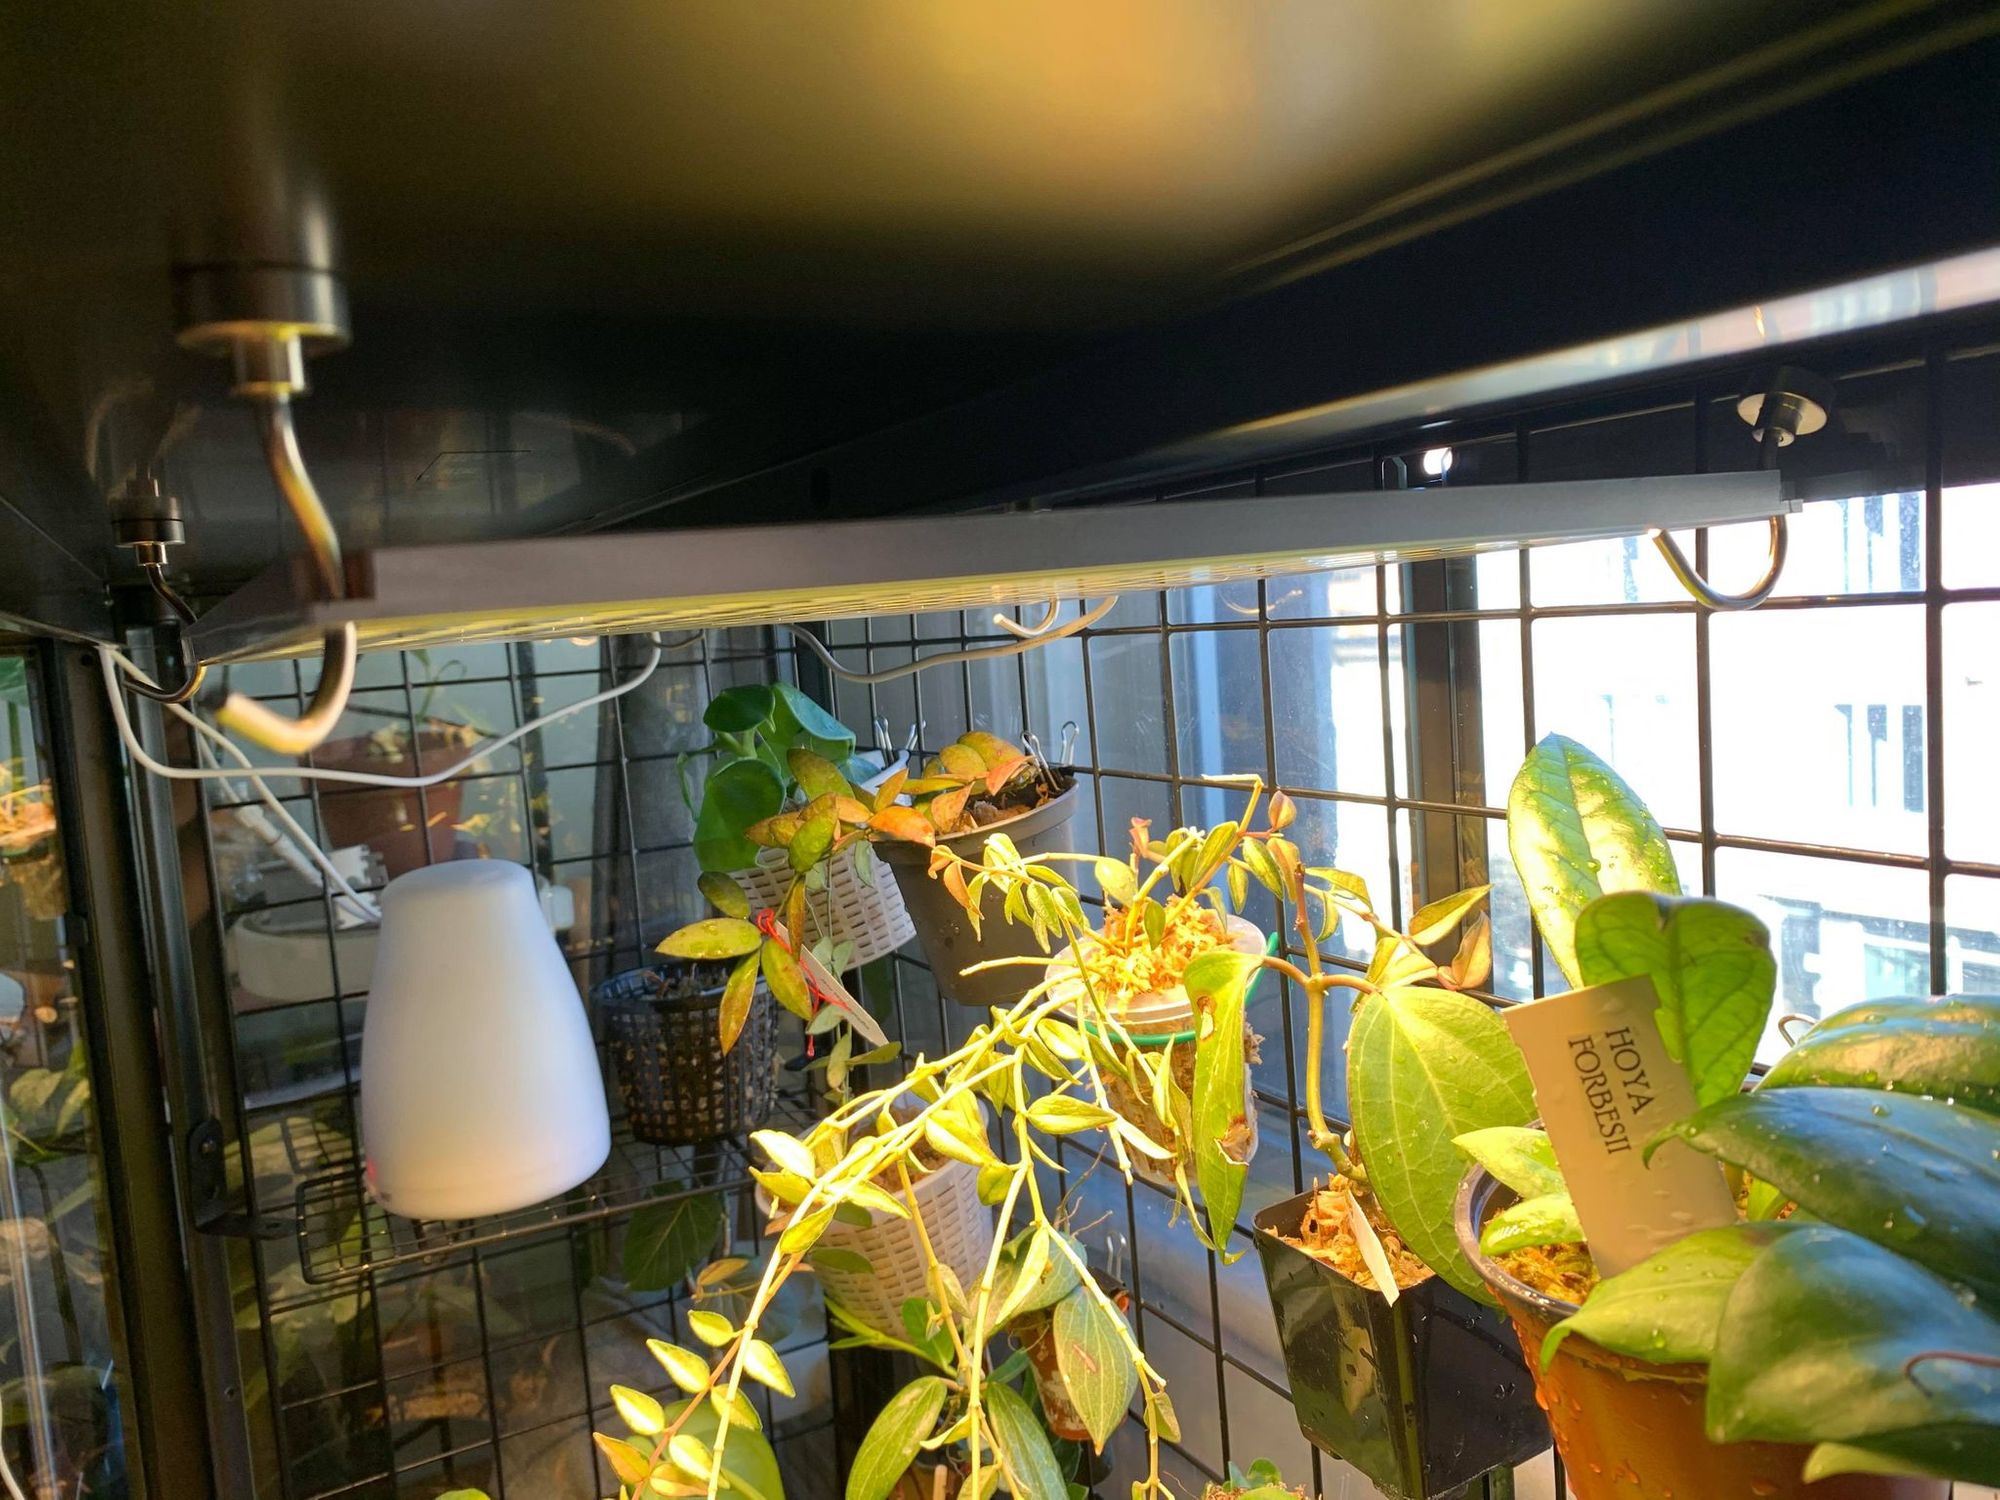
I use a single LED growlight panel installed with 4 neoamydrium magnet hooks. The cord exits out the top of the door as you can see in the top left corner of the photo below.
Update (February 2, 2023): The LED growlight panel that I used is no longer available, this LED growlight seems like a reasonable and affordable substitute.
Fan:
I installed one fan using 2 wire grid hooks on the side panel. Thus, the air circulation goes throughout the cabinet. The cord exits out through the doors of the cabinet, I did not drill any holes. (Note: The fan pictured in my conversion is no longer on sale, now I recommend this Honeywell Fan.)
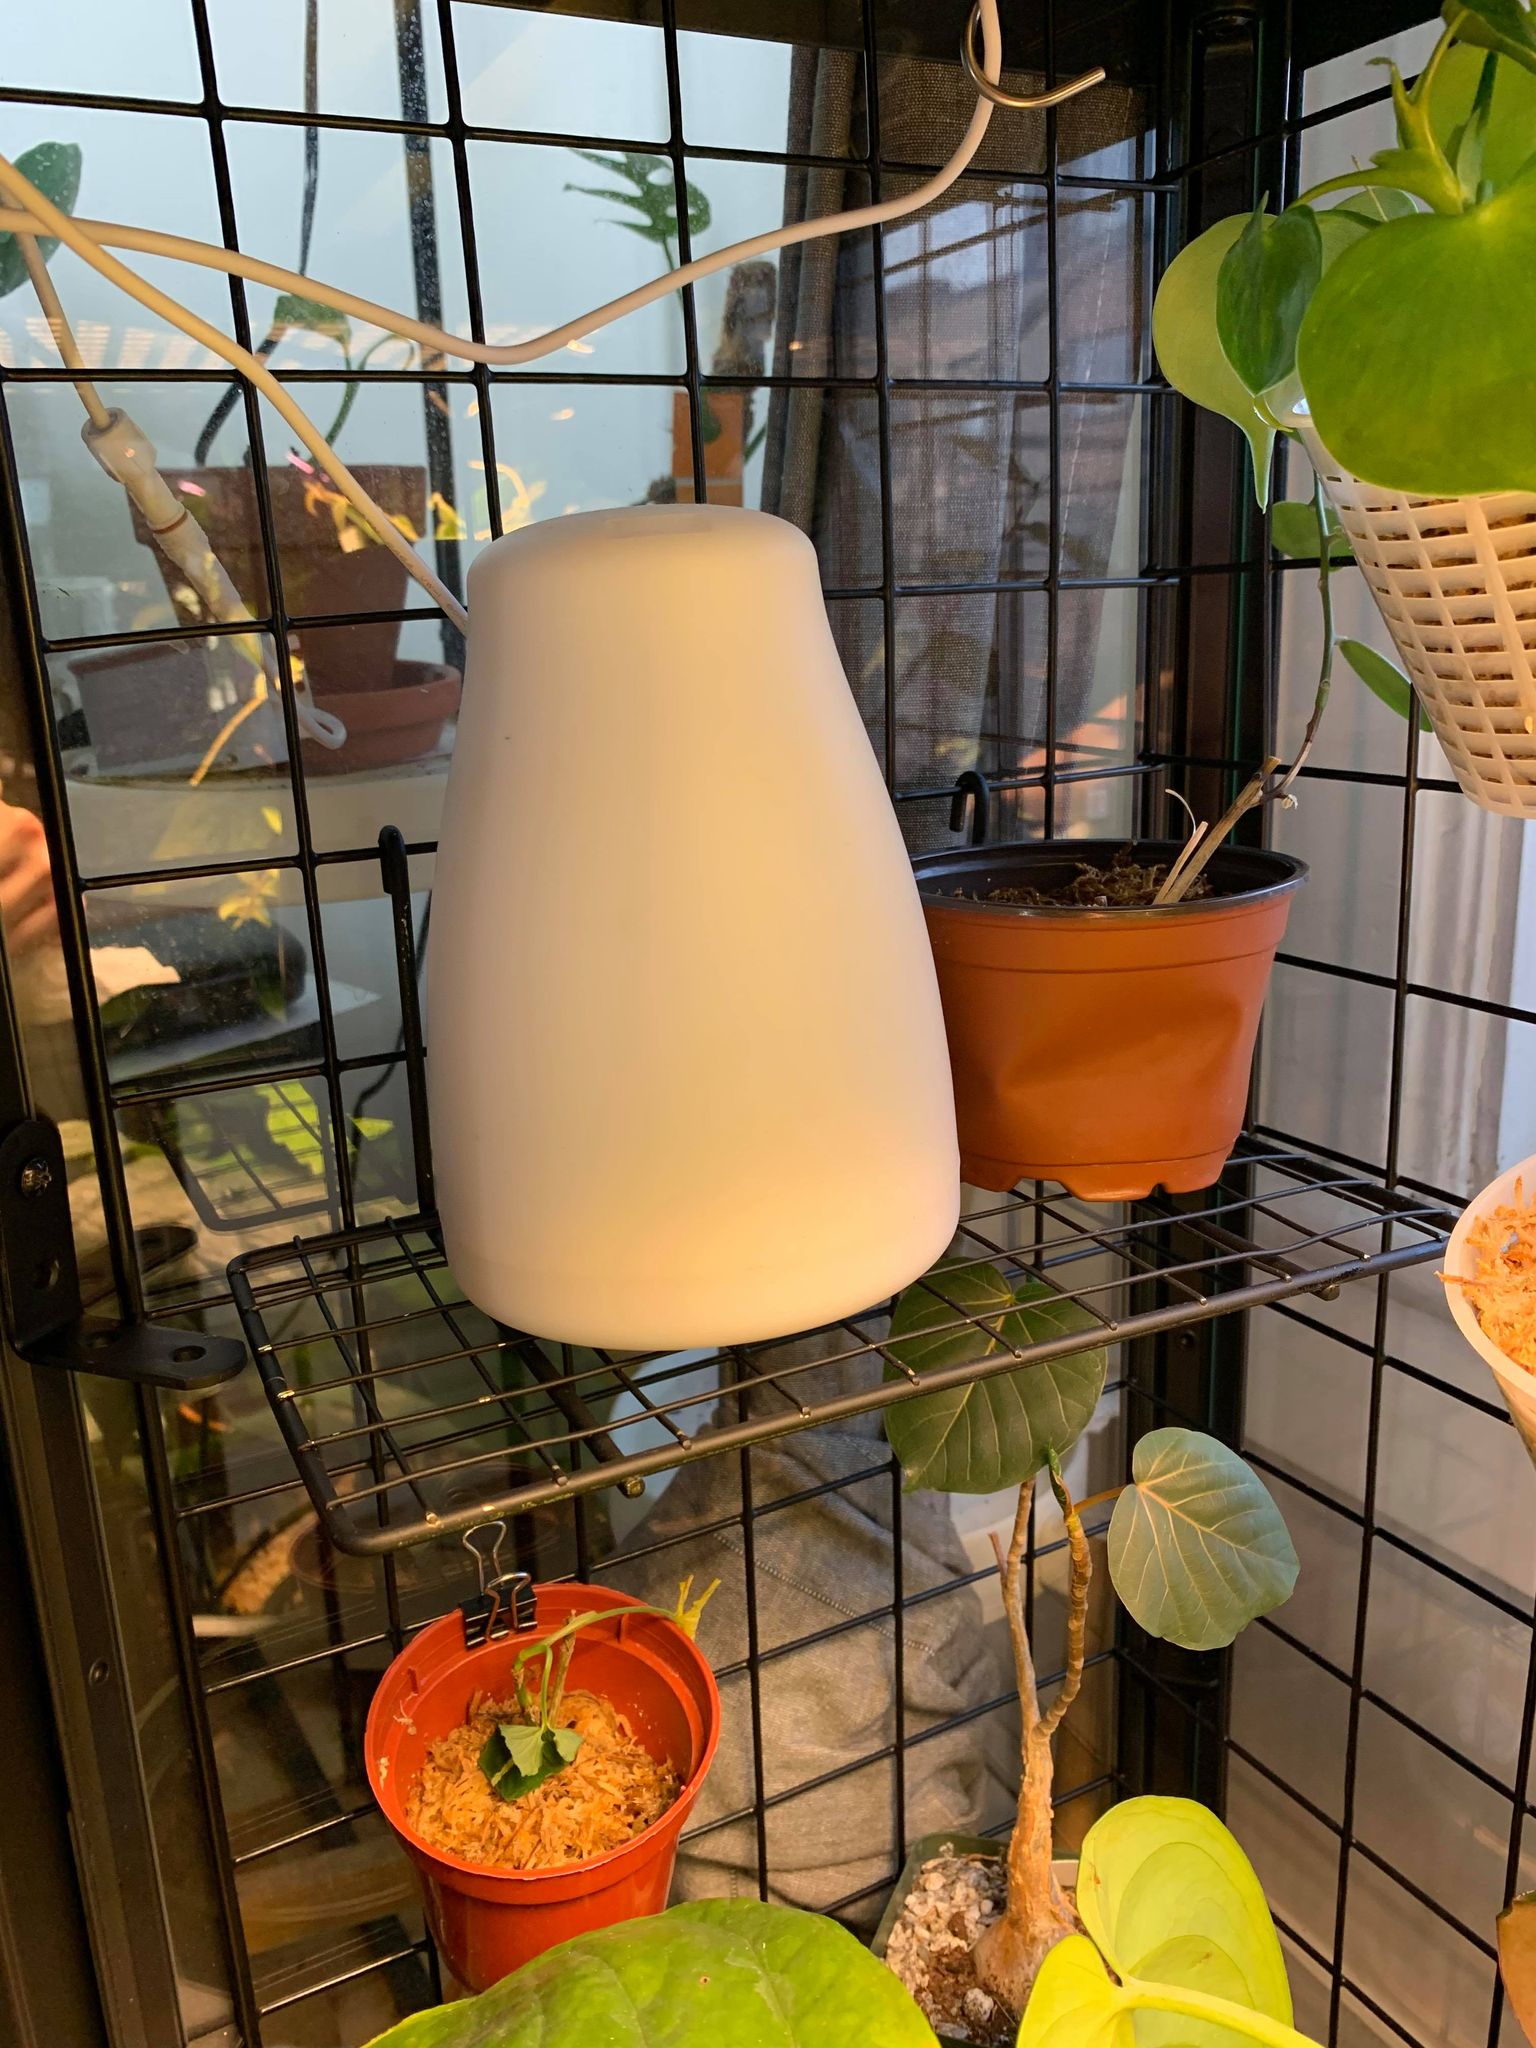
Humidity and Hygrometers:
In this cabinet, unlike my others, I do use a small humidifier. I already had this humidifier lying around, but I do like that it's compact so it doesn't take up too much space. I have it resting on a mini shelf on the side panel opposite to the fan.
Humidity:
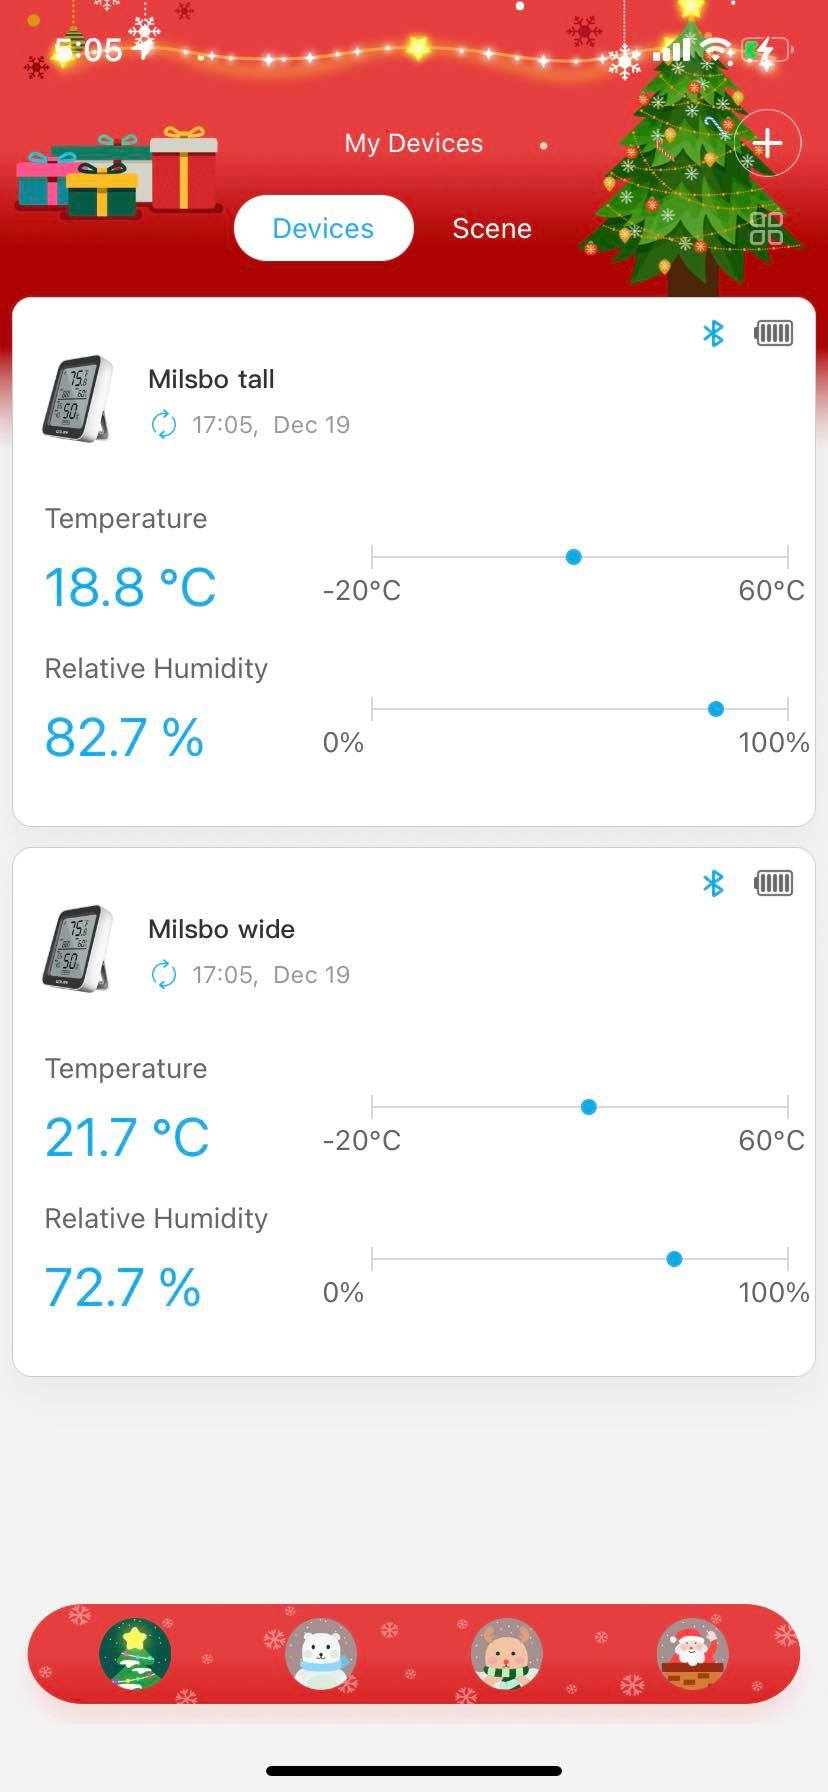
I monitor the humidity using the Govee hygrometer which has an app that connects to my phone. Bluetooth connectivity was the only affordable option in Canada, it seems that Wifi hygrometers are cheap in the US.
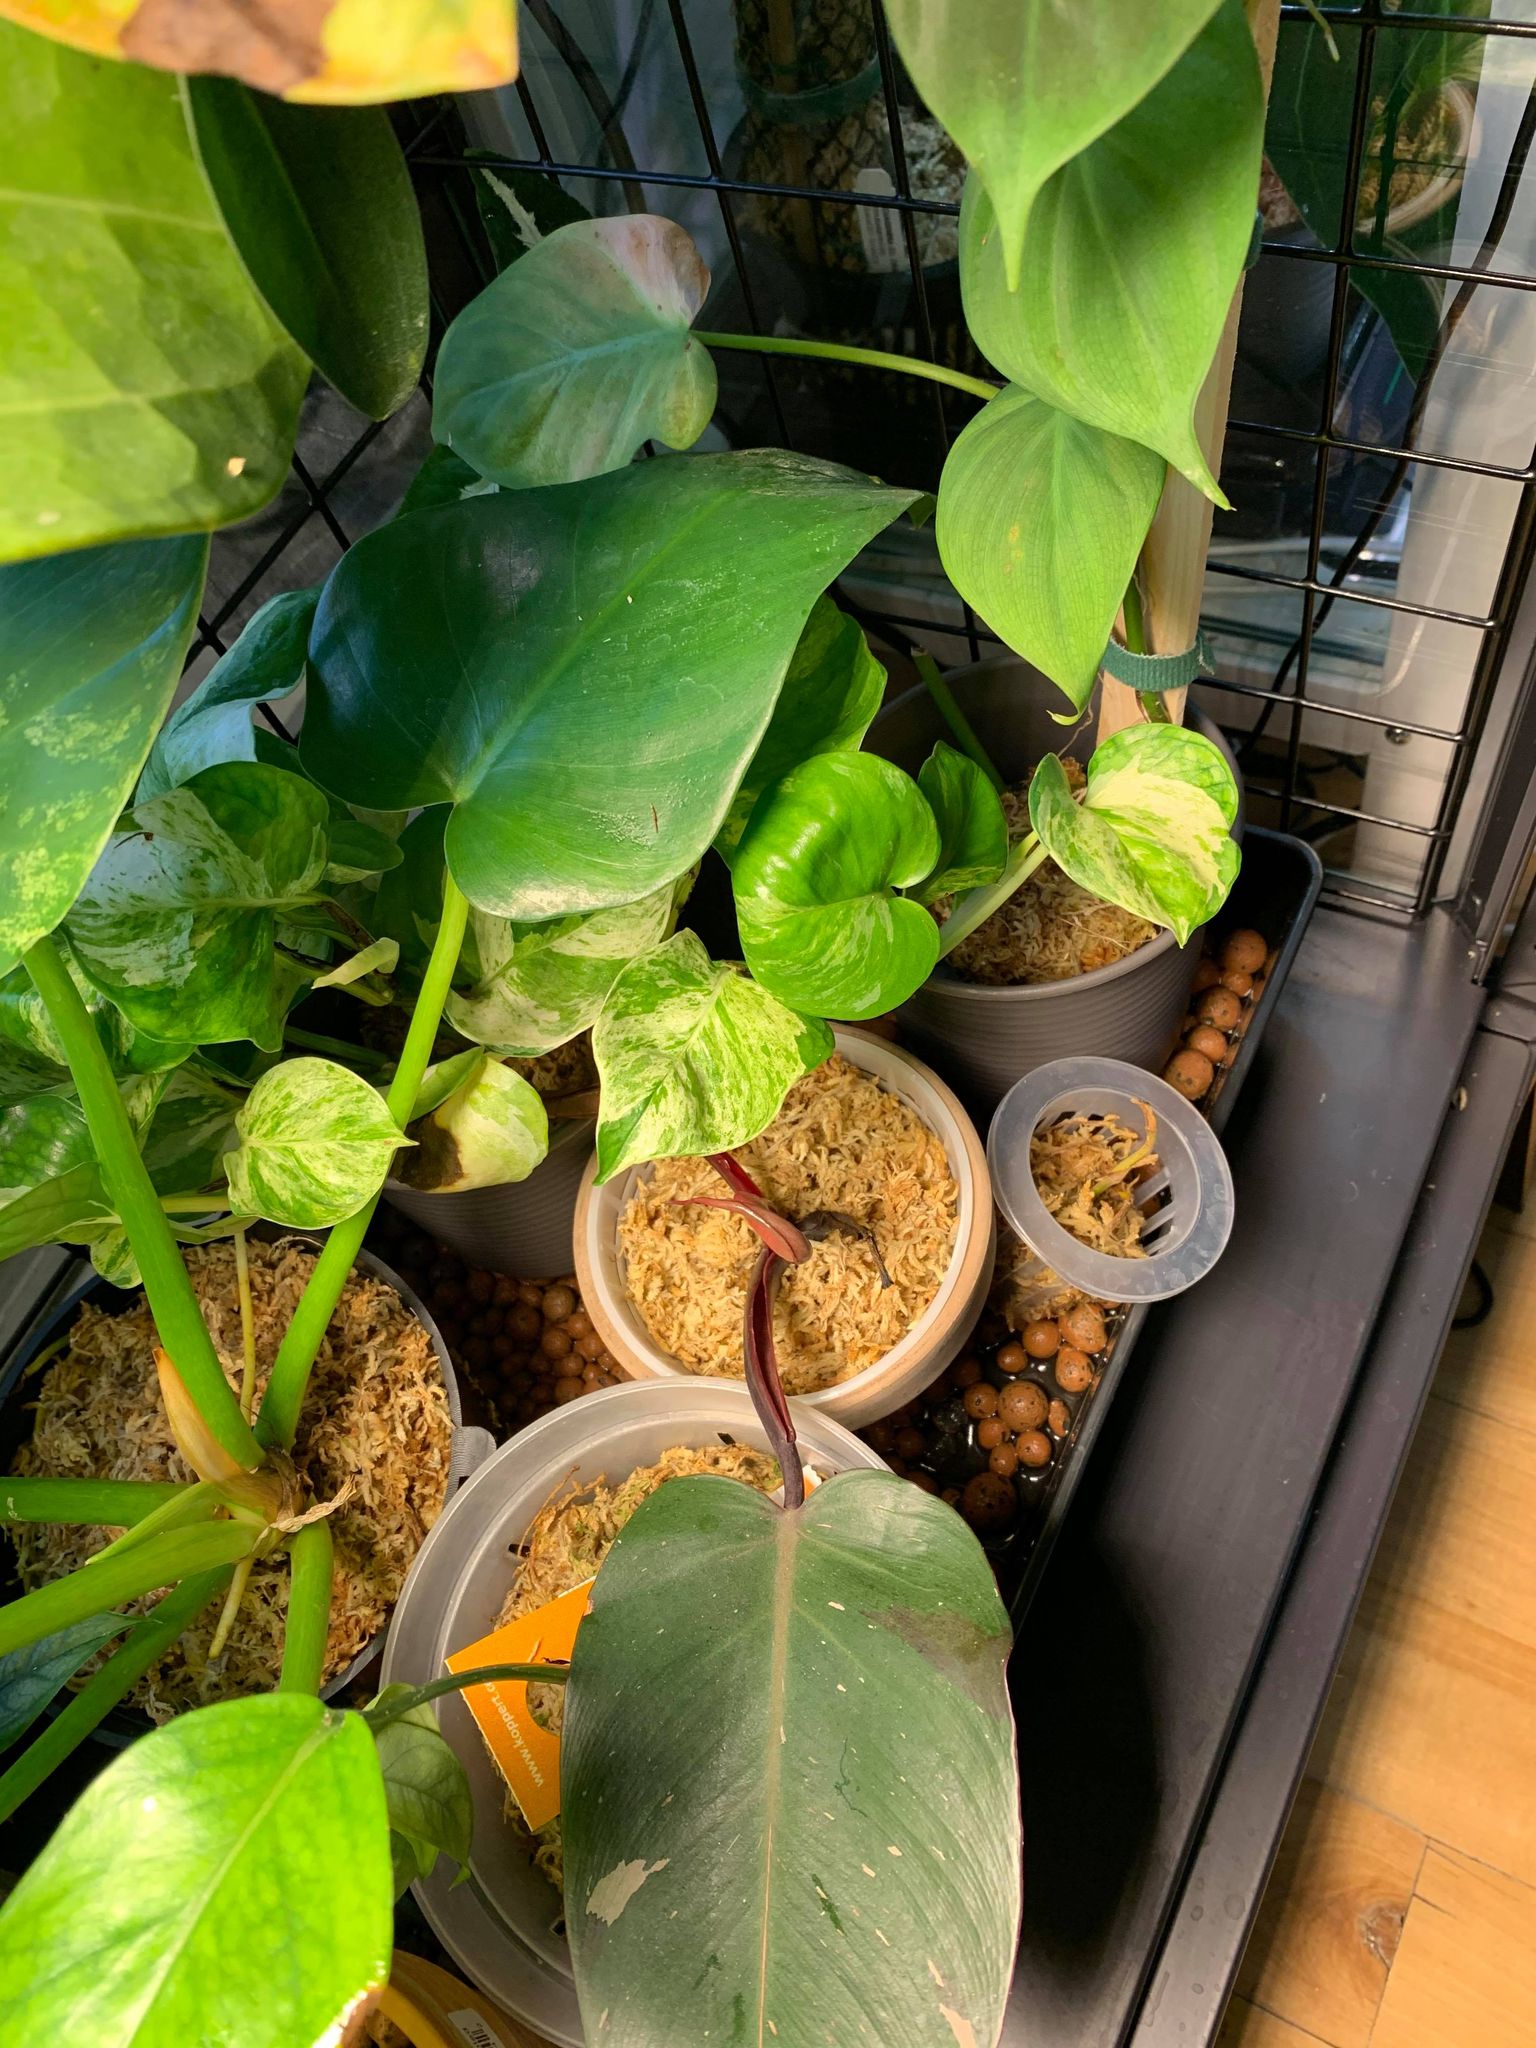
When the humidifier is on and the pebble trays have been filled, humidity ranges from 70-90%. Though, as you can see from the photo above, it does drop to ~60% after a few hours. I do not have weatherstripping at the moment. The Milsbo tall does not have a humidifier, just many many more plants.
Weatherstripping?
I know many people like to weatherstrip their cabinets as it keeps the humidity consistent, but I like having a bit of airflow and I am lazy.
I personally have not done this on any of my cabinets, but here are some supplies I have seen people use:
- Door weatherstripping: This is used to cover the gaps between the doors.


- Weatherstripping foam: This is used to seal the gaps between the glass and the metal frame. It could also be used to bolster the seal around the door.


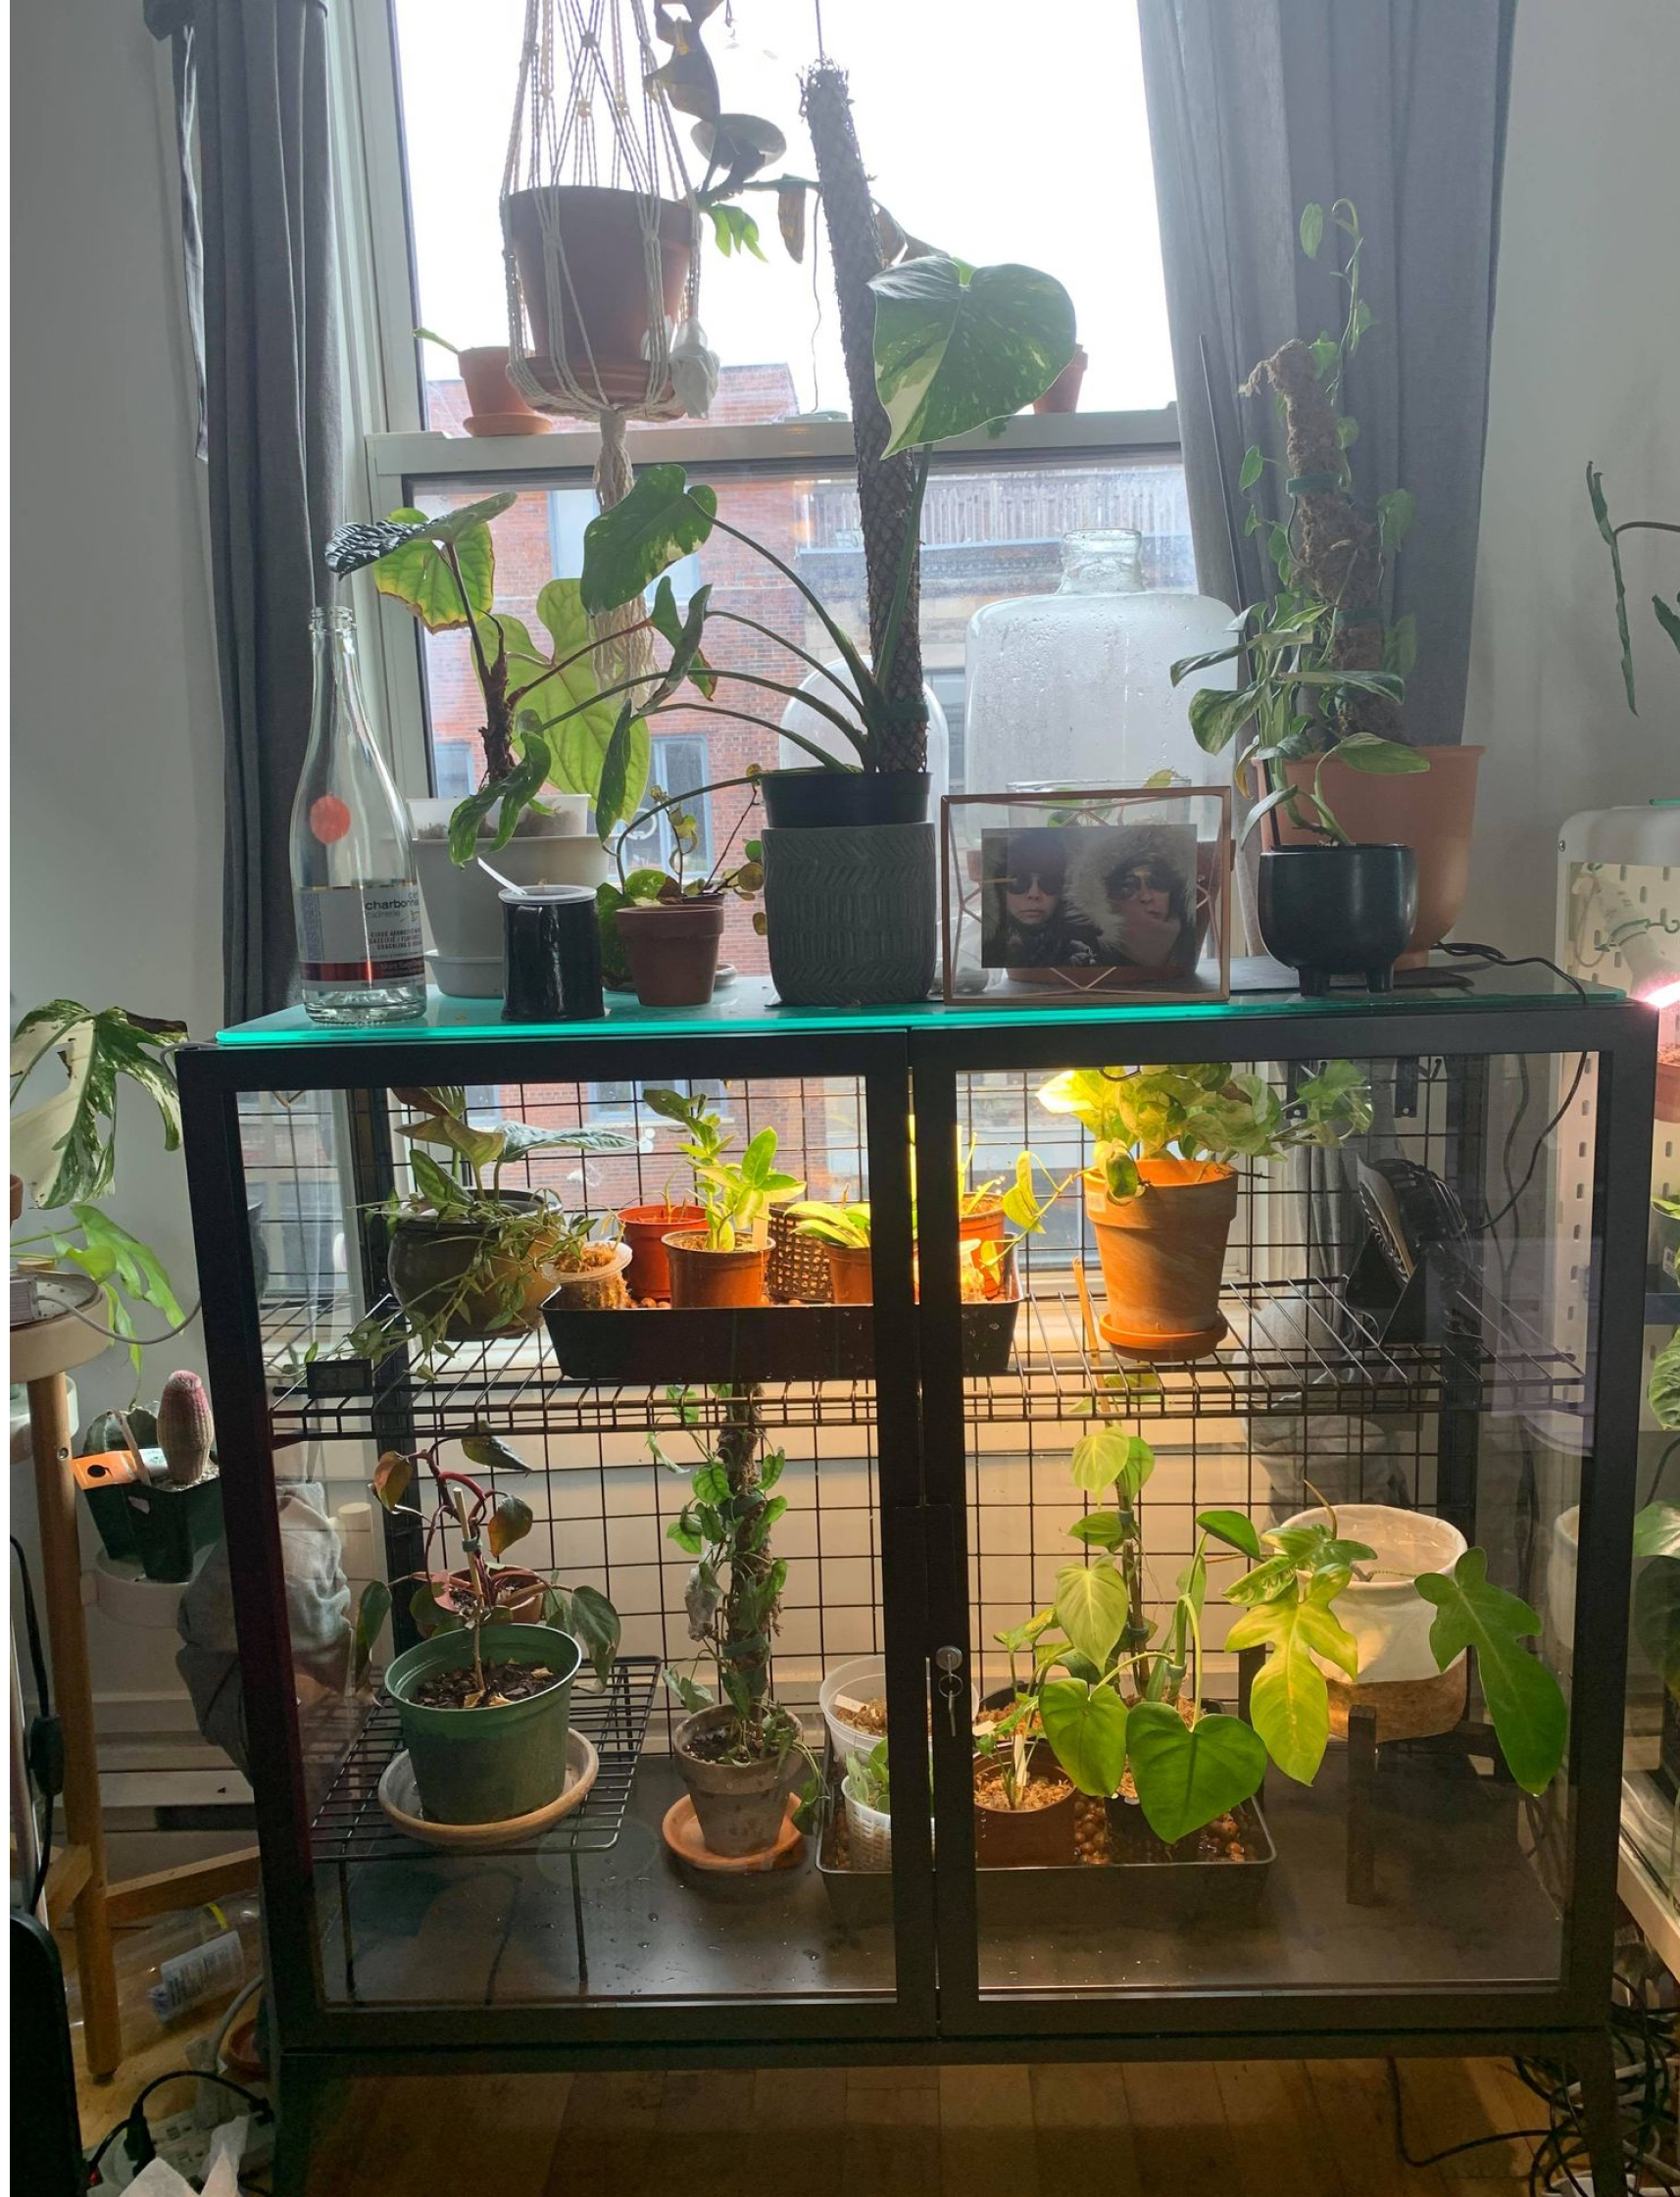
Finished product
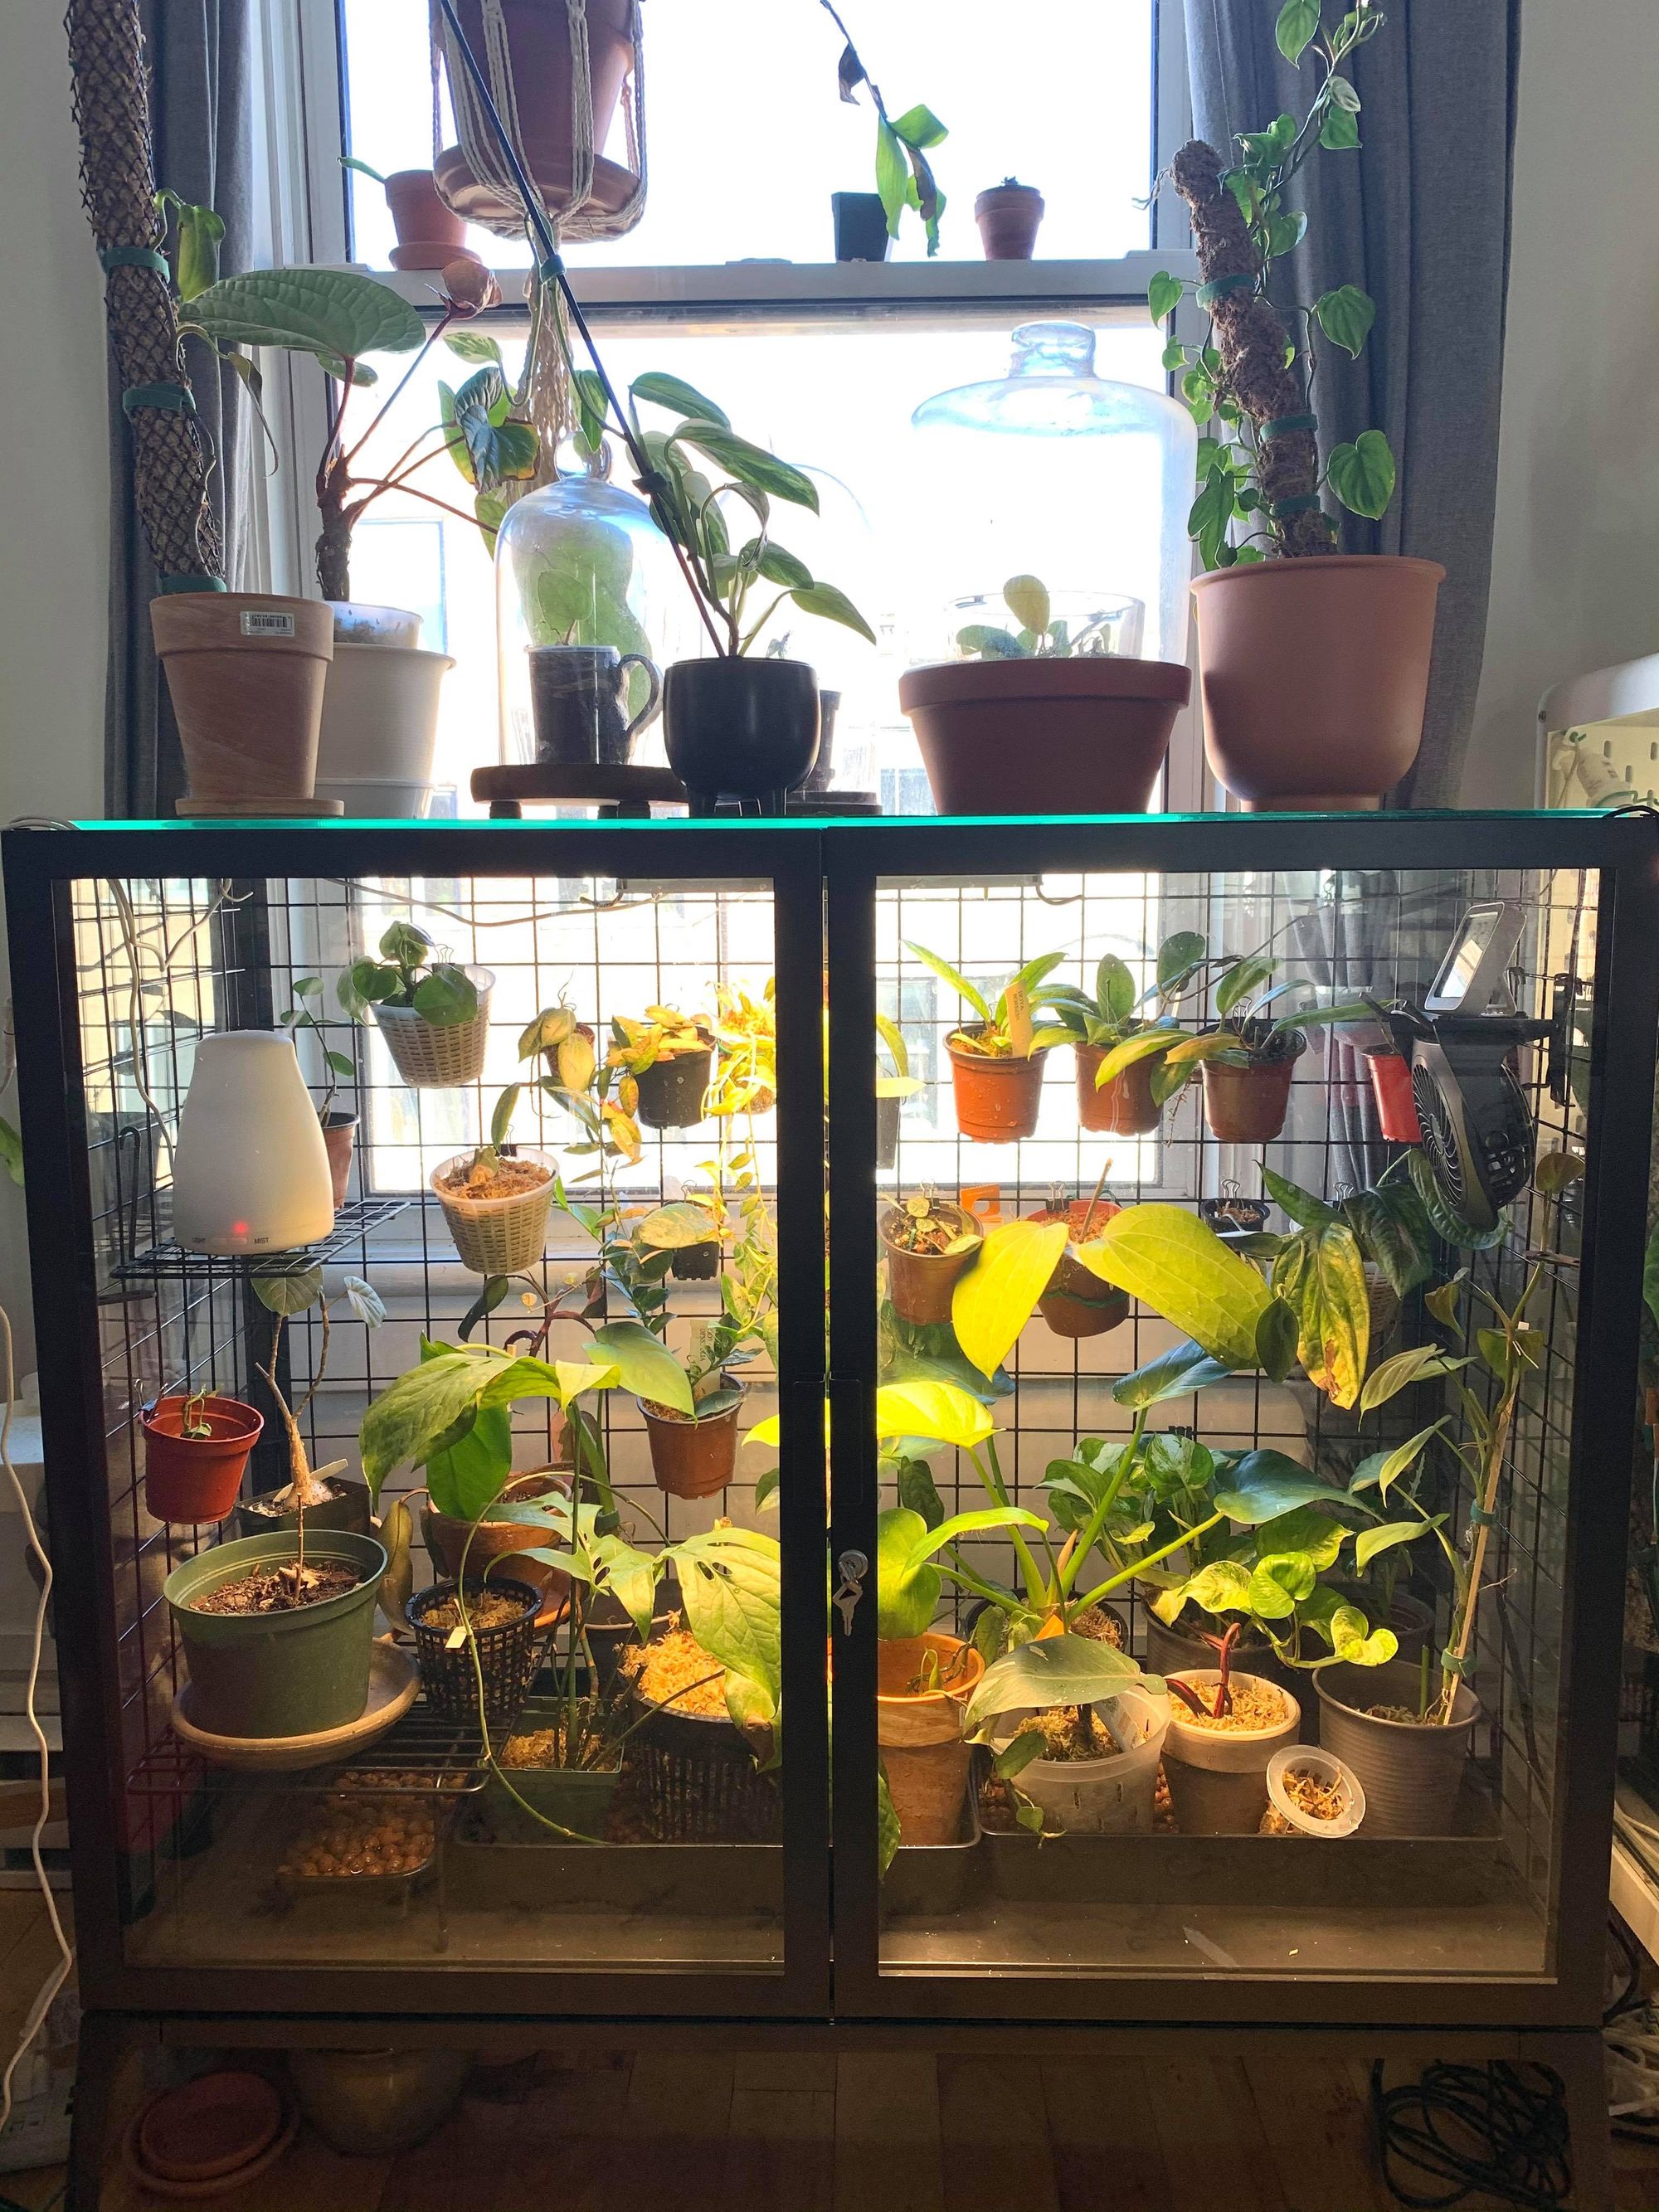
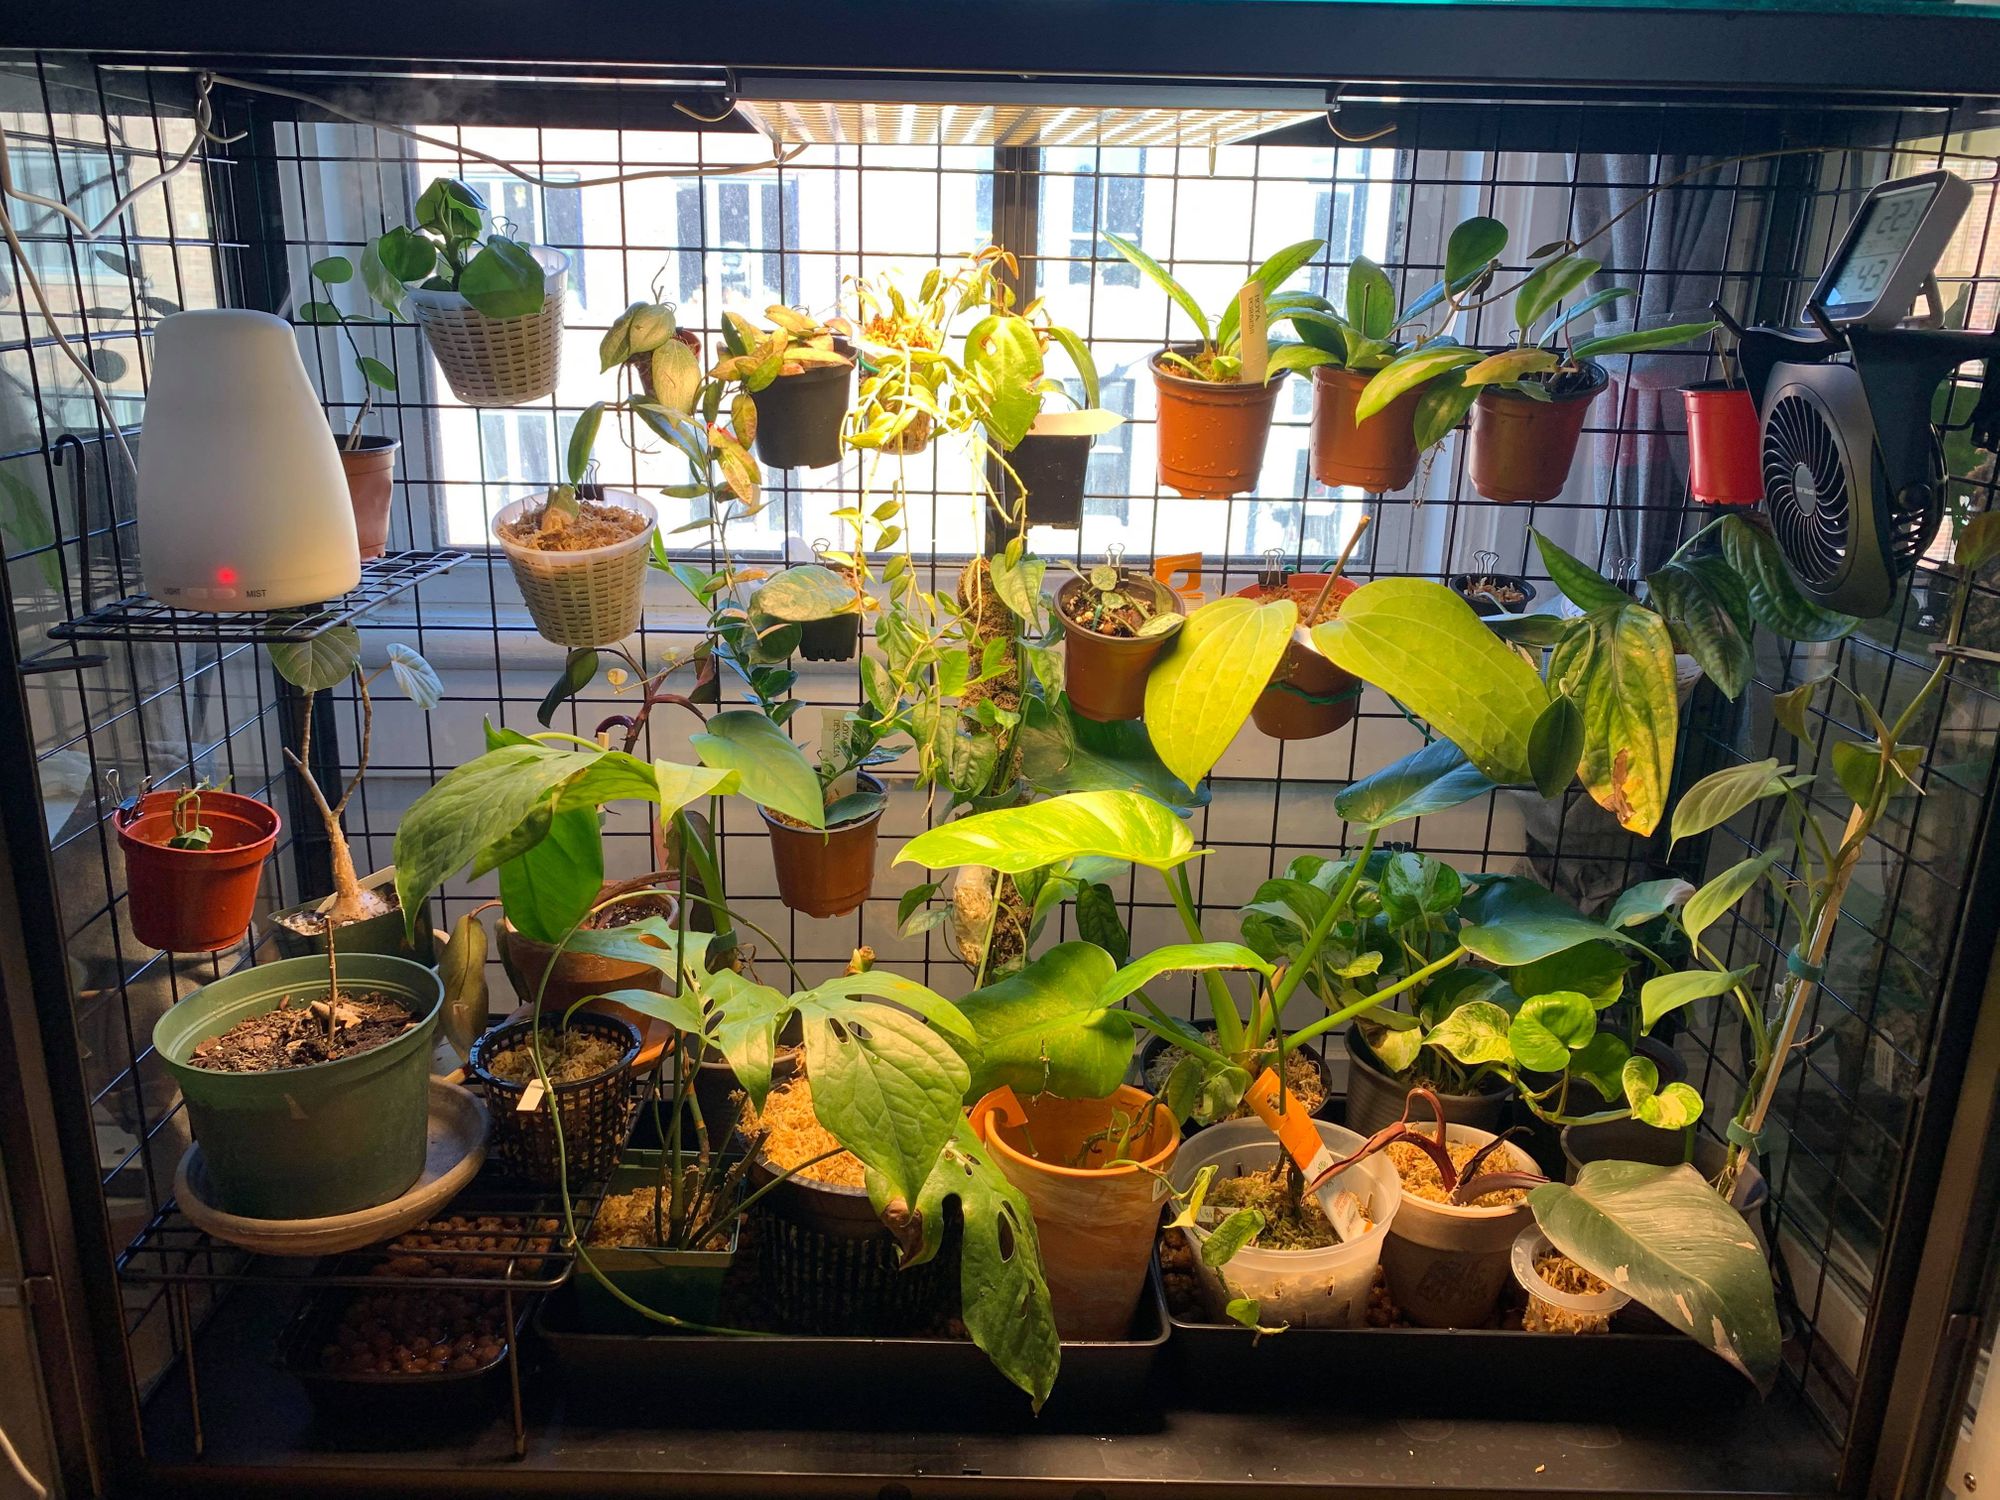
Last but not least, some close-ups of happy plants living inside:
Thanks for reading!