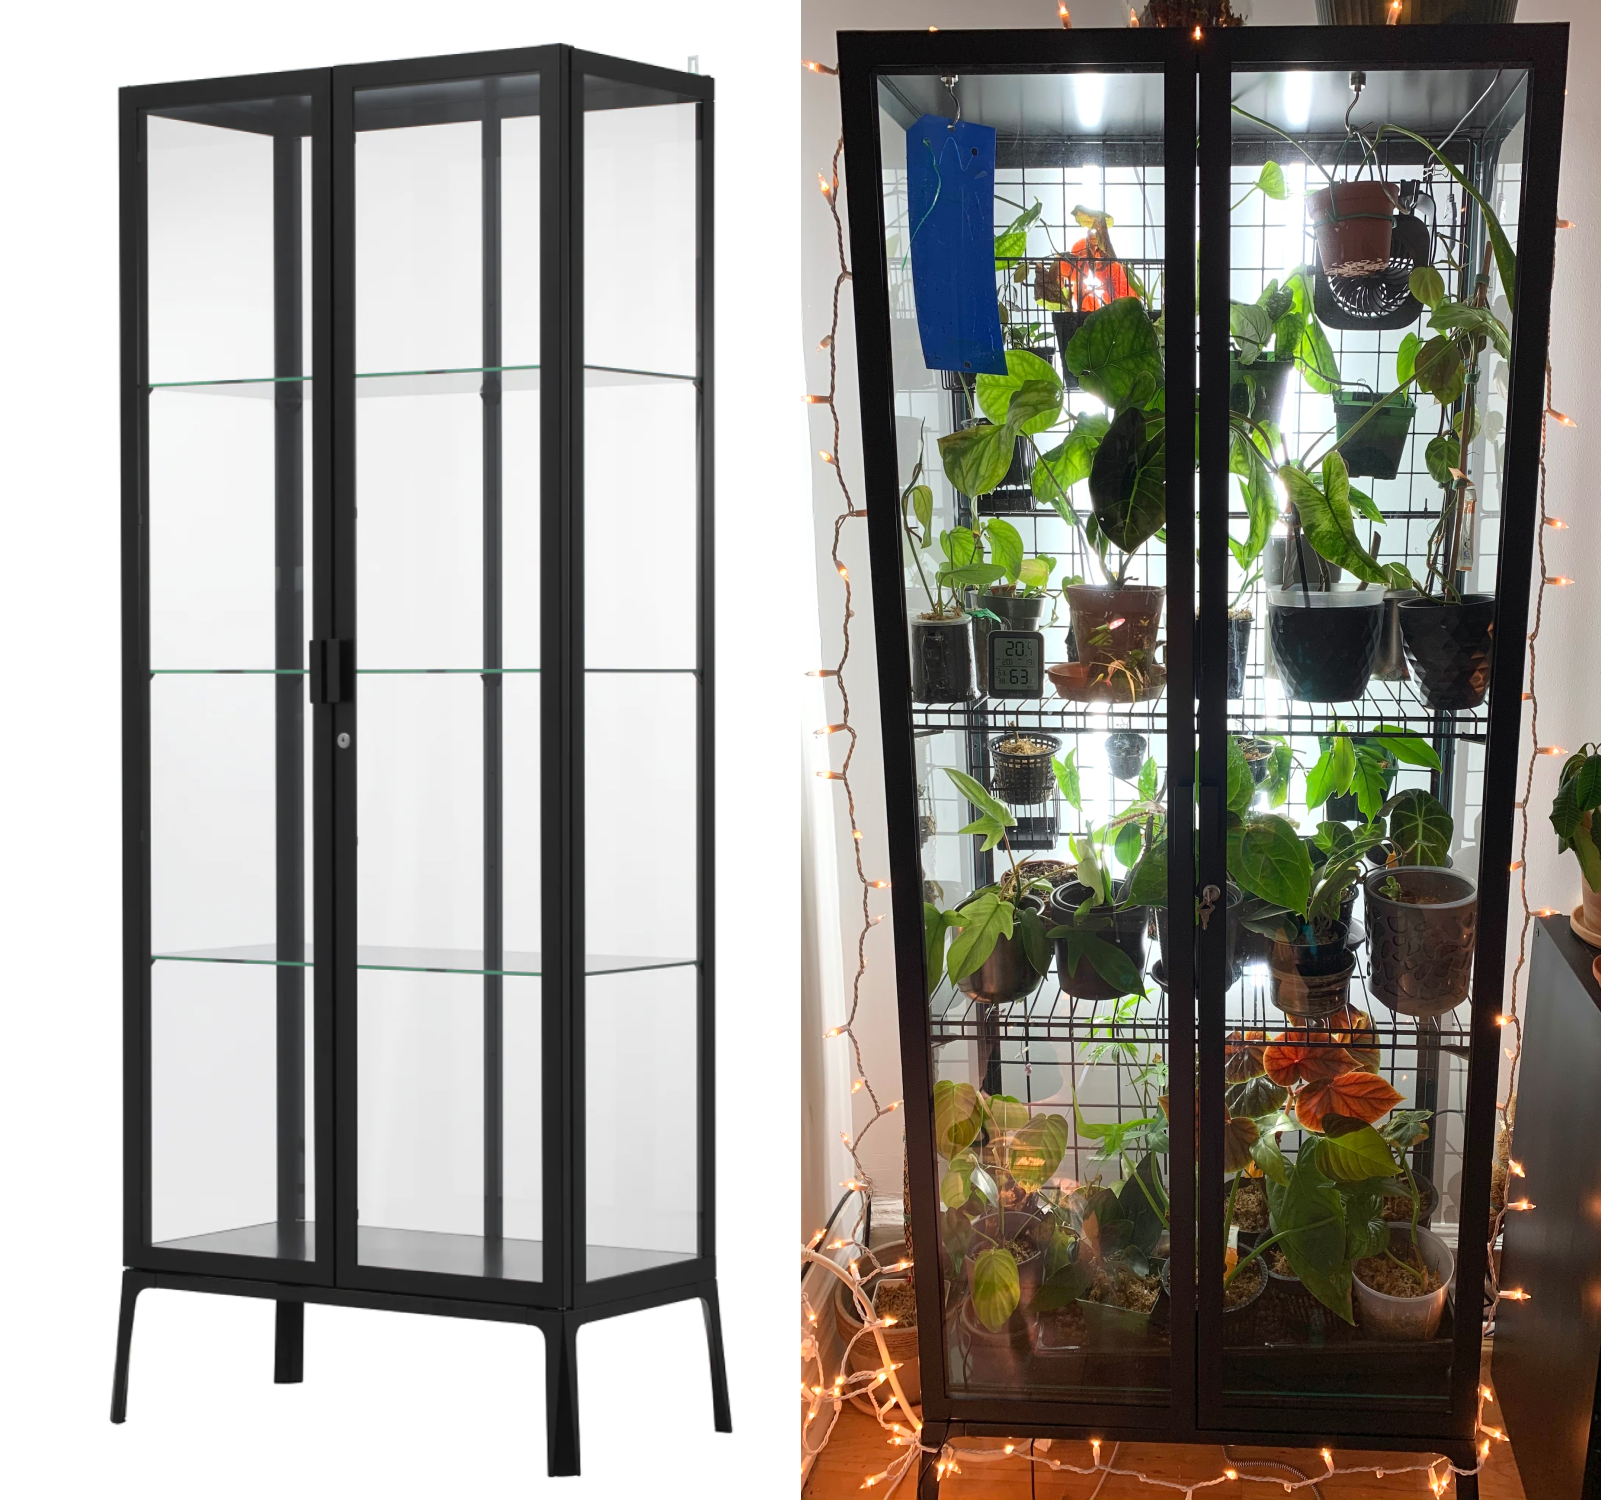
Converting the Ikea Milsbo (tall) cabinet into greenhouse
And another post in our series on converting Ikea cabinets into greenhouses. Today I will be covering probably the most popular Ikea cabinet, the Milsbo.

And another post in my series on converting Ikea cabinets into greenhouses. Today I will be covering probably the most popular Ikea cabinet, the Milsbo.

Looking for the other cabinets? Check out my other conversions for the Fabrikor (wide) and Fabrikor (tall).
List of all the items I used to convert the Milsbo into a greenhouse:
- Ikea Milsbo cabinet
- 26" inch wire shelf kit (comes with 2 shelves)
- 2 inch L-brackets (to install wire shelves)
- 4ft LED growlights
- Gorilla double sided tape (to attach growlights)
- Black spray paint
- 26" x 17.5" Wire grid panel
- Wire grid basket
- Wire grid shelf
- 2 x USB fan
- USB extension cord
- USB power bar
- Grid wall hook to hold fan
- Smart plug
- Govee hygrometer

Wire shelves:
Changing the glass shelves to wire shelves was the biggest change I made to my Milsbo. This was done to improve airflow and more even distribution of humidity throughout the cabinet. Many people leave the glass shelves in for aesthetics, but have had to add fans on each shelf to ensure proper air circulation.
With the Milsbo cabinet, adding wire shelves is much easier than the Fabrikor series. You can still use the same holes and screws for the glass shelves that came with the original cabinet.
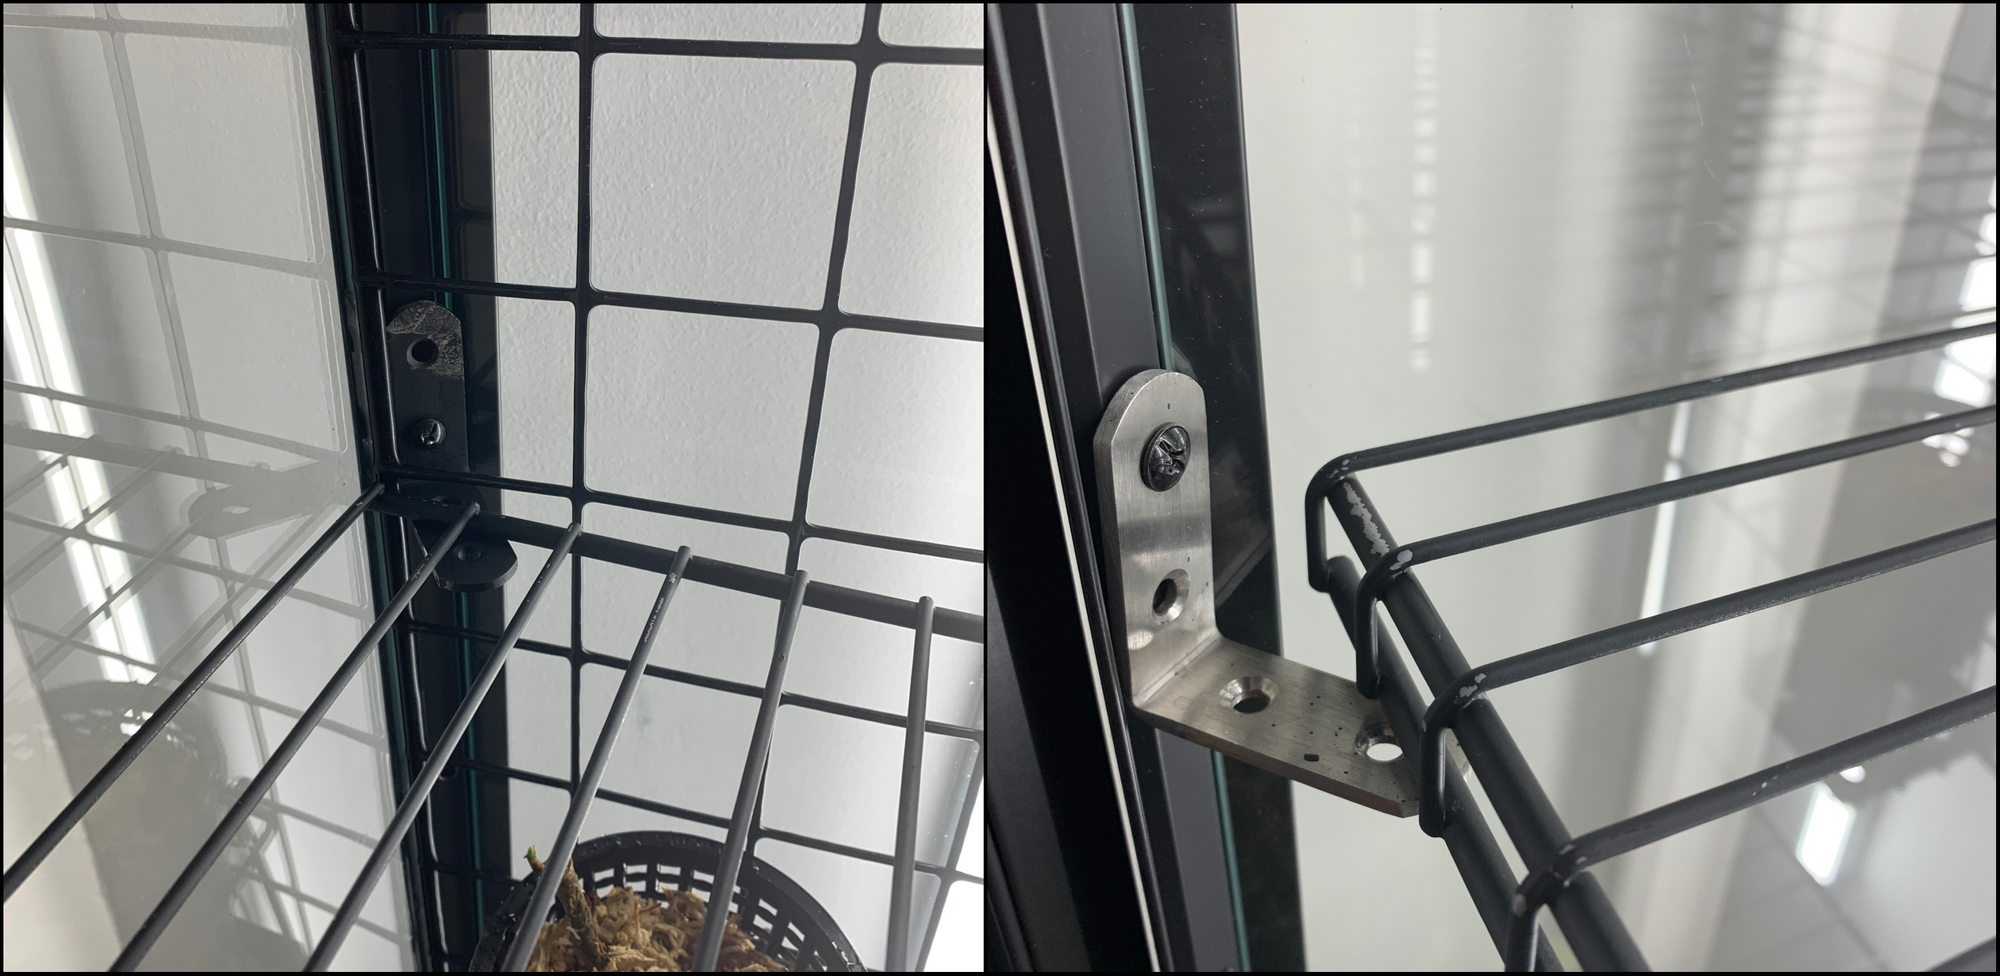
To install wire shelves in the Milsbo, you need two pieces: L-brackets (to hold the shelves up) and the wire shelves themselves.
Measurements of the wire shelves and L-brackets:
- Wire shelf: 26" wide by 12" depth
- L-brackets: 2"
For the wire shelves, I used the Rubbermaid wire shelf kit. It comes with two shelves of the perfect dimensions required for the Milsbo - no cutting required. If you have the Black Milsbo, it's been impossible for me to find black wire shelves, so I spray painted mine with Tremclad Rustoleum (black matte). If spray painting, you need to do this outside or in an extremely well ventilated location. Let them dry outside for at least 24 hours so the toxic fumes are gone.


There are also more affordable options at big box stores such as Home Depot, Rona, or Lowes. You could purchase a 72" wide by 12" deep wire shelf and have it cut to size (26").
To install the shelf, use the existing screws and holes of the Milsbo. You can also spray paint the L-brackets to make it look seamless.


For the back of the shelf, install the L-bracket using the second hole. For the front of the shelf, install the L-bracket using the top hole. This allows the shelf to sit evenly with the lip facing downwards.
You can choose whichever height you wish to put the shelves. I preferred having more space on the top shelf and the bottom and opted for a smaller gap between the two shelves in the middle.
Wire grid panel:
I opted for a wire grid panel over the Skadis pegboard from Ikea because it allows light to pass from the back. Additionally, it's easier to find accessories and I use binder clips to attach plants to it.
I purchased a 2-pack of wire grid panels sized 26" x 17.5", the perfect width of the Milsbo.


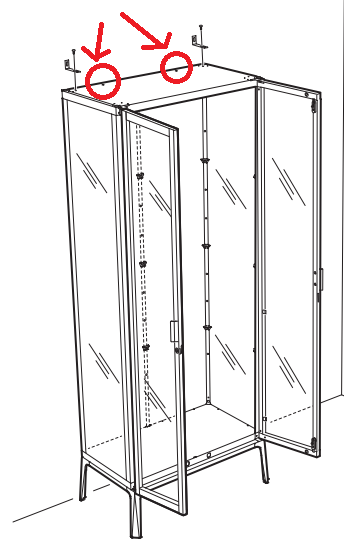
To install the wire grid panels, I used the two holes at the top of the cabinet, two of the rubber shelf supports that came with the original cabinet, and two zip ties.
Steps to install wire grid panel:
- (1) Place the rubber shelf support on the hole on top of the Milsbo.
- (2) Thread a zip tie through the hole into the cabinet and through the wire grid panel and back through the hole out the top.
- (3) Now close the zip tie.
- (4) Once both sides of the wire grid panel are threaded through with the zip ties, you can tighten both.

To install the second wire grid panel, simply attach it to the bottom of the first one using zip ties.
Grow lights:
Different from other conversions, I prefer to have my lights on the outside of the cabinet as opposed to the inside for two reasons. First, it can be unsafe to have lights in a high humidity space. And second, I didn't want to drill any holes in my cabinet for cable management.
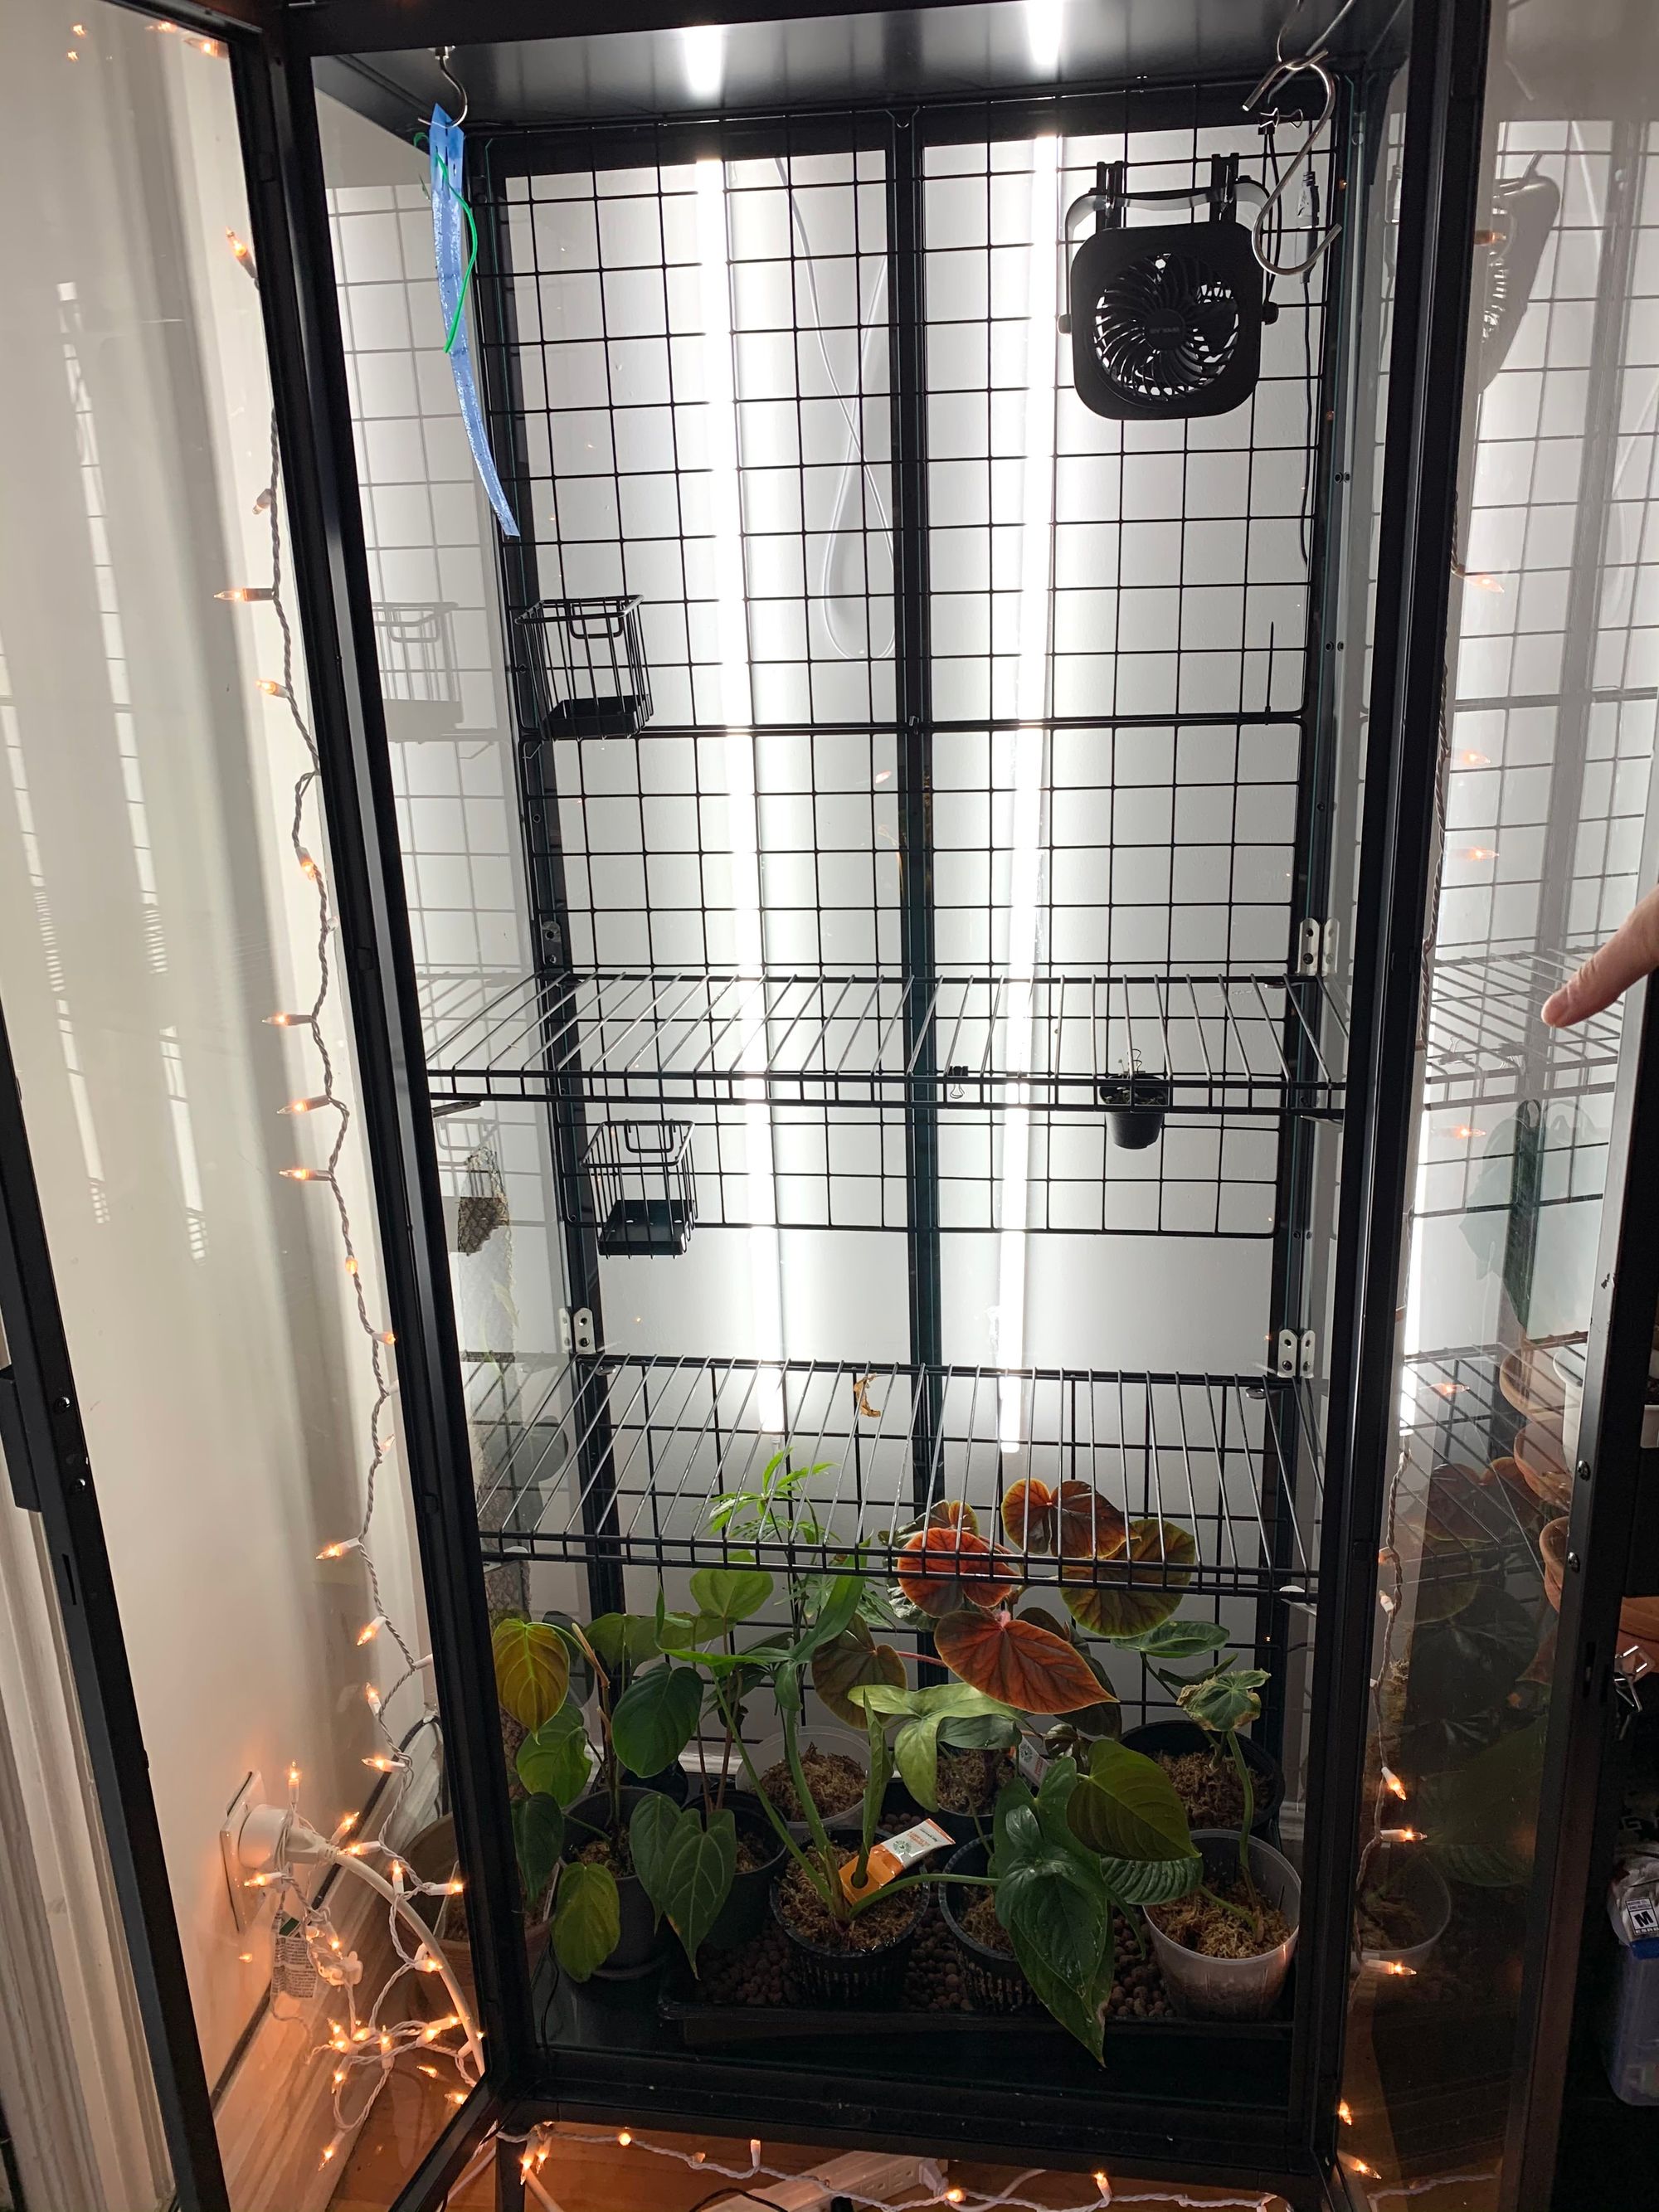
I mounted two 4ft LED Barrina growlights on the wall behind my Milsbo using Gorilla double sided tape. Do not use cheap Dollar Store double sided tape! I used the pieces that came with the lights and connected them using a connector, thus they're controlled by one switch,
Do I like the Barrina growlights? Yes, they are a pretty cheap option at 8 4ft LED growlights for $89.99. The price has increased now. They are extremely bright, honestly, hurt my eyes the first few days after I installed them. But the plants love them and their growth shows it.
Do the plants grow towards the light? Yes, but I see it as akin to a plant being placed in a windowsill. They always move towards the light anyways, I rotate them to keep the growth even.
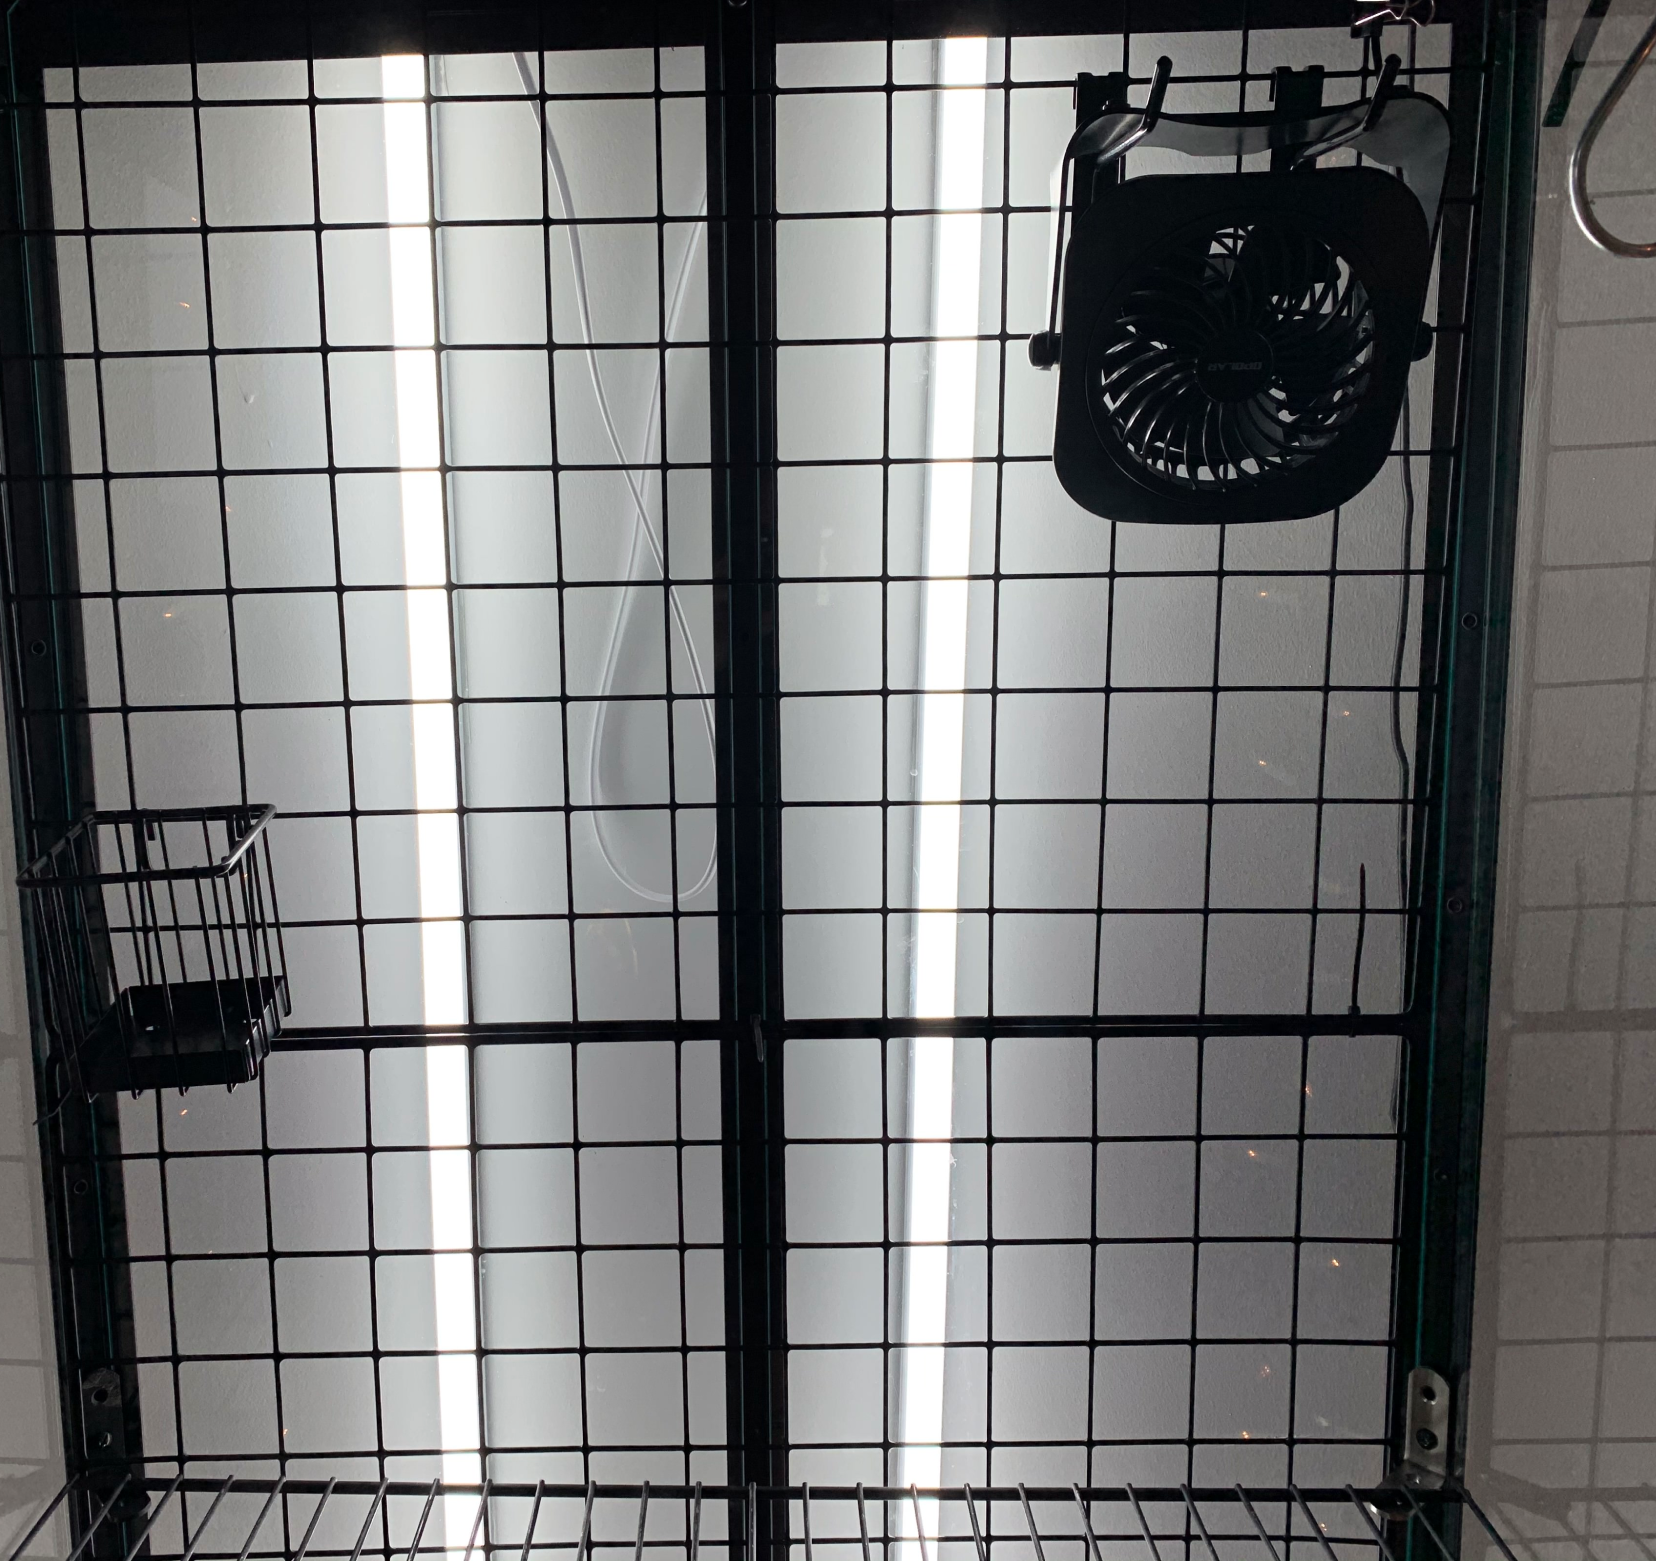
Fans:
Humidity and adequate airflow come hand-in-hand. Without proper airflow, the air inside your cabinet will become stagnant, which increases the chances of root rot.
I used two USB fans with a manual power switch so they could be controlled with my smart plug. One fan was installed on the top using wire grid hooks which hold the fan's base perfectly keeping it level. The second fan sits on the bottom shelf facing upwards.


With this fan, the power cord is only 3 ft, thus, I had to use an USB extension cord.
UPDATE (Dec 16, 2021): Fans pictured are no longer available, these are an affordable alternative that come in black and white.


Humidity and Humidifiers?
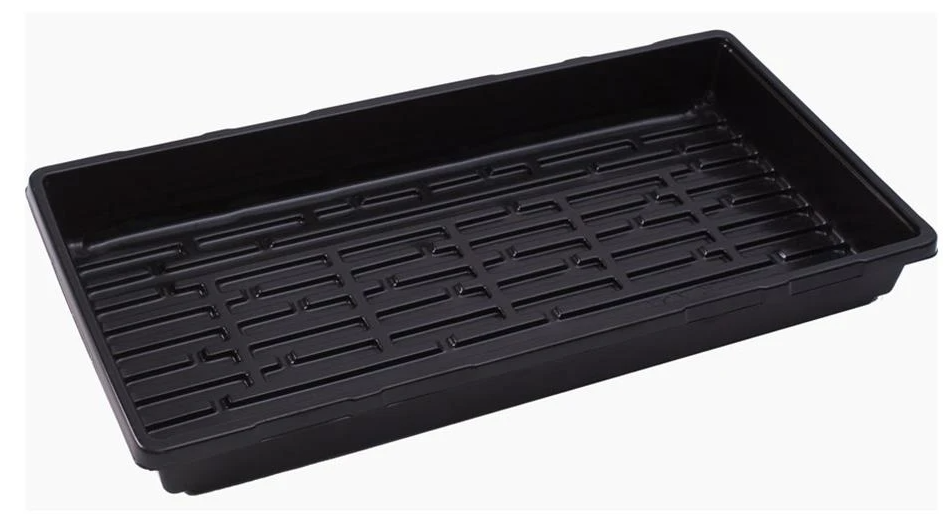
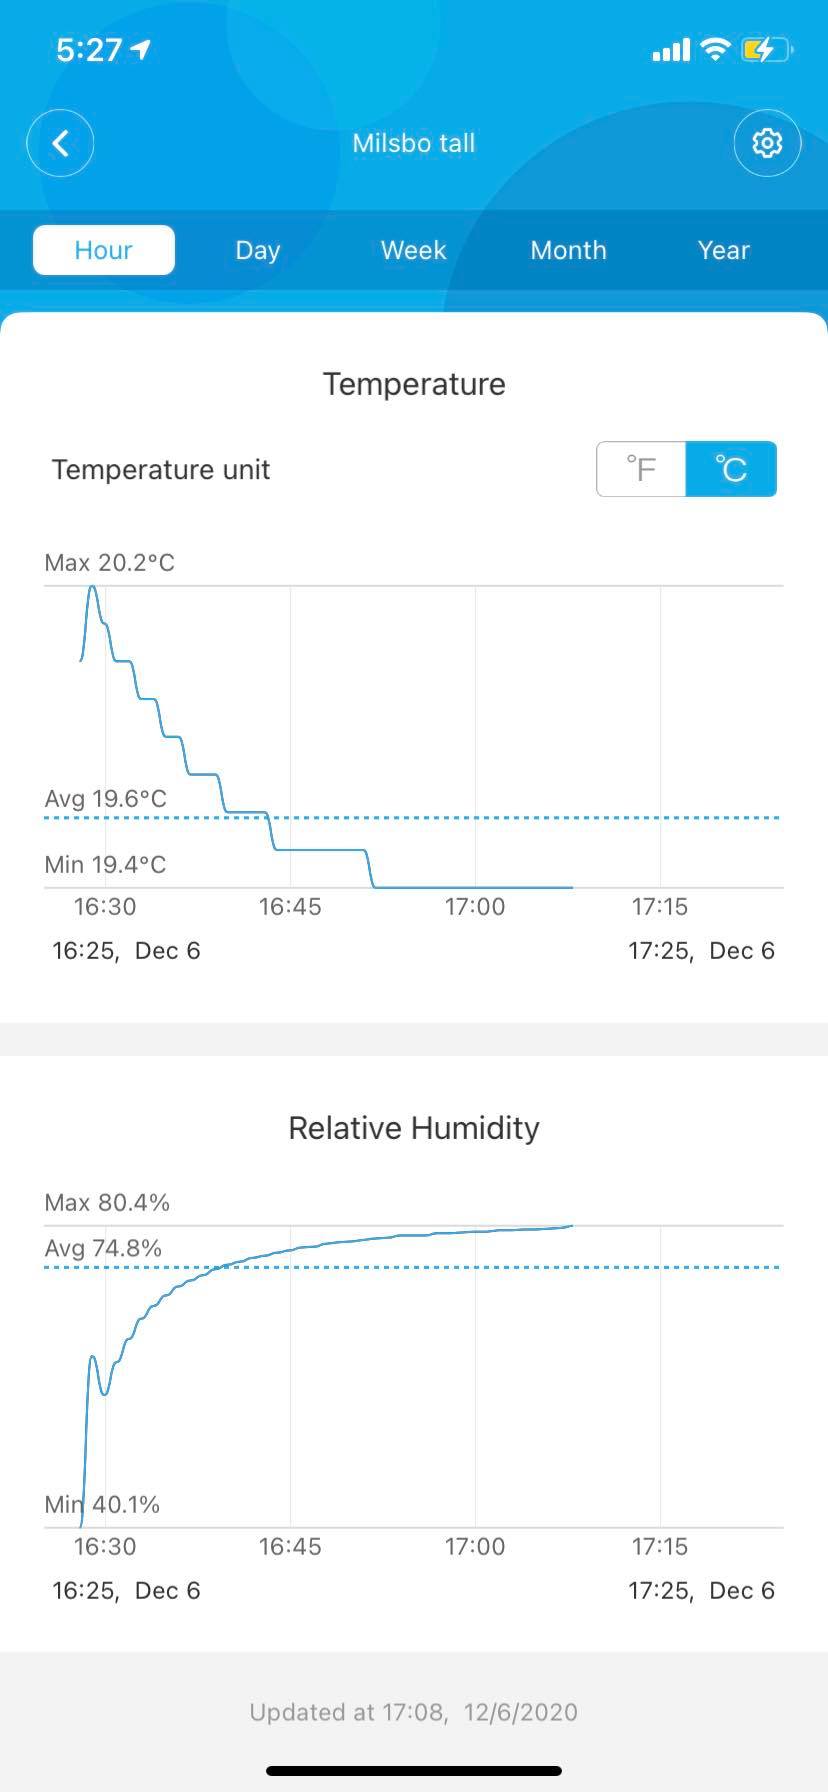
Without weatherstripping (to be discussed below) or a humidifier, my humidity is around 70-80%. I maintain this level of humidity by supplementing with a large pebble tray on the bottom shelf.
For the pebble tray, I use a large garden tray that I found at a local garden centre, Fill the garden tray with pebbles or LECA. Then place your plants on top and fill with water just so it covers the top of the LECA.
To monitor humidity levels, I use a smart hygrometer that has a great app.
Weatherstripping?
I know many people like to weatherstrip their cabinets as it keeps the humidity consistent, but I like having a bit of airflow and I am lazy.
I personally have not done this on any of my cabinets, but here are some supplies I have seen people use:
- Door weatherstripping: This is used to cover the gaps between the doors.


- Weatherstripping foam: This is used to seal the gaps between the glass and the metal frame. It could also be used to bolster the seal around the door.


Finished product
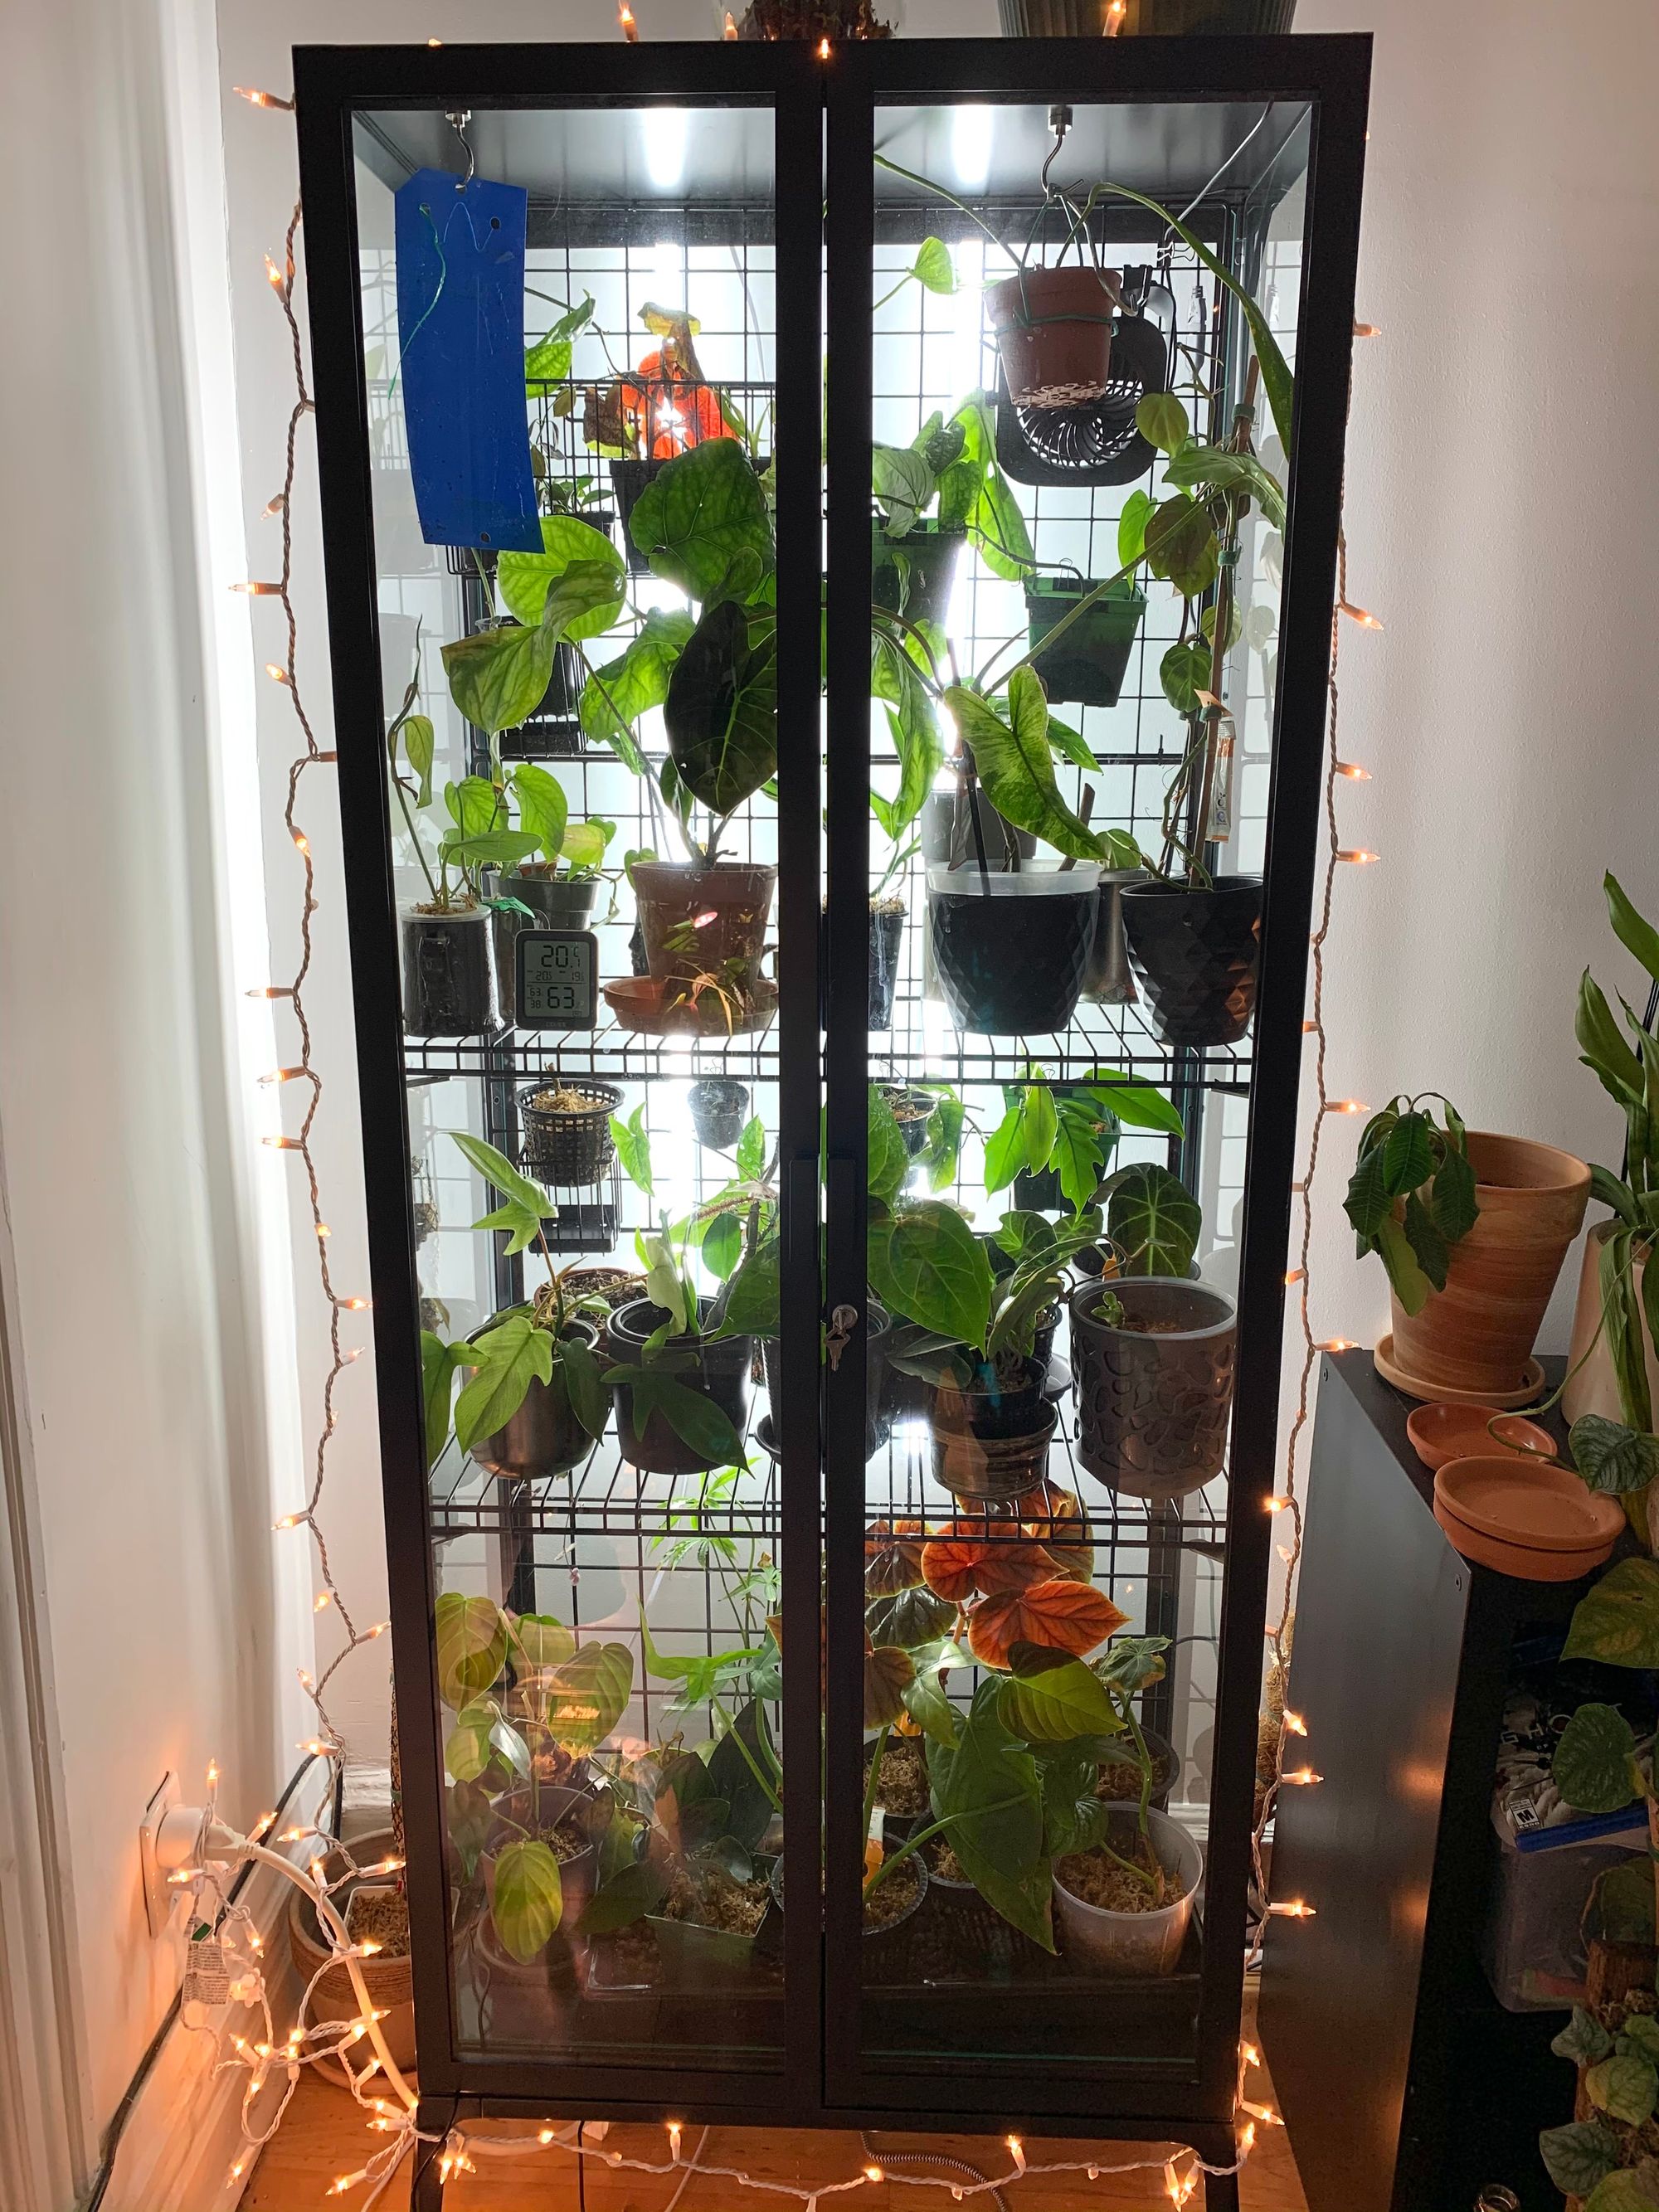
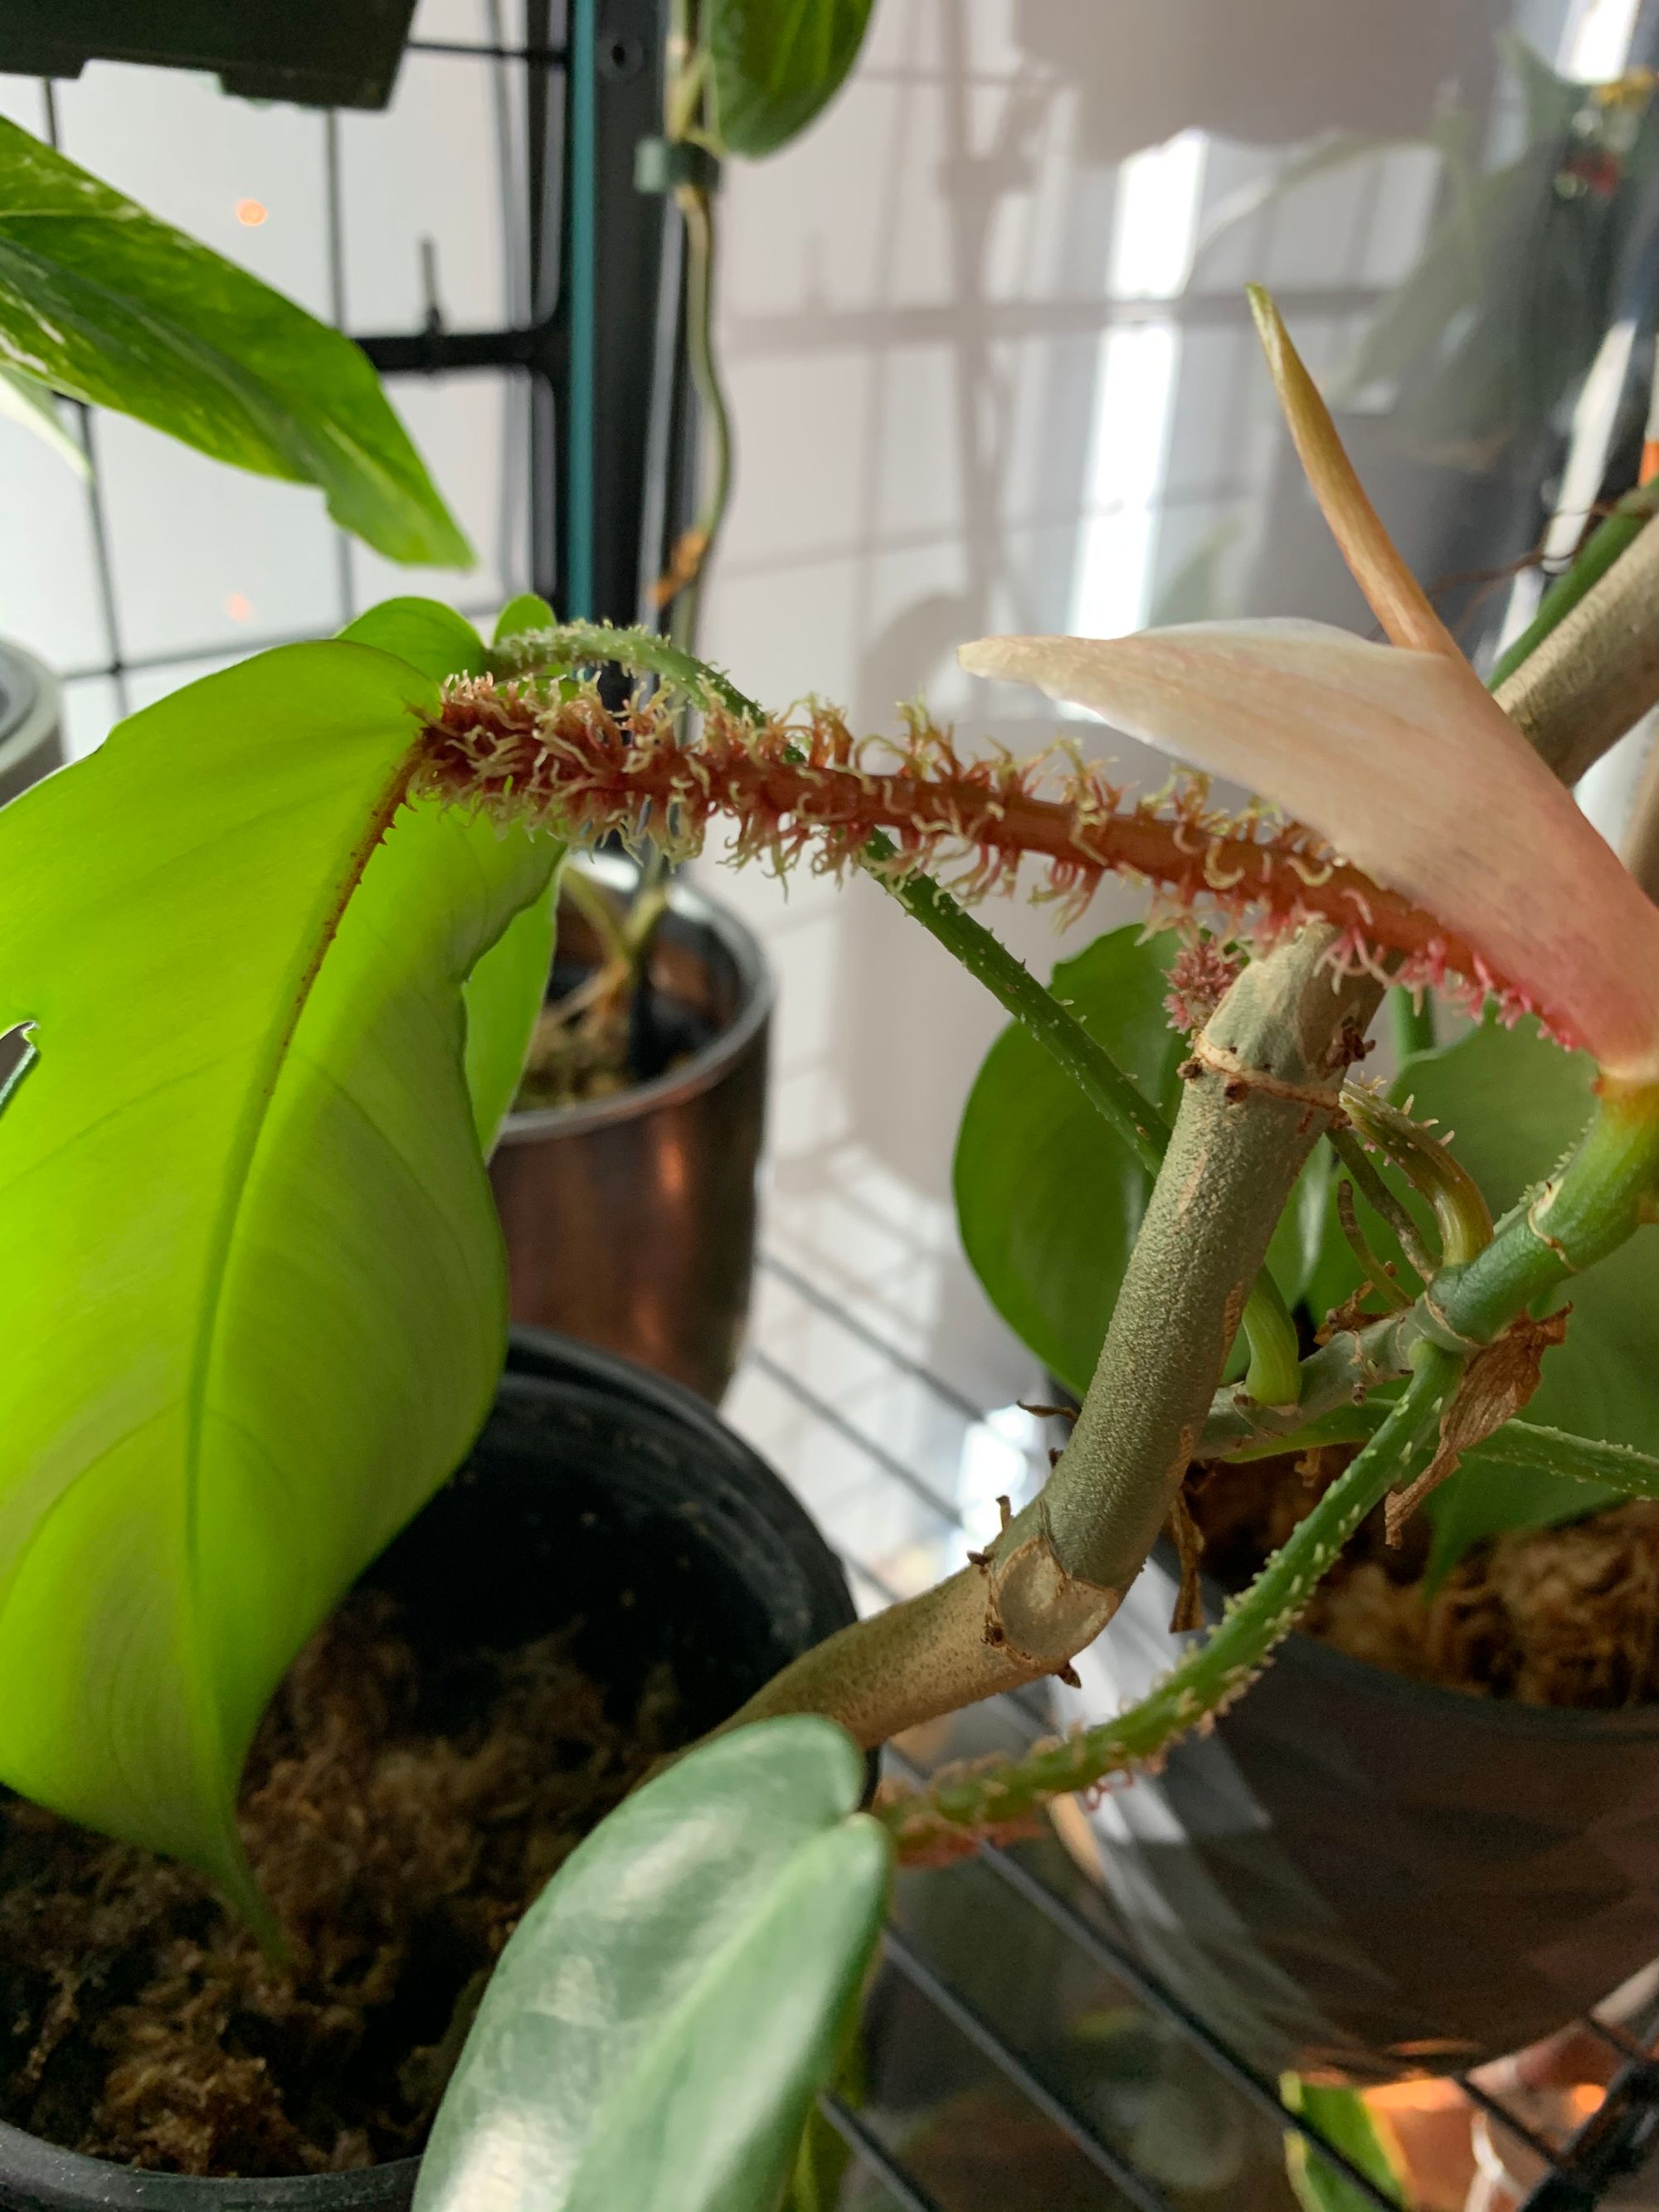
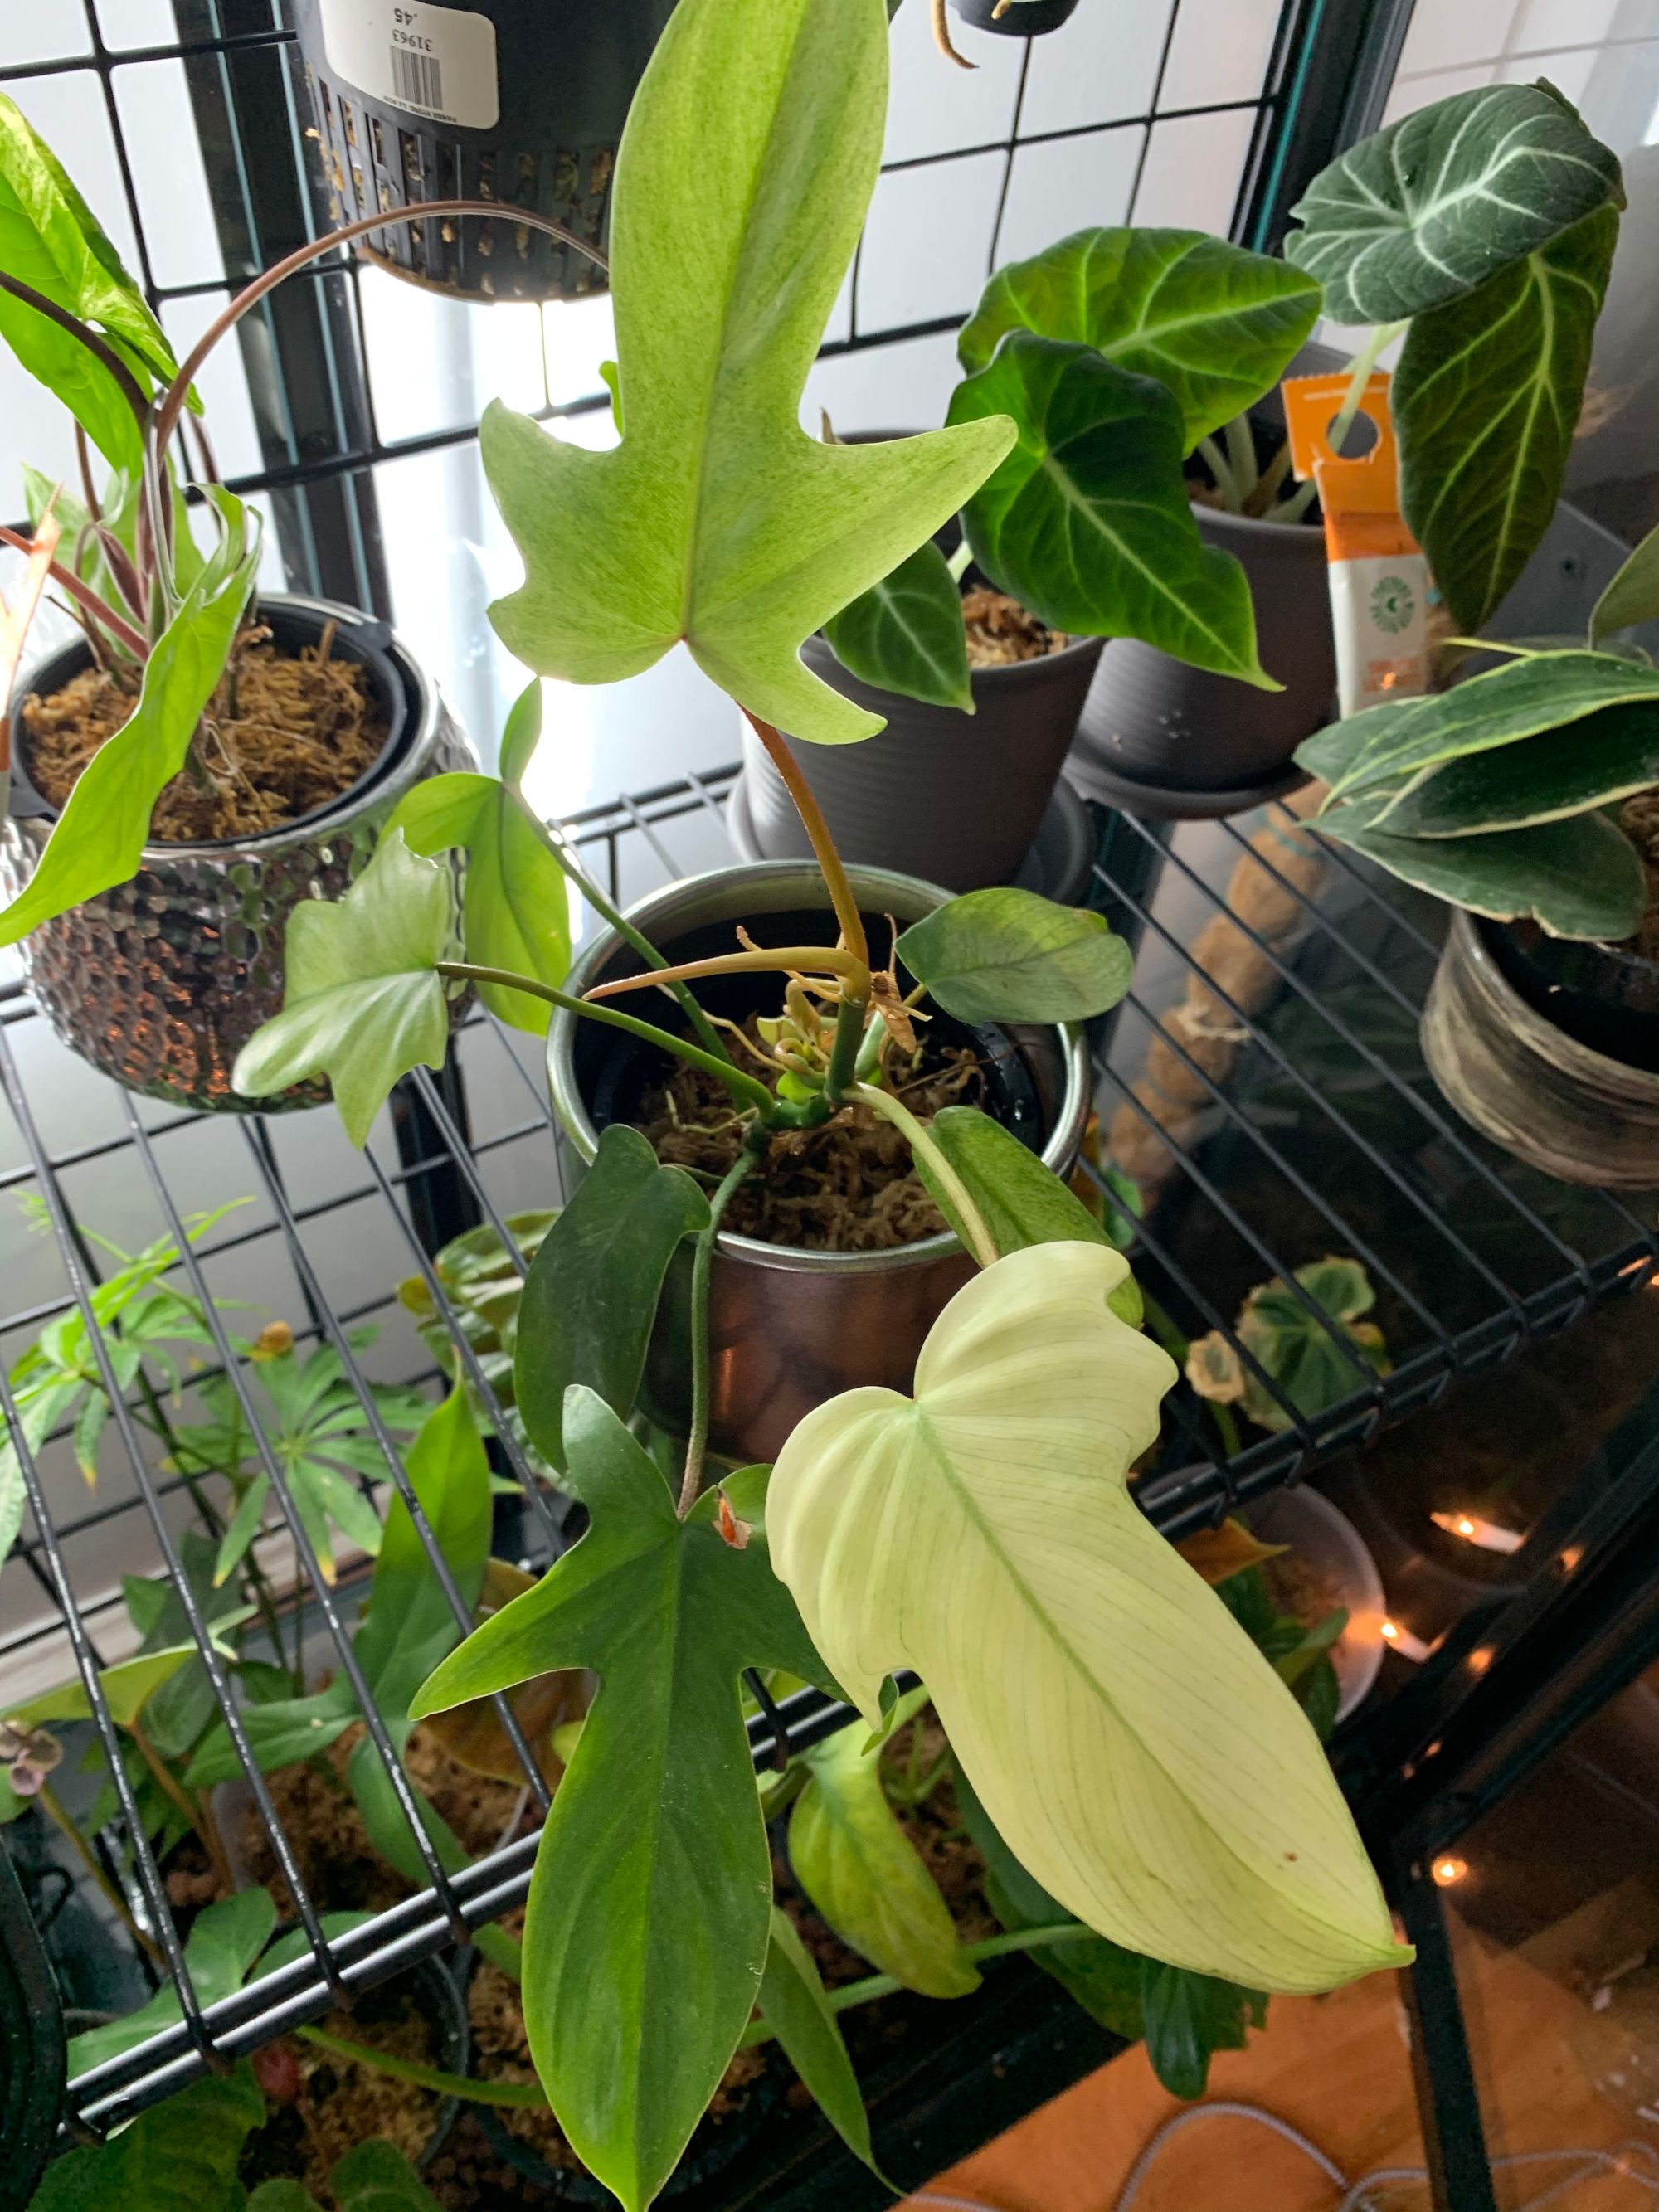
Now for the fun part, some plants that have been living inside:
Thank you for reading!